≡ Menu

Food For Digital Thought

A camera, handled correctly, is a passport to wonderful places and experience. You’ve noticed that I put ‘handled correctly’ in italics, and there’s a good reason for that.

I teach an online class with the BPSOP, and I also conduct workshops everywhere in the world. It’s the workshops that I want to talk about because it’s there where  I find the biggest problems.

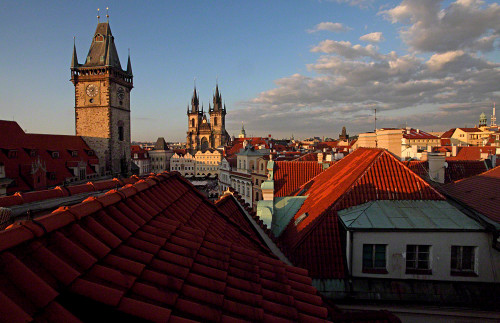
Case in point. During my workshop in Prague, we were shooting sunrise at a famous cathedral know for being one of the first to use a Flying Buttress in it’s architecture. Right at sunrise a woman came up to me with her new Leica (with lens was $60,000) and asked me if I knew how to use it.

Apparently, she had bought this system right before the workshop and had no idea how to use it….boggles the mind!!!

I said that I had no idea and asked her if she had practiced with it and read the manual before coming. I also said that there’s lots of instructions you could find on YouTube.

She responded with a strange kind of look and then said that she had never thought about it. She thought that there would be people in the workshop that could help her.

I can’t tell you how important it is to try out new equipment before going anywhere. Whether it be a new body, a lens, or switching to a brand new system…especially a new system. Sit down with the camera and manual and go through each and every page so you’ll have a complete working knowledge and

be in a position to come back with photos of a lifetime.

The second most important thing I strongly suggests to all my fellow photographers and students is to learn how to shoot on manual. Make your own decisions as far as the camera settings, and not let the camera (a machine) make them for you. I can guarantee you that you’ll become a far stronger shooter.

Visit my website at www.joebaraban.com, and follow me on Instagram: www.instagram.com/barabanjoe. Check out my workshop schedule at the top of this blog. Come shoot with me sometime.

JoeB

{ 0 comments }

AskJoeB:Four Minute Exposure

So many elements from her Artist Palette.

Valeriano submitted this remarkable photo and asked what I thought of it.  Here is what he said when I asked him to explain what he did:

“Hi Joe,

The exposure was 4 minutes (I have used a 10 stops ND filter and a 2 stops ND Grad to hold back the sky).

I knew the pier would have been a silhouette and I wanted to catch the muted colors of the last rays of sun at sunset. Also I have chosen to go for such a long exposure in order to get the ocean really calm an some movement in the clouds, juxtaposing it to the fixed figure of the pier structure. What do you think?”

OK, I have to preface my answer to him by saying that Valeriano was an online student of mine with the BPSOP. With both my online class and my “Stretching Your Frame of Mind” workshop I conduct around the planet, I teach people how to use the elements of visual design and composition to take their photography what I refer to as “Up a Notch”. We also work on color as a way to communicate ideas and light as the single most important element found on my Artist Palette.

In Valeriano’s photo, he has used his new Artist Palette to create a wonderful photo; a photo that will be remembered. His use of Negative Space to define the posts in the water, the railing on the pier, and the people and umbrellas was no accident. We start working on Negative Space in the first week since it’s so important to strike a balance between the Negative and Positive Space. Valeriano knew exactly what he was doing!!!

In the second week of my online class, we work on using Vanishing Points to lead the viewer around the frame, as well as to the horizon. Valeriano, by placing himself where he did, created a wonderful Vanishing Point, and as you can see, it’s a wonderful way to keep the viewer an active participant in our photography. When we do that, he’ll stick around longer, and that’s exactly what we want him to do.

By framing the way he did, he created “layers of interest” by anchoring the sitting area in the foreground. This is also what we work on..Perspective and depth. His use of a silhouette is something we spend an entire week on in my BPSOP part II class

If I could do anything, I would have asked if I could open all the umbrellas and create a pattern with them using Negative Space to define each one…we also work on Patterns (an element of visual design) as well.

It takes a lot of work and thinking to create a photo like this, and Valeriano should be proud of his accomplishment.

Thanks for the submission, I enjoyed looking at it.

Visit my website at: www.joebaraban.com and follow me on Instagram: www.instagram.com/barabanjoe come shoot with me sometime. You’ll walk away with your own Artist Palette as a souvenir of your experience.

JoeB

{ 0 comments }

My Student’s Work: Tension Equals Energy

In my online class with the BPSOP, and in my Workshops I teach around the globe, we work on the elements of visual design and how they can be incorporated into our imagery. These elements are found on my ‘Artist Palette’, and it’s what a lot of my workshop is all about.

One of the elements is called Tension. Tension is Energy, and it’s a very important tool in taking our photography what I call “Up a Notch”.

There are several ways to generate Tension in our photos, and one of them is “Framing within a frame”. The Energy is created when the viewer looks through the frame to see the subject. He will first see the frame, then he’ll move through it to see whatever it is for him to see. The time spent on doing this will take additional Energy, and TENSION=ENERGY.

Here’s an attempt by Laurette, on of my online students to create Tension. Not only is it a very good example of “Framing within a Frame”, but it’s also filled with other elements of design that can also be found on my ‘Artist Palette’:

Negative Space, Patterns, Texture, Line, Vanishing Point, Shape, and Perspective.

When you can put this many elements into a photograph, it stands a very good chance in being considered “Up a Notch”…even though it’s a square.

🙂

Nice job Laurette!!!

Visit my website at www.joebaraban.com, and follow me on Instagram www.instagram.com/barabanjoe. Look for coming workshops at the top of this blog. Come shoot with me sometime.

JoeB

{ 1 comment }

Anecdotes: United airlines/Hawaii

It was me all along.

It was me all along.

I was shooting for five weeks in Hawaii for United Airlines and the Hawaii Department of Tourism. Along with some of the top hotels, they had formed a coop in which they all shared in the expenses.

I had sent my producer over a week ahead of time to scout locations for me to look at once I got there and to ultimately shoot. I had told her that I wanted to include some typical well-known tourists attractions, because they would look different when I shot them….why you ask?

For the simple reason that the tourists would get there sometime after breakfast and before lunch, or after lunch and before dinner. Either way, they would be there in the worst possible light, while I would be there before the sun came up and right before it set.

In these types of locations, it’s all about the light, and very few of my fellow photographers ever thinks about that. In my online class with the BPSOP, and in my “Stretching Your Frame of Mind” workshops I conduct around the planet, I’m always stressing that the light is critical if you’re trying to take your photography what I refer to as “up a level”.

Knowing where the light is going to be, how long it will be there, and when it will leave is fundamental in coming home with that illusive OMG photo. The only time light can be second in the thought process is when you’re street shooting and “the moment” will and can trump beautiful light…especially if you’re shooting B/W.

One of the tourist attractions my producer found was on the Island of Kauai. It was the Kilauea Lighthouse, and it was one of the more popular attractions on the Island. At a popular lookout point I checked the light for sunrise and sunset readings coupled with my Morin2000 Hand Bearing Compass. After determining that it was a sunset shoot, I set out to add something to what would otherwise be a fairly predictable photo; even at sunset…another “layer of interest “.

There was a big enough budget that I could do pretty much what I wanted in terms of props. In this case the prop was a forty-five foot sailboat I chartered to have it tack back and forth close to the cliff. Since I knew where the sun was going to set, it was easy to backlight the huge sail.

We arrived at the lookout well in advance to make sure we secured the best spot, free from other tourists that might get in the way; not an option considering what the sailboat cost.

Right on time the sailboat came around the cliff and as it did, all the tourist that were also there started hooting and hollering while clapping at their good fortune. While the rest of the ‘weekend photographers’ shot with their small cameras with even smaller lens, I had my 600mm F/4 Nikor lens on.

The crown couldn’t believe it when the sailboat started going back and forth with the lighthouse overlooking it; they hooted, hollered, and clapped some more. Finally one of them came over to me to see what I was doing since I had a headset on with a voice-activated mike.

What I was doing was talking via a powerful walki-talki to one of my assistants that was on the sailboat with another walki-talkis. I was the one that was instructing the sailboat to tack back and forth. When the word got around to all the others, they began to hoot and holler louder than they had been…and applauded my entire crew.

Visit my website at: www.joebaraban.com, and follow me on Instagram, www.instagram.com/barabanjoe. Check out my workshop schedule at the top of this blog. come shoot with me sometime.

JoeB

{ 0 comments }
Look ma, no Photoshop

Look ma, no Photoshop

I often wonder what kind of photographer I would have turned out to be had there been Photoshop way back when. Way back when Adobe was a type of house in the Southwest part of the US. What would I have done differently? It’s always a topic talked about with my online students at the BPSOP, and in my “Stretching Your Frame of Mind” workshops I conduct around the planet.

Remembering back when whatever you did in terms of creating a photo that the client would buy, had to be done in the camera because way back when there weren’t personal computers.

The big companies were just starting to use computers, and these giant behemoths I was occasionally sent to photograph took up an entire floor to generate the power that can now be found sitting on my desk in my iMac 27 with 32 GB of RAM, a 4.0 GHz processor, and a three terabyte Fusion hard drive…maybe? Close?

In my opinion, I wouldn’t be near the photographer had I had access to Lightroom, Photoshop, and all the plug-ins that one can find out in the geek-produced/induced digital market. I would have wound up with a sore butt from the hours that would have been needed sitting in front of a computer to achieve what I did in the camera.

In terms of my imagination, and my eye, and always thinking about “coloring outside the lines” these things would not have been any different. It’s using that imagination and my ‘eye’ instead of digital help that I’m talking about. Using the Elements of Visual Design and composition, and being a student of the Light is what made me whatever I am today, and not a computer.

I even know how to focus manually!!!!

🙂

Don’t get me wrong, I’m not a purist in any sense of the word. I love Photoshop, and I use it on every photo I take to some extent…why not!! I just personally like the challenge of getting it in the camera.

In the above photo, I was shooting for Rubbermaid outdoor furniture, and had two truck loads of their entire line that followed me down the California coast. We were in Big Sur at the Ventana Inn. Actually, we were on the roof of the Nepenthe restaurant and it was mid day.; not the ideal time to shoot as the light was hot and harsh.

I needed the light to be soft so it might replicate the period of time we were going for; it wasn’t going to happen without help.

If this would have been shoot in the digital age, creating that feeling in front of the computer would have been easy, but it wasn’t. Instead, to get that feeling I set up my 20X20 silk to diffuse the harsh light. coming from a sun that was directly above us. As you can see, this isn’t a small item, and it took an hour and a half just to set it up in the wind.

Think about a 20X20 piece of silk…that’s 400 square feet of sail, and if not tied down correctly on huge stands that were held down with sand bags, it would take my assistants over the ocean and deposit them in really cold water inhabited by things that can eat you…or maybe just play with you until you drown.

400 sq. ft. of sail.

400 sq. ft. of sail.

The good news is that it wouldn’t take me ( as I would be the only one left) near as long to break down what was left of the set.

🙁

Visit my website at: www.joebaraban.com, and follow me on Instagram: www.instagram.com/barabanjoe. Check out my  workshop schedule at the top of this blog, and come shoot with me sometime.

JoeB


{ 0 comments }

I found the light!

In my online class I teach with the BPSOP, and in my “Stretching Your Frame of Mind” workshops I conduct around the planet, I’m always telling my students that LIGHT IS EVERYTHING. I also tell them that when you find the light, you’ll find the shot.

As for the photograph above, I was walking the streets of Cairo doing what I’m always doing…looking for light, when I walked by this small shop where this man was selling very strong sweet tea. There, right in front of me, was the light. It was just a sliver of light that was  hitting the man and the small area around him. I immediately backed up to observe how a tiny bit of light could create such a strong image.

This is exactly what I was telling Eleanor, an online student of mine. The week assignment for the class was to go out and Find The Light. That’s exactly what she did, as you can see in these wonderful photographs.

Great job Eleanor!!

Take a look at my website at www.joebaraban.com and follow me on Instagram: www.instagram.com/barabanjoe. you’ll see a lot of what I think is the number one most important piece of advice I could ever give anyone. You find the light and you’ll find the shot! Come shoot with me sometime and we’ll look for it together.

JoeB

{ 0 comments }

06Two of several lessons I give, both in my online class with the BPSOP and my “Stretching Your Frame of Mind” workshop I conduct around the globe, deals with Vanishing Points and Negative Space. It’s about taking these elements of visual design  and using them to take you photography “up a notch”. The above photograph is one I show to my students as an example of both appearing in one shot.

These two elements are found on my ‘Artist Palette’ along with: Perspective, Tension, Light, Color, Texture, Pattern, Line, and Form.

Briefly, a Vanishing Point consists of parallel lines that begin somewhere behind the camera, and converge at a point on the horizon.

All photos are made up of Negative and Positive space, and in my class and workshop, we deal with that Negative Space that ‘defines’ the Positive Space and gives it substance.

Vanishing Point and Negative Space

Birka, one of my online students living in Moscow, Russia went out to “make a picture” with a Vanishing Point in it, and also use Negative Space to define the Positive Space. In the above photograph, she did just that. The white columns on the left form a Vanishing Point that leads the viewer to the two people walking in the middle of the frame. The Negative Space I’m referring to is that space that surrounds the two people, defining them. If it weren’t for that Negative Space between the people and the shadows on both sides of the columns. they wouldn’t be what I call a “quick read”; in other words, they wouldn’t look like two people walking.

This is how important Negative Space and a Vanishing Point are in taking our imagery “up a notch”.

Great shot and great job Birka!!!

JoeB

{ 0 comments }

Napa Valley Workshop and Wine Tastings

Sunrise at the Napa Valley train yard.

Sunrise at the Napa Valley train yard.

I was going through some of my videos and came upon this one. It gave me so many great memories that I wanted to share it with you. It was a workshop I did years ago in Sonoma and Napa Valley. I have to say that it was one of the best experiences I’ve had teaching. I had a full class and all of them were good photographers, which made it even more fun when it came to the classroom critiques. Every day I looked forward to seeing everyone’s photos and I was never disappointed.

Some of the class had taken my online course with the BPSOP and wanted to actually shoot with me, and some had taken other “Stretching Your Frame of Mind” workshops and wanted to shoot with me again. Since I rarely shoot myself, I spend all the time walking around to see what others are doing. I’ll offer advice or talk to them about what they’re thinking, give them different ideas, and suggest alternate points of view.

Russ and Pat Johnson, who live in Sonoma, had taken one of my workshops and since I  had always wanted to do this workshop I had asked Pat if she would be willing to produce it for me. She agreed, and we virtually spend a year putting it together with Pat doing all the legwork and making contact with the vineyards. We shot at several of the top vineyards in Napa and Sonoma and they were gracious enough to give us a private tour and wine tasting before and after the shoots for the class. Pat also arranged for this years farewell dinner that was hosted by the Michelin rated Sante’ Restaurant in the fabulous Fairmont Sonoma Mission Hotel. It was a perfect ending to a memorable week.

I had a very hard time picking the photos for this post, as there were at least twice as many as I’ve shown here. For the first time I had a photographer who just happened to be Russ Johnson who is also a videographer, create a short film on the workshop. It will give you an idea and show the flavor of what goes on in one of my workshops.

Here’s just some of the images shot during the five days. Enjoy the show!!!

Visit my website at: www.joebaraban.com, and follow me on Instagram: www.instagram.com/barabanjoe. Be sure to watch for my workshop schedule at the top of this blog. Cone shoot with me sometime.

The class at our farewell dinner at the Sante' restaurant at the Fairmont Hotel in Sonoma.

The class at our farewell dinner at the Sante’ restaurant at the Fairmont Hotel in Sonoma.

JoeB

{ 0 comments }

Life Before Photoshop: Fine Dining

Look ma, no Photoshop.

Look ma, no Photoshop.

Here’s another photo in my ongoing category to show those of my fellow photographers how it was when Adobe was a type of house prevalent in the Southwest. Both in my online class with the BPSOP, and in my “Stretching Your Frame of Mind” workshops I conduct around the planet, the vast majority of my students became interested in Photography after the demise of film and the cameras that shot it.

These same students think that computers with Photoshop, Lightroom, and all the available plug-ins downloaded into them are a necessary part of the new digital age. To some, it’s the only way to create photographs. While it’s true that Photoshop and Lightroom have been an important part of my photography, I can also tell you that you don’t need any of it to make memorable pictures.

On the first day of my classes, I tell people that for the duration of the course, whether it be the four weeks of my online class, or my one week workshops, they’re not allowed to use any post-processing of any kind. I can’t tell you how many people freaks out!!! “What? Are you kidding? No way I can do that”, just to mention the three most popular come-backs.

FYI, auto focus is a luxury, not a necessity. That really has them baffled.

The above photo was taken for a company that was building a mid-level high rise in Houston. Since the building hadn’t been built, they wanted to show what amenities there would be in the area for those that would live there. One of the ideas was to create a photo that suggested Fine Dining in the area.

I created this photo in the wine cellar of a well known restaurant in the area. With the bottles of wine in the background, I set up a table and arranged the wine glasses and tulips from edge to edge. That was the easy part. I wanted to show a hand coming into the frame lighting one of the candles. Trying to open the shutter and exposing for the table setting and then having the hand light the candle proved to be impossible. I just couldn’t get the flame to stand up and look delicate. Remember that this was before the days of Photoshop, where it would now be soooooooo easy to create it on the computer.

I finally figured out a way to make it work. I had the waiter hold his hand in position with an unlit match in it. I turned off the modeling light and fired the flash to record everything. While the shutter was still open, I placed a black card in front of the lens and lit the match with another one. Once the smoke cleared and just the flame was showing I removed the black card and exposed for the flame.

What you see here was shot on one piece of film and one exposure.

Visit my website at: www.joebaraban.com, follow me on Instagram: www.instagram.com/barabanjoe. Check out my workshop schedule at the top of this blog. Come shoot with me sometime.

JoeB

{ 2 comments }

Food For Digital Thought: Clutter

I always pay attention

If it ain’t helping, get rid of it.

Ok, now that I put the emphasis on what this post is about, I can further explain.

I’ve been writing posts here since 2011. For those that are just now tuning in, I teach an online class with the BPSOP, and I conduct workshops all over the place. I can tell you from personal experience that so many of my fellow photographers don’t pay attention to what’s going on inside the four walls of your composition…or barely outside.

Your field of vision narrows down to your subject or your center of interest, without considering what else is going on. One of the best ways to help with this problem is what I’ve been teaching forever. It’s called my 15 Point Protection Plan. 

There’s two ways to use it effectively. The first is easy, just move your camera up a little, down a little, move to the right or left, take a step forwards or backwards.

The second comes when the first one can’t be accomplished. First, let me say what I’ve been telling students as long as I’ve been teaching. Make no mistake, you and I are artists who has chosen the camera as our medium. The camera on a tripod is the same as a blank canvas on an easel.

We paint. What that means at least what it means to me, is that like a blank canvas we add pigment until we feel like we have painted our ‘work of art’. In photography, the art of subtraction, we add or subtract things in our compositions until we have create our ‘work of art’.

What that means is that if something is in the way, move it out of the frame. If you need something that’s out of your composition, move it in.

Of course this is predicated whether you needed to obtain permission or not. I know…I know…I know, that there are people out there that call themselves a purist, and wouldn’t think about doing something so utterly distasteful. Those same so called purists have no qualms about using Lightroom or Photoshop to enhance their photo.

Don’t get me started!!!

Visit my website at www.joebaraban.com, and follow me on Instagram www.instagram.com/barabanjoe. Check out any new workshops at the top of this blog. Come shoot with me sometime.

JoeB

{ 0 comments }

Anecdotes: Hiring a New First Assistant

I loved the POV!!!

I loved the POV!!!

Now that I’m semi-retired from fifty-three years of shooting advertising, editorial, and corporate photography, I can devote my time to teaching with the online class BPSOP and conducting my “Stretching Your Frame of Mind” workshops around the planet.

There was a period of about thirty years when I traveled up to two-hundred and fifty days out of the year, and for those days I always traveled with my first assistant. When we got to a city, I would pick up a free-lancer who knew the city and could get things for me as I needed them.

My first assistant went everywhere with me and was responsible for the equipment, and the liaison between the free-lancer and myself. He was always right by my side, giving me the ever-changing exposures readings from a one degree external meter made by Minolta.

When the assistant I had at the time gave me his two-week notice (the best ones would only work for two years before going off on their own), I would begin to advertise through several channels I had at the time. When they applied for the job, they would have a portfolio with them that I basically looked at the backs to see how neat they were.  If they didn’t take care of their own work, they wouldn’t take care of mine, and there was just too much money involved for the assistant to be sloppy.  Their subject matter didn’t matter since they would not do any shooting.

What I did care about and was the first question I would ask someone that I was interested in was if they were afraid of heights. If they were, then the interview was over. They needed to be willing to do whatever I needed them to, and I never asked anyone to do something I wouldn’t do myself. The question had a tendency to shake someone up, to the point of thinking I was kidding…which I wasn’t.

It usually brought the macho out of the guy and no one would ever say no. That is until we were in a position to test their testosterone quotient…as in out in the field.

The above photo was taken on the Elissa. A tall ship anchored in Galveston, and it was shot for National Geographic’s World Magazine. My assistant was fairly new and had not been field-tested. I wanted a portrait of this kid that was spending the summer on board.

The kid told me some of his duties, and right then I knew the photo I wanted to take of him. When I explained what I was going to do to my assistant, the blood drained out of his face; which in itself was fairly scary/funny. The three of us climbed out on the mast to get the shot.  The next day my brand new first assistant quit…his face was still white!!!

His last shoot with me.

His last shoot with me.

Visit my website at: www.joebaraban.com, and follow me on Instagram: www.instagram.com/barabanjoe. Check out my workshop schedule at the top of this blog.

JoeB

{ 0 comments }

From a Student

So many Elements of visual design in this photo!!

Dawn, a photographer from the West coast, submitted this photo of three girls standing on what appears to be a bridge of some kind.

Ok Dawn, here’s my take on this photo:

You obviously know what you’re doing, you have a keen sense of design, and you have a very good knowledge of the Elements of Visual design…why, you ask?  Because there are several present in this photograph:

These Elements are what I teach online with the BPSOP, and also in my “Stretching Your Frame of Mind” workshops I conduct around the planet.

NEGATIVE SPACE: since everything that’s not positive space is negative space, the negative space I’m referring to is that space that Defines the positive space and gives it meaning. What that means is that the negative space in and around the three girls defines them. It’s that negative space that makes the three girls…three girls. Each one of their shapes is well defined by the use of the negative space, and it’s what I call a “Quick read”.

TENSION: by minimizing the negative space between the outside girls and the bridge, you’ve created Tension, as well as the stark contrast between the girls and the background. Framing the subject within a frame is another way to generate Tension.

VANISHING POINT: By having the parallel liners begin behind the camera and converge at an implied line on the horizon.

PATTERN: Both the floor and the sides of the bridge are Patterns.

TEXTURE: The Texture inside the Patterns.

LIGHT: I love the blown out light behind the girls!!! Also the band of light in front of them.

When you can combine this many Elements, you stand an excellent chance of your photo not only being “up a notch”, but one that will be remembered.

A very strong image Dawn, and I’ll certainly remember it. Thanks for sharing it.

Visit my website at:www.joebaraban.com and follow me on Instagram: www.instagram.com/barabanjoe. Check out my workshop schedule. Come shoot with me sometime and learn about the Elements of Visual Design.

JoeB

{ 0 comments }

Ask JoeB: How Do I Show Scale?

Thilo, a photographer living in Holland, sent me another spider so I wanted to get it close to the other spider that was submitted before moving on to the next submission. He wanted to know how you would show how big this spider is.

In the first spider shot, I suggested Soumyajit show scale as a way of making her spider a quicker read. Since her photo was so busy and the viewer somewhat distracted by everything around it, the spider became less important. In Thilo’s submission, that’s not an issue. It’s a quick read, and the spider is so scary that it’s size becomes less important as Arachnophobia has taken over scale!!!

If Thilo wanted to show scale, he would need to show it next to something that the viewer will immediately recognize and know right away it’s size by comparison. For example, it’s soon to be dinner like a fly, or a moth. If the web was against something recognizable like a fencepost or between barbed wire. By the way, the spider won’t touch it if it’s already dead.

Another way to imply scale is through the use of Tension. In my online class with the BPSOP, and the “Stretching Your Frame of Mind” workshops I conduct around the planet, We work on implementing the elements of visual design and composition into our imagery, and one of the elements is Tension. I’m not talking about the garden variety type of Tension caused by mental or emotional strain. I’m talking about the Tension resulting when forces are acting in opposition to one another.

Three of the ways to generate Tension are to place the subject close to the edge of the frame, to minimize the Negative Space surrounding it, and the use of light. When Thilo used all three in this photo, he made the spider look larger than it might be in person whereas Soumyajit, by placing her spider in the middle of the frame, didn’t create scale through the use of Tension.

In this submission as it the last one, black was used to hide the background. It’s believable in this photo, where it wasn’t in the first spider submission. It’s also much better lit. Also, this spider looks like it could swallow Tulsa, Oklahoma.

Thilo, one last thought to create scale would be to put your finger right next to it!!!!

Visit my website at: www.joebaraban.com, and follow me on Instagram: www.instagram.com/barabanjoe. Check out my workshop schedule at the top of this blog and come shoot with me some time…but not spiders!!!

JoeB


{ 0 comments }

Vertical and Horizontal Lines

Dominant vertical lines

I like to include in a post a photo and question from one of the photographers that follow my blog.

Here’s one from a photographer in Japan, and as usual, I like to show the note that he sent because I find that there are lots of photographers out there that have had similar problems with similar questions on how to fix those problems. Here’s what he had to say:

“Hi Joe,

I am posting a photograph that has to do with lines. This is a photo on the outer part of a temple in Japan. What i want to know is if there are horizontal and vertical lines in one scene, which one takes priority over the other? In this photo, I used the vertical line closest to the left side, but the distortion is still present. It seemed the wooden structure is falling/leaning over to the mountain side. I tried to correct the distortion but in the end, I am still unsure what is the correct way to see. Lens used was the 16-35mm”.

Thank you,

I tell my online students with the BPSOP, and in my “Stretching Your Frame of Mind Workshops” I conduct,  Line is the most important of all the elements of visual design, for without Line none of the other elements could exist. The basic elements of design such as Pattern, Texture, Shape, Form, etc. all need Line to be what they are. In fact, you and I would not exist nor would planes, trains and automobiles because we all have an outLine.

Having said that, the most important Line is the horizon line. That’s the first Line you should correct. Since I almost always shoot on a tripod, the very first thing I do is to make sure my horizon line is straight. The only time it might not be straight is if you saw it from the Space Shuttle. FYI, the “unmentionable” word around the teaching scene is that when you see a photo with a horizon line that’s not straight, it’s a sure sign that a novice took the photo…I’m just saying!!!

Once you have the horizon line straight, then you look at the other horizontal lines and the vertical lines. Never try to correct those lines beforehand since by doing so, you might render the horizon as being off-kilter. If the vertical and other horizontal lines are not correct, then leave them because something made them the way they are. For example the wind, a storm, the ground shifting, bad construction, or just plain old ‘Father Time”. As I said, the horizon line is always going to be straight…no matter what. If you wake up one day and the horizon line is not straight, it would be a good time to pay back any past debts you might owe friends because you won’t have any more use for money!!!

Now that the horizon line has been taken care of, I look for the dominant line, whether it be a vertical or a horizontal. If the vertical lines are close to the edge of the frame, I always straighten them since they are more susceptible to bend; this is especially true if you have a wide angle lens on like your 16-35mm. The wider the lens, the harder it is to use as far as making your lines straight. The wider the lens, the more curve there is in your glass which curves the lines. The key is to always tr to have your camera level.

Correcting the horizontal lines is a matter of tilting your camera to the left or right.To correct the vertical lines you simply tilt the camera up or down. Tilting the camera up and the lines go in and when you tilt your camera down, the lines go out. In the photo you posted, if you would have tilted the camera down (just a touch) you would have corrected the vertical lines WITHOUT affecting any of the horizontal lines. That is once you have the horizon straight.

Hope this helped!!!

Visit my website at: www.joebaraban.com, and follow me on Instagram: www.instagram.com/barabanjoe take a look at my workshop schedule at the top of this blog. Come shoot with me sometime.

JoeB

{ 2 comments }