Look ma, no Photoshop!
Before reading this post, for all of you that have taken my part I and II classes, the school is bringing back my Gestalt class for a month, starting the first week in May. Here’s the link: https://bpsop.com/courses-1/
In my ongoing quest to enlighten those photographers that started in the digital era, I like to explain to people that there was actually a time when you had to create your image in the camera without any help from Photoshop; mainly because it wasn’t born yet. I know it’s scary to a lot of you because we talk about it in my online class with the bPSOP and in my “Stretching Your Frame of Mind” workshops I conduct around the planet. The thought of not being able to fix it later in front of a computer is chilling to say the least. YIKES!!!
I’m not opposed to using my Adobe CS5 program, because I tweak all my photos to some degree, but to me, the challenge is taking my visual idea and shooting it in the camera. The digital age has made photographers lazy. Why move a step to the right to take the telephone out of someone’s head when you can just use the Content Aware tool to remove it later? Why concern yourself with learning that 1/60th of a second at F/8 is going to look a stop darker than 1/60th of a second at F/5.6. there’s Lightroom to take care of that mistake.
To me, shooting on manual will make you a better photographer than setting your camera to one of many program modes. It’s a good way to learn exposure and shutter speed combinations.
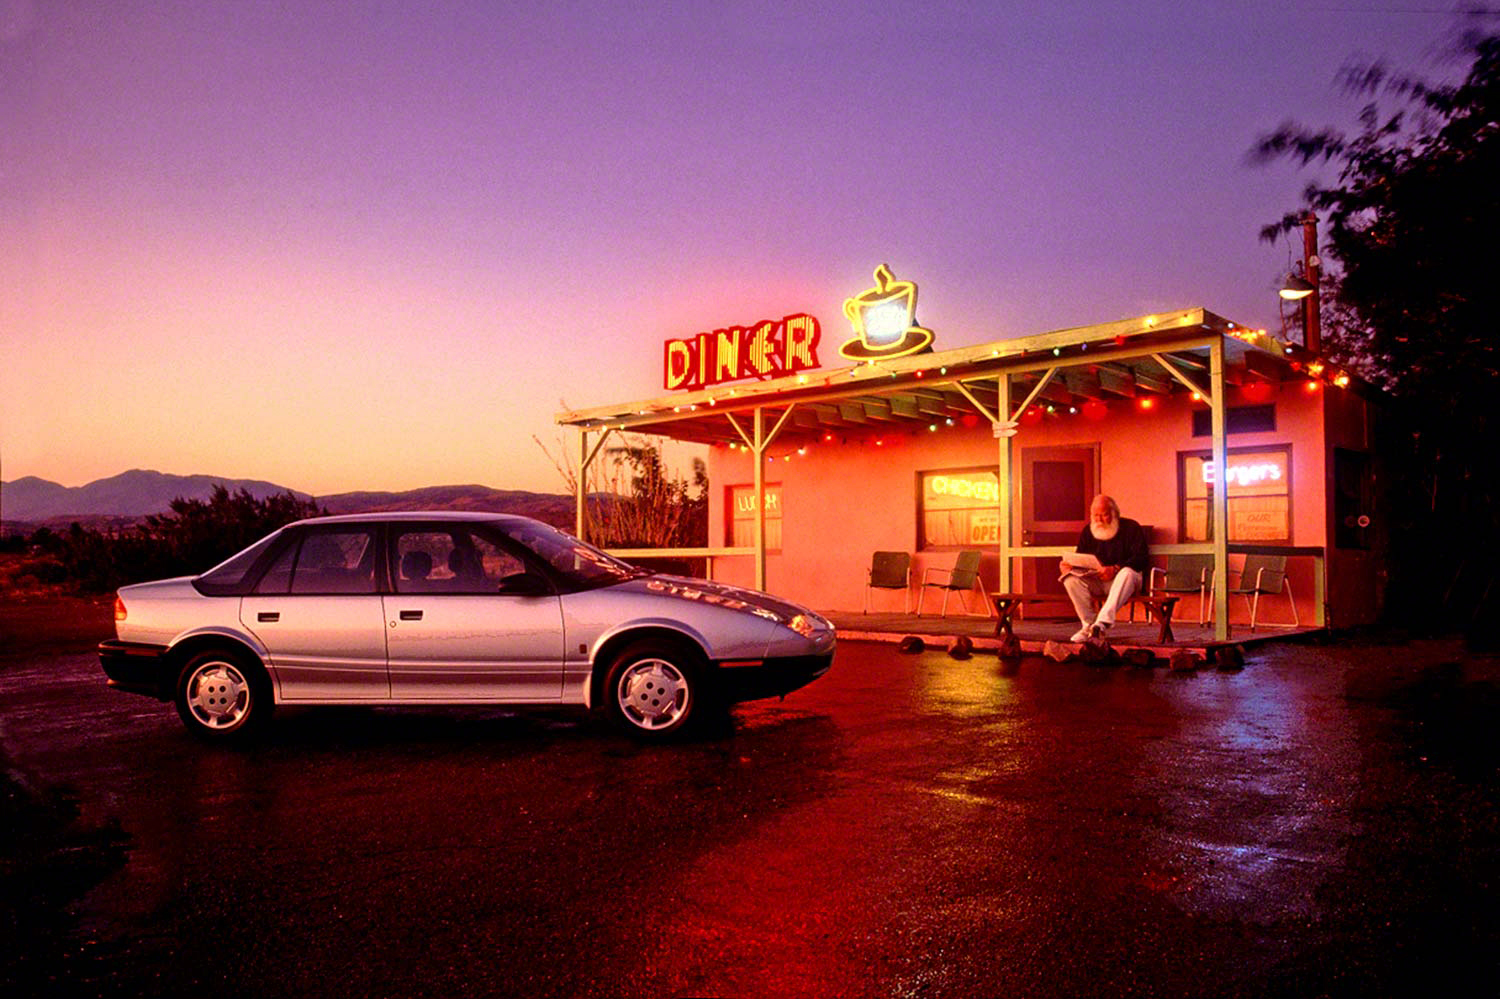
In the top photo of the Saturn, everything was done in the camera. The color silver was chosen so it would reflect the ambient light of the sunset evenly without adding any additional light. My instruction to the location scout was to find a diner where the sun would set or rise directly behind it. Using my Sunpath software and my Morin 2000 hand bearing compass, I was able to know ahead of time if this location would work. Shooting close to Hollywood was always nice because I had access to any props I could conjure up in my imagination. It certainly helped here since the diner was abandoned; we added all the neon and interior lights.
The pavement looked terrible so I had a water truck come in and do what’s called a wet down. This makes the driveway not on;y hide the cracks and discoloration, but being wet, it reflected the lights from the diner.
By the way, the man sitting out in front was the agency’s Art Director. I put him there to add an editorial feel.
So, there you have it. A little pre-visualization and pre-production can achieve the same results as sitting in front of a computer for hours to create this photograph. I can assure you that you don’t have to have a big budget to be able to create in the camera. It comes down to whether being a well-rounded photographer that takes the time to challenge himself is more important that being a good digital technician. Why not have the best of both worlds?
Here’s the diner when we started to work on it: 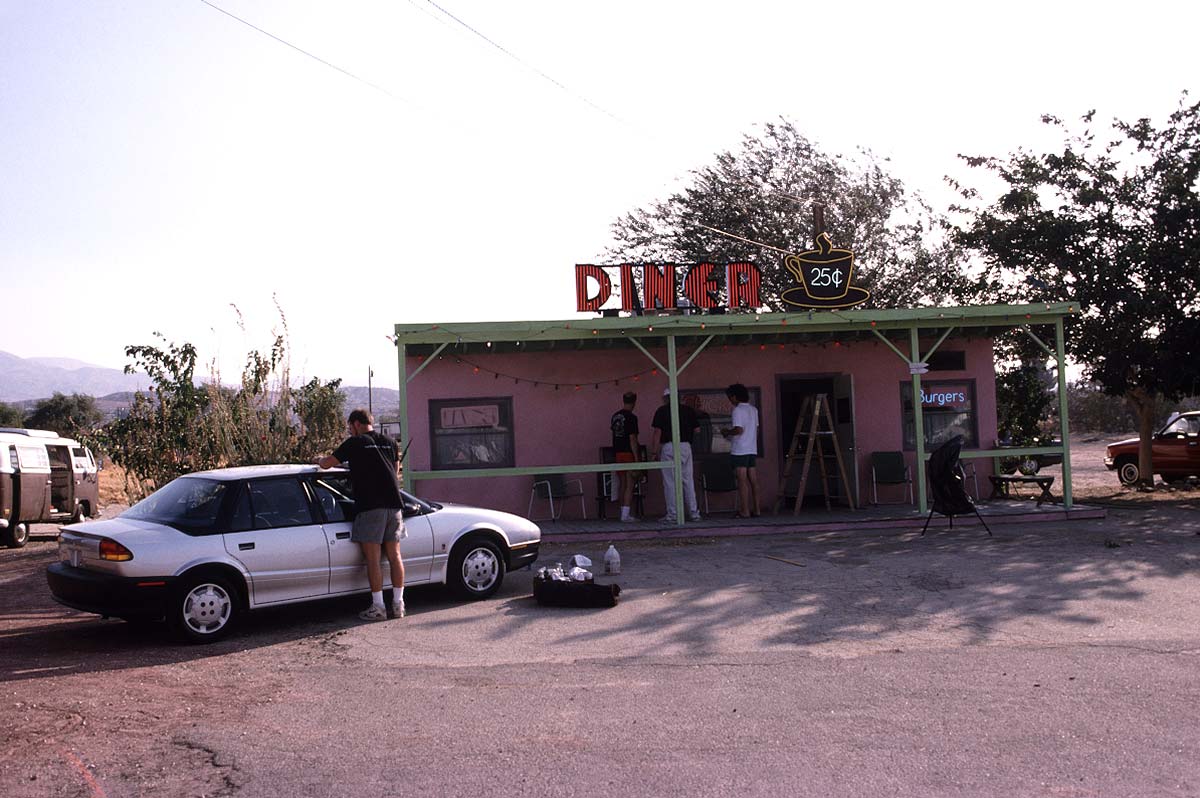
Visit my new website at www.joebaraban.com, and check out my workshop schedule at the top of this blog. Come shoot with me sometime!
JoeB


Hi Joe,
awesome result! Great idea to water the pavement and get some reflection from artificial lights of the building.
I have two question about this photograph:
1)have you used any ND graduated filter to achieve the right exposure?
2)I cannot tell where the light is coming from, can you tell me that?
Thanks.
PS your photography and your “stretched creative mind” is very inspiring. Thanks for sharing your knowledge.
Hello Valeriano,
Thanks for the nice words!!!
In answer to your questions, the answer to the first one is no I didn’t use a ND here. As I always do, I used a Minolta One degree (reflected) spot meter to take my readings. I read the sky first, then the car, then the building and when they were close to one another (exposure) I started shooting. Since the car was the hero, I needed to make sure it was exposed correctly while having the sky saturated. If you look at the car and half way up the horizon in the sky, you can see that they are very close to being the exact same exposure.
The light is coming from behind the car and building. When I had my location scout looking for the right kind of building, the pre-rerquisite was to have the sun set behind the car. I choose a silver car because I knew that it would reflect all the light in the sky so I didn’t do anything to light the car. The light reflecting off the silver car is all natural.
By the way, wetting down the pavement also acted as a reflector for the car.
JoeB
How did you capture the color of the sky? I have never seen this tyoe of color it is georgeous
Andrea,
The color in sunset and sunrise skies depends on the atmospheric conditions that particular day. Since the atmosphere is made up of water vapor (humidity), mixed with pollution it will dramatically affect the color in the sky on any given day. During sunrise and sunset the sun is lower in the sky and that lengthens the angle in which light reaches the Earth. This low angle will ‘scatter the light’ which in turn will affects the different colors you see appearing in the sky.
Sunsets are usually more dramatic because all day leading up to sunset dust, debris, and pollution get kicked up and as a result this dust and debris will filter the wavelength of each color. The sky in the Saturn shot is a result of just this phenomenon. If I had shot the next day, the sky would probably have looked different. You just never know what it will look like.
Plus it didn’t hurt to shoot in LA!!!!!
Thank you, thank you very much
!!!
JoeB
Thanks!
JoeB