Student’s Work: New York Workshop/2016

"Taxi"!!!
“Taxi”!!!

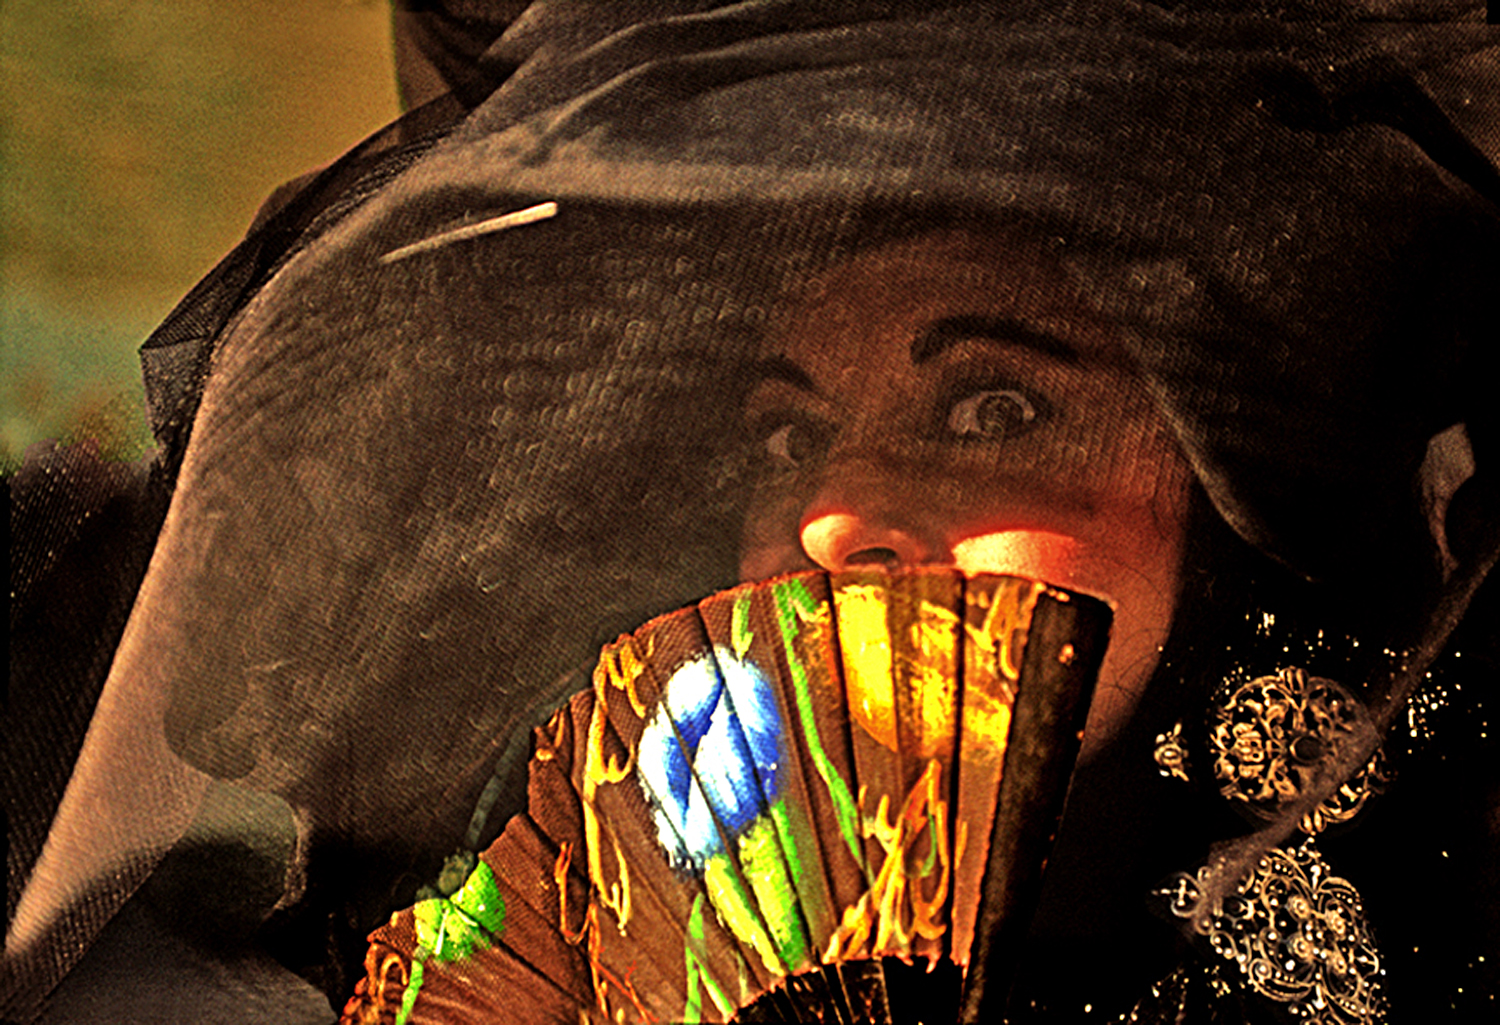
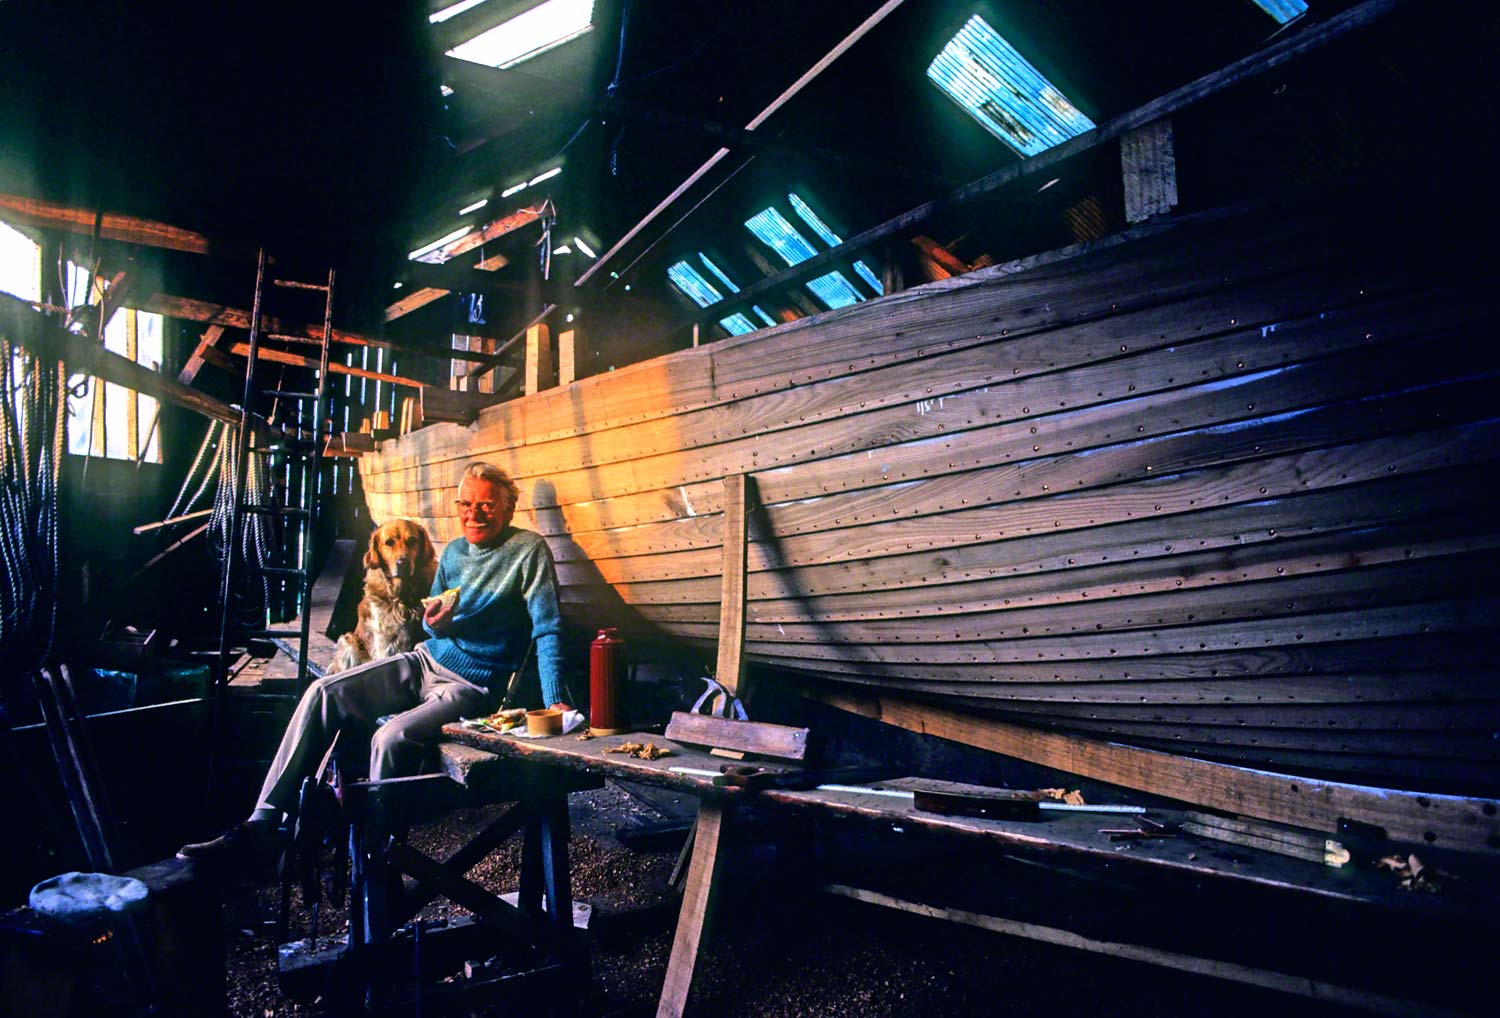
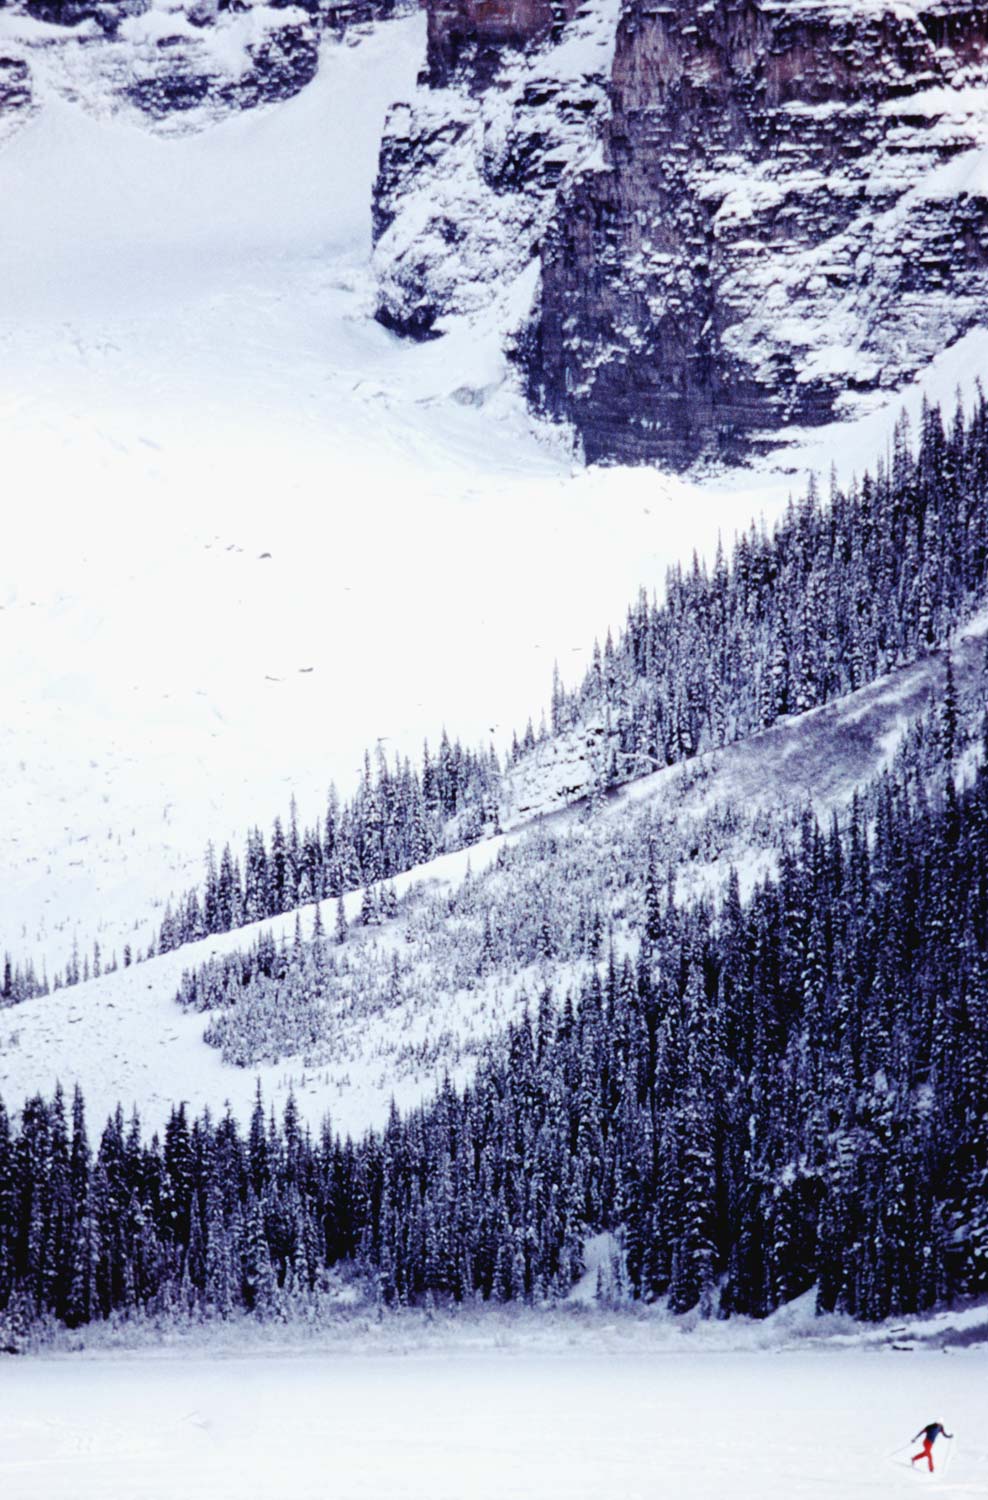
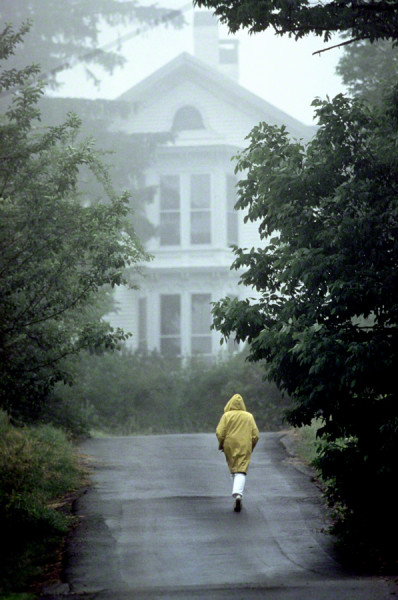
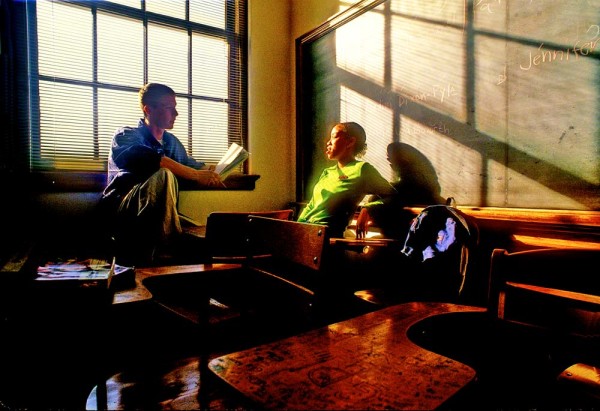
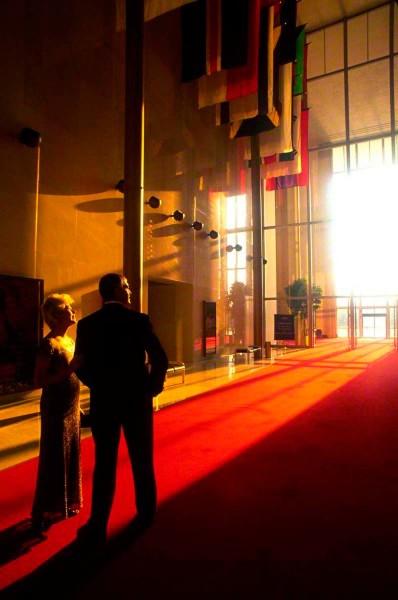
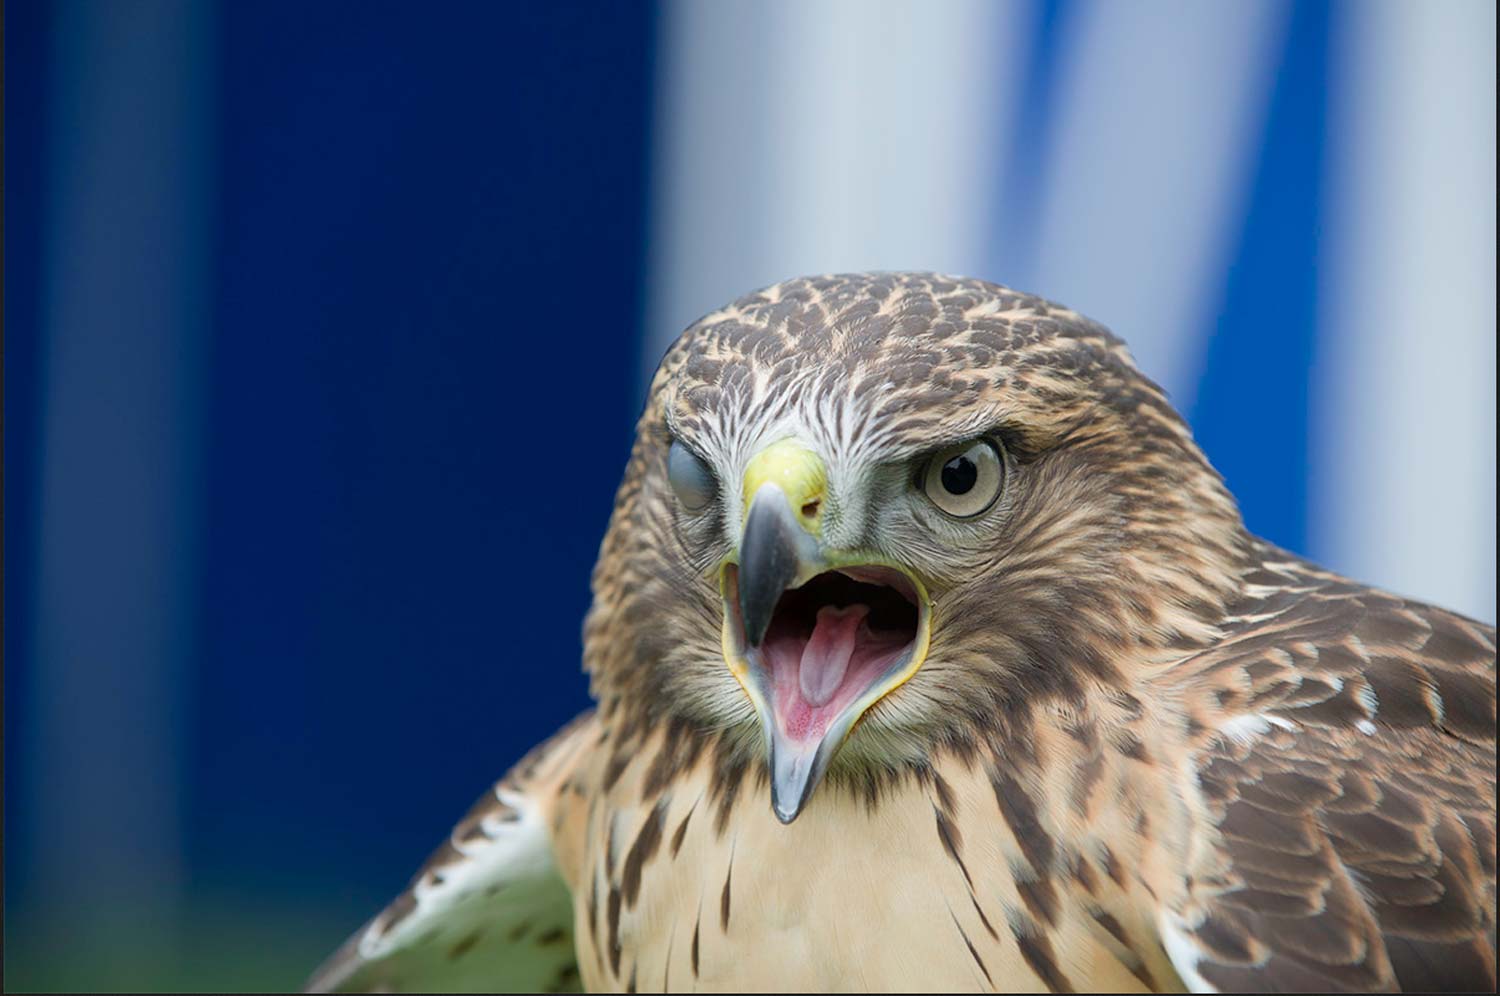
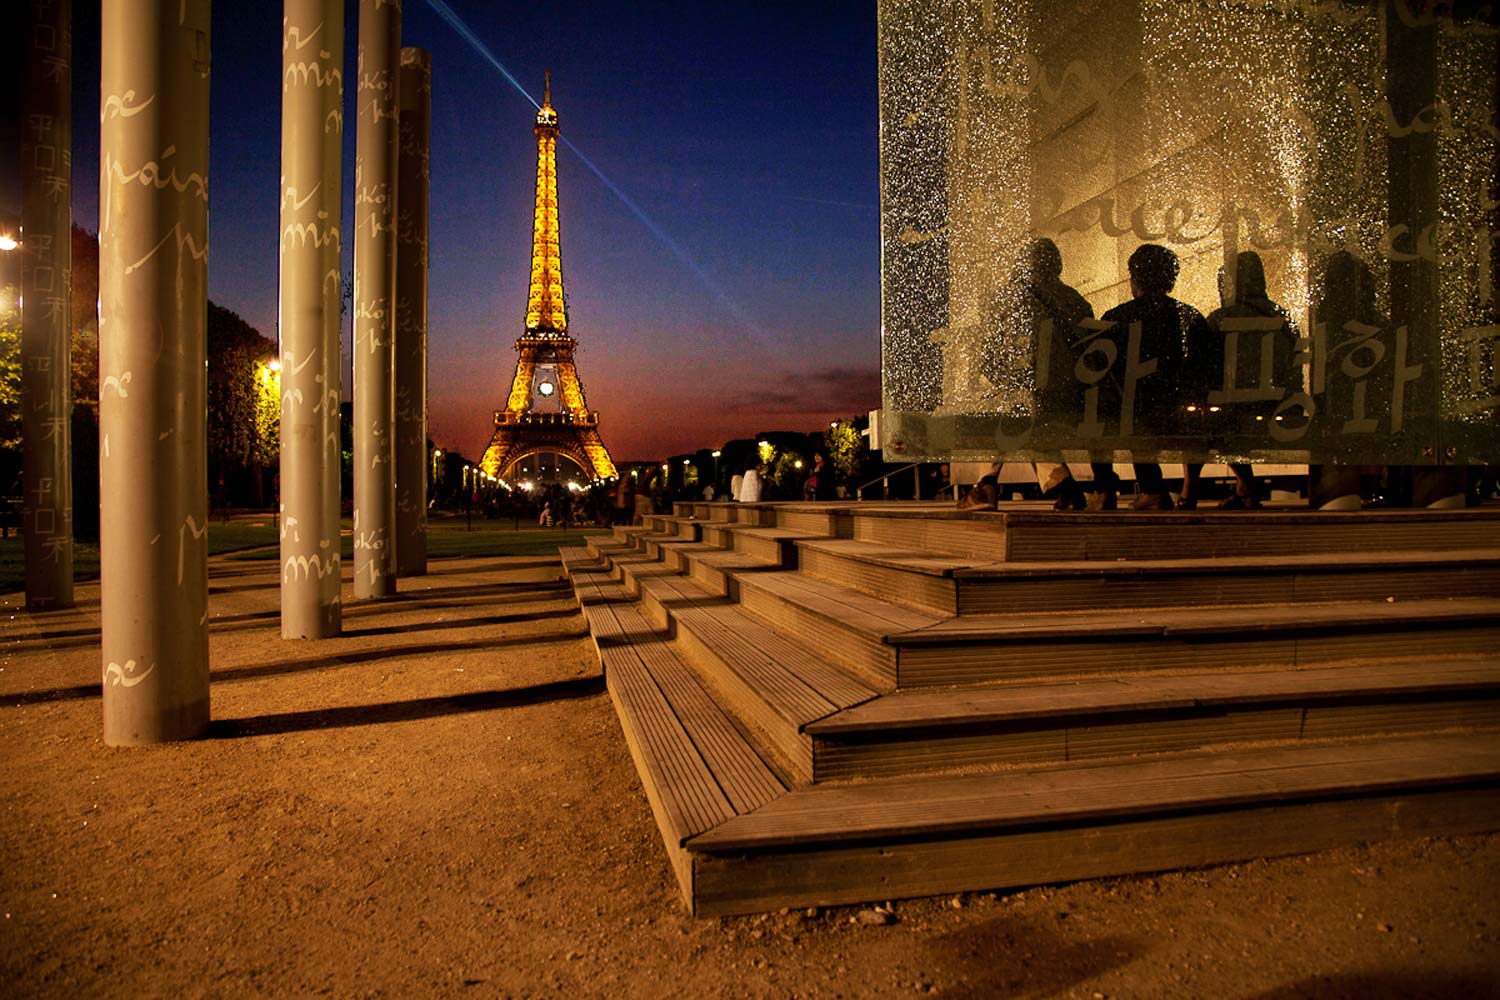
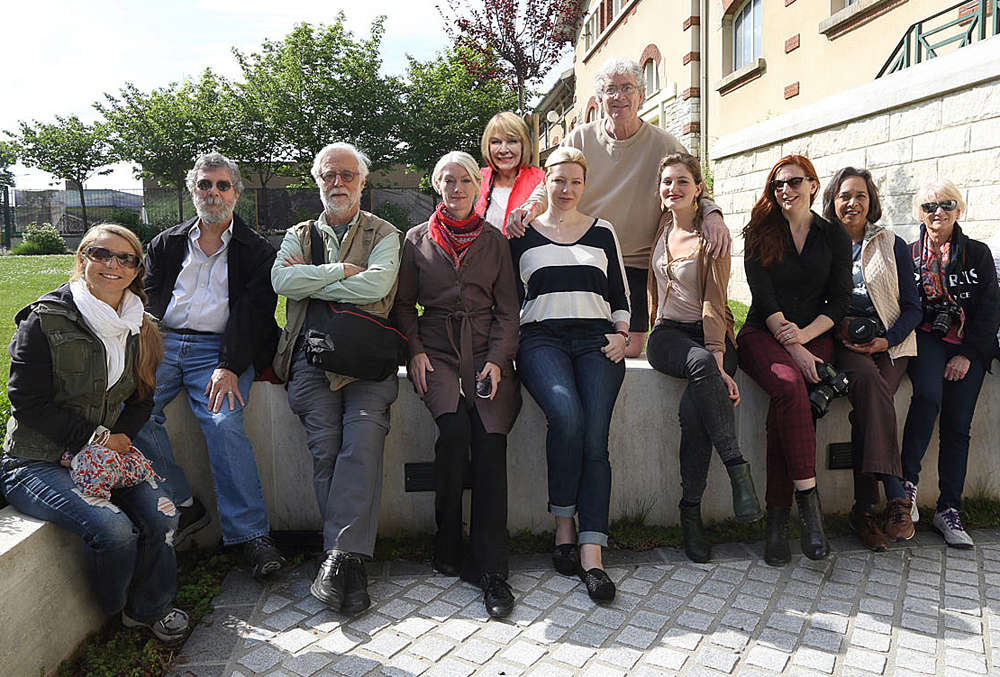
I recently returned from yet another of my latest workshop in New York, and it will have to go down as one of the best group of people I’ve ever had…or close to it since so many had taken at least one if not ten  previous workshops with me. The level of work was amazing and I was was proud to be a part of it. Nor only am I proud to show you their week taken during the week, but I would think you will agree that it’s pretty impressive work.

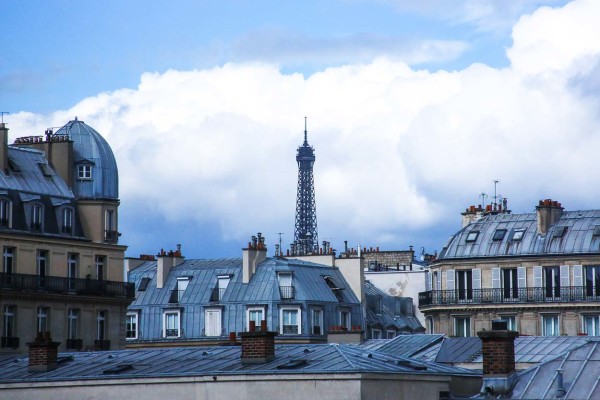
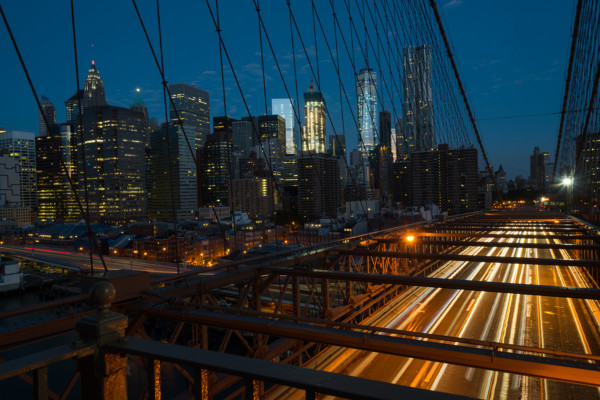
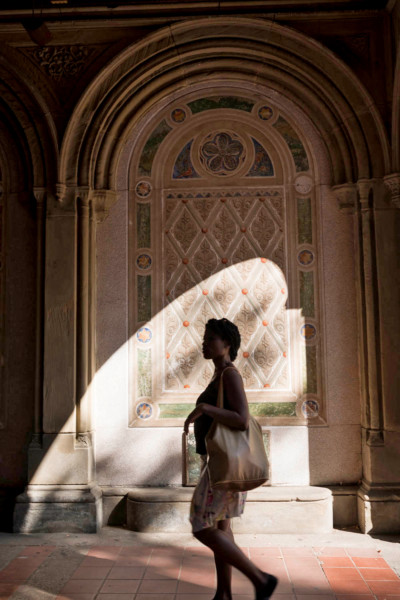
We shot at several places you’ll recognize in the slideshow: The Seaport, Memorial Gardens, the Brooklyn Bridge, Chinatown, Washing Square Park, the Village, Central Park, Calatrava Path Station, and a private hard hat tour of the shuttered hospitals on Ellis Island…not counting just walking around the city finding photo ops wherever you looked.

As I said, most of the people had taken my “Stretching Your Frame of Mind” workshop, or had taken my online classes with the BPSOP…or both, and I would put their body of work against the majority of working professionals living through the US…and abroad.

Group photo taken after the hard hat tour on Ellis Island.

You’ll have to excuse me this time for the amount of photos I’ve selected, but it was very difficult and this is less than half of what I went through as to make it as short as possible. Just keep your finger clicking on the arrow and it will go by a lot quicker!!!!

🙂

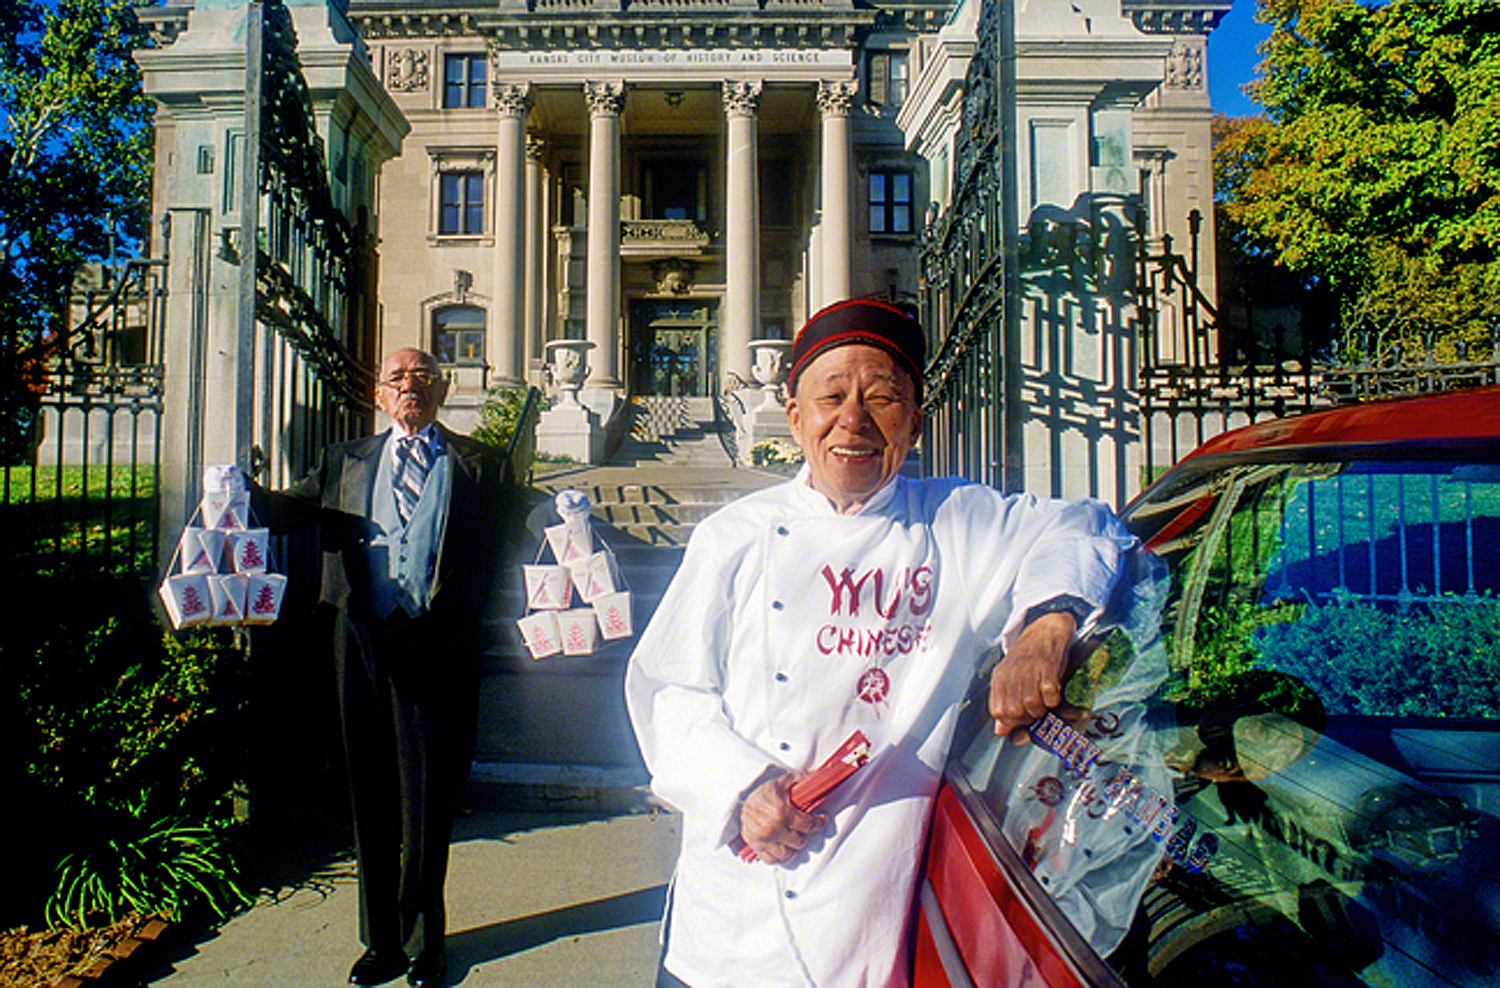
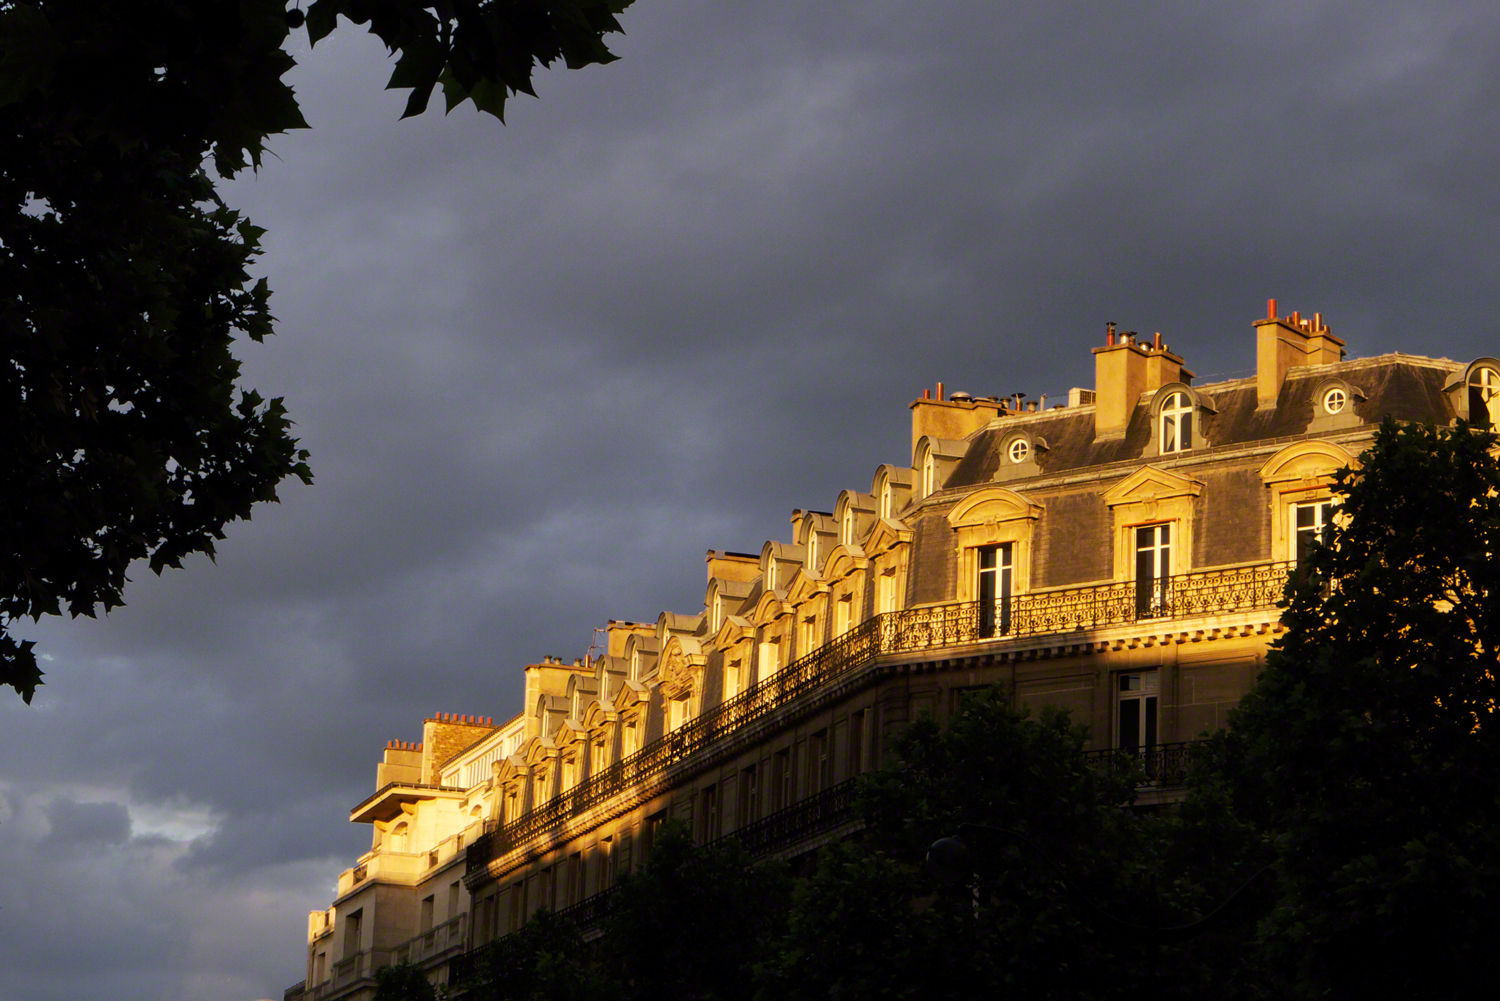
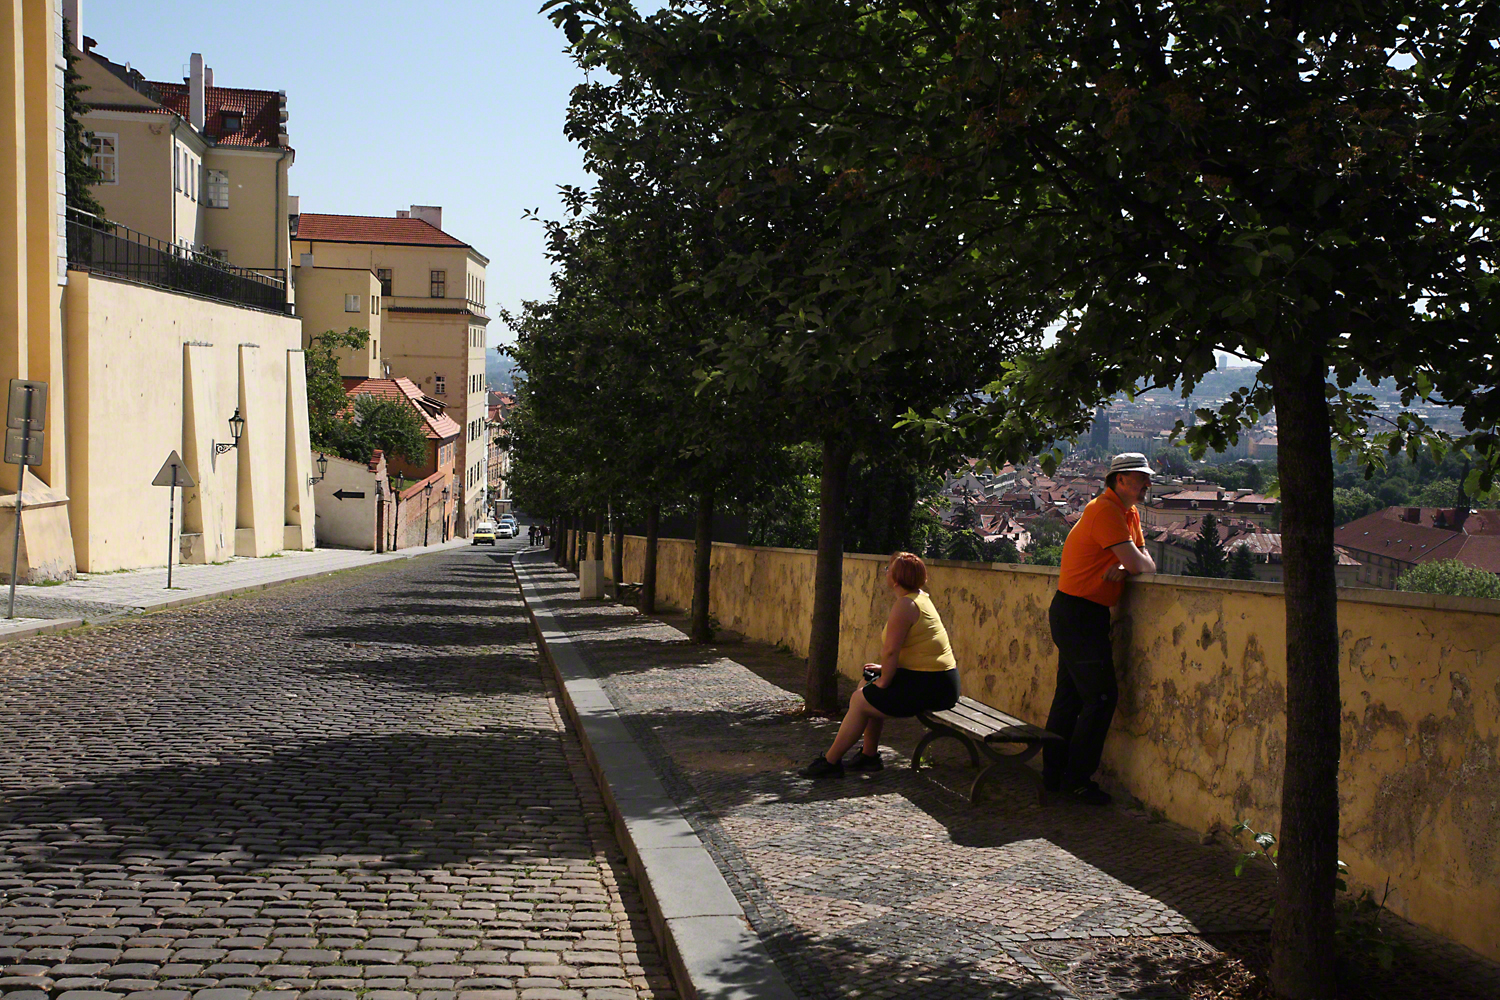
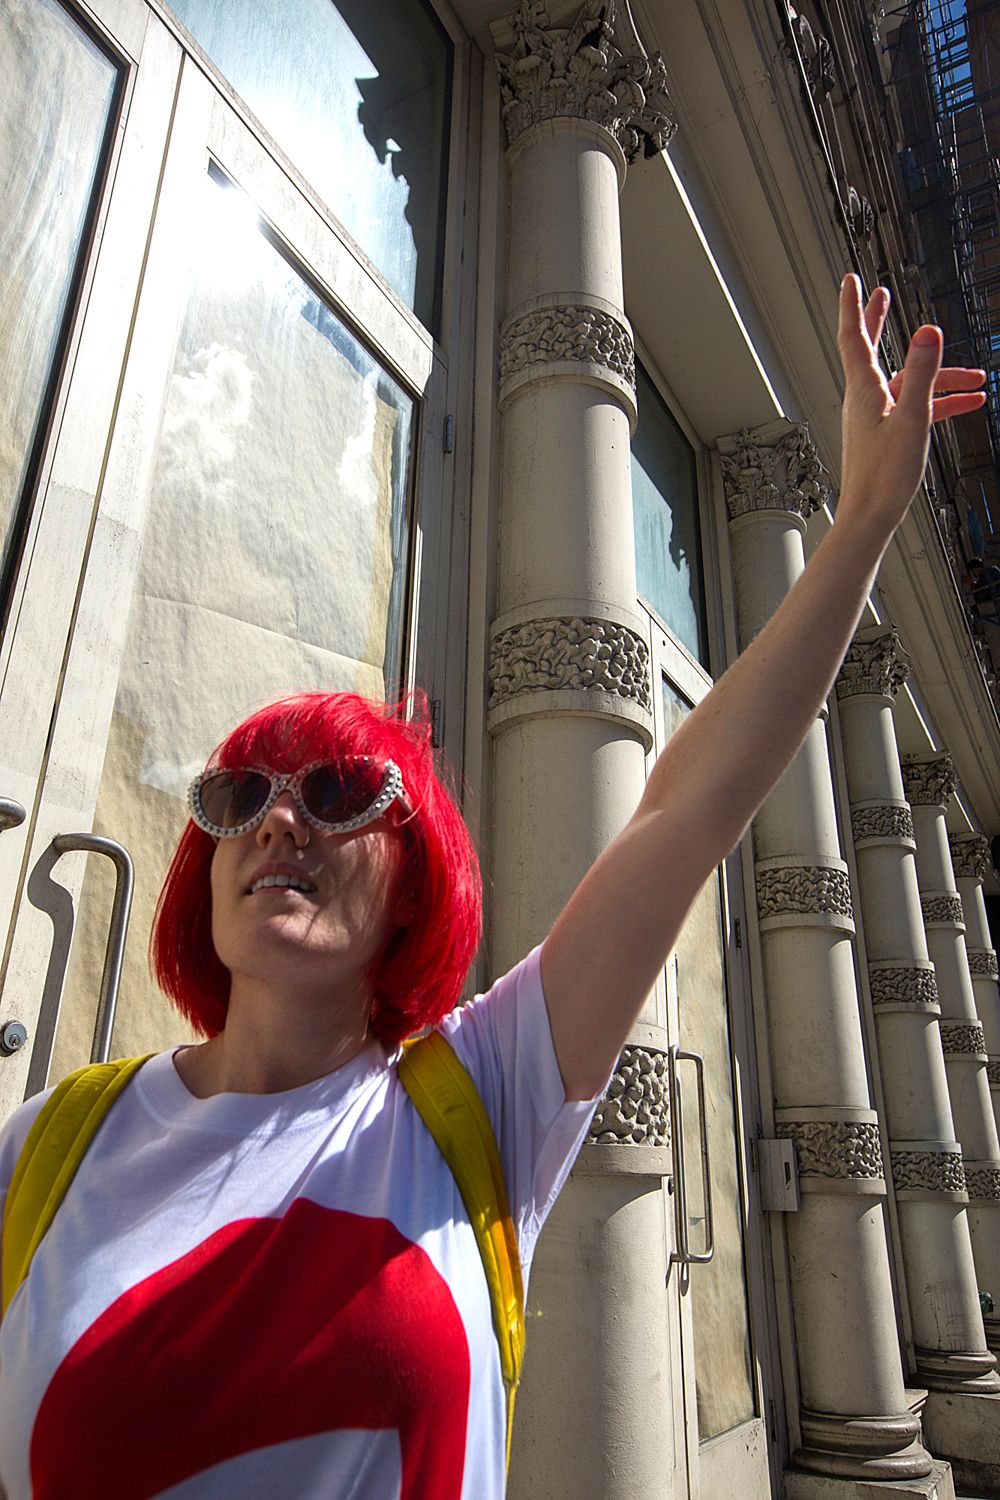
I always try to select a photo to highlight and it was very difficult to do so. I finally settled on the one at the top that to me represents New York, albeit in a semi-strange (NY) way. It’s the one image you see happening more than any other when in the Big Apple.

Enjoy:

Visit my website at: www.joebaraban.com and follow me on Instagram: www.instagram.com/barabanjoe. Check out my workshop schedule at the top of this blog.

JoeB

Anecdotes: Anderson Consulting

Game, Set, Match

Although it feels like centuries, some thirty years ago I was hired to shoot the annual report for Anderson Consulting. By all accounts, it was a great project that took me around the world shooting their clients.

One of their clients was the Social Security Department of Spain, and my assignment was to just shoot the people of their country. What a great job I thought to myself upon hearing what they wanted me to do. What more could I ask for since I love to shoot environmental portraits, and to travel around doing just that (with a complete free hand in what subject I picked to shoot) was just about as good as it got.

We based out of Madrid, and we were there during their Carnival…another story of really weird people dressing up and walking around the Plaza Mayor, Puerta Del Sol.  Besides shooting in Madrid, we also went to Toledo, and Cordoba to shoot there as well.

While in a small plaza in Toledo, I had a 300mm F/2.8 lens on a tripod and I felt as if I were a submarine captain in World War II looking through a periscope hunted enemy targets. Instead I was looking in the viewfinder, and after I had loosened all the knobs, I could freely swivel my camera around the crowds back and forth looking for subjects/targets of any height.

As I tell my online students with the BPSOP, and in my “Stretching Your Frame of Mind” workshops I conduct around our planet, constantly look around you, be aware of any movements and especially look behind you because that illusive ‘OMG” photo is lurking somewhere out there and just waiting to be captured.

While scanning the crowd, I saw this woman holding a fan close to her face. The first time I saw here she quickly turned away…the game was on!! I wanted her picture, and she was doing everything she could to avoid me. What I had in my favor was her extreme curiosity as to what I was doing and she couldn’t help herself to periodically look in my direction. At that point come hell or high water, and if it took me the rest of my life, I was going to get my shot.

In those days I was shooting film, and you had to focus your own camera. While her head was turned I pre-focused on her, and since I was at F/2.8, and at the minimum distance for that lens to get her sharp; I didn’t have much latitude as far as my DOF was concerned.

Since I was focused on her, I pretended to scan the rest of the people but was not actually shooting. Not knowing whether she was looking or not I looked back in her direction, and before a blink of either her or my eye, I clicked the shutter. I got her!!!!!

I smiled at her and reluctantly she gave me a half smile back as she knew at that moment that it was game, set, and match.

Visit my website at: www.joebaraban.com, and follow me on Instagram: www.instagram.com/barabanjoe. Check out my workshop schedule at the top of this blog as it becomes available. onderful country.

JoeB

Food For Digital Thought: Lifestyle Photos

An everyday occurence fror him.

In the last couple of years I’ve seen a trend develop concerning my fellow photographers that take my three classes with the BPSOP, and also in my “Stretching Your Frame of Mind” workshops I conduct around the planet.

It seems that everyone wants to have a website and actually try to generate some income from it. I’m often been asked what type of photos would need to be in it in order for people to be interested in buying their services.

My first question to anyone is what do you like taking pictures of? That’s so important, because if you don’t love your subject matter, you’ll never be happy with whatever outcome befalls you. Second question would be where do you want this new generated income to be coming from. Are you looking for people to buy prints from your site, or do you want someone to hire you to shoot original photography.

If you’re only interested in selling prints, then the subject matter should be generic in nature. In other words, color photography of land or seascapes, flowers, abstracts, or B/W editorial or photojournalism. Of course any of the areas I’ve mentioned can also be shot in B/W.

If you’re interested in being hired to shoot editorial, corporate, or advertising photography, then it’s very important to be able to shoot people. People like to see people in photos, and for an editor, art director, or graphic designer to hire you you need to be good at what’s called Lifestyle Photography.

Lifestyle was one of the areas I was best known for back in the days when I was shooting for all three of these avenues. It’s about capturing people in everyday life. Situations that are common to the people that will be looking at your pictures. Situations that they are involved in every day of their lives. Needless to say these Lifestyle photos need to be shot by portrait or people photographers and handled in an artistic manner.

Although Lifestyle photography depicts common everyday occurrences, it would also include those moments that are not seen everyday, but still include people interacting with other people or people being alone with nature. For example a lone cross country skier alone against the elements. Lifestyle, but not an everyday occurence.

Think of situations that you’ve experienced or seen being experienced by others. Finding these happening in real time…real life may take you a long time to accumulate enough images to put on a site.

Or, try setting  these scenarios up and then shooting in a reportage style. In other words, set up a situation and shoot it as if it were really happening.

Here’s a few examples of what I mean:

Visit my website at: www.joebaraban.com, and follow me on Instagram: www.instagram.com/barabanjoe. Check out my workshop schedule at the top of this blog. come shoot with me sometime.

JoeB

The Law Of The Light Part II: Lighting People

The jockey picture.
The jockey picture.

In my part I post on the “Law of the Light” I talked about positioning my 57’Chevy in a position where I could get a “POP” on the front grill. By placing the car in such a way as to have the Angle of Incidence (the light falling on the grill) being the same as the Angle of Reflection (the light reflecting off the grill to the lens).. I also said that it was my favorite way to light …anything!!! Well that, next to backlight, is my favorite way to light people as well.

In my online class with the BPSOP, and in my “Stretching Your Frame of Mind ” workshop I conduct around the planet, I provide my students with a diagram of a clock as I’ve provided here. If you notice, I have my subject right in the center and my camera right above the six. I tell them to imagine this clock on the ground (or behind your subject depending what is easier for you to imagine) and the person they want to photograph standing where I have the subject (in the middle of the clock).

In order to light the person so that they’re in the “Law of the light”, I want the sun, or the light source to be either around 10 o’clock or around 2 o’clock with the camera at 6 o’clock. This would be when the angle of the light source hitting the subject is the same angle as the light sources reflecting off the subject hitting the lens.

As you can see by my clock diagram, the source of the light is coming from about 2 o’clock and from behind the jockey. The angle from the ‘2’ to the subject is the same angle as the subject to the camera.

Here’s a few more examples of shooting people in the “Law of the Light” In each of these photos, imagine the clock superimposed over the photo:

Visit my website at: www.joebaraban.com, and follow me on Instagram www.instagram.com/barabanjoe. Check out my workshop schedule and come shoot in the “Law of the Light” with me.

JoeB

AskJoeB: Red Tailed Hawk

Mary sent me this image with a question. I like to include what fellow photographers have to say so that others that might have a similar question or photo can benefit. Here’s what Mary had to say:

“Hi,

My name is Mary Robinson and I came across your site via Lightstalking.com. I have enjoyed reading your blog and am interested in having a photo critiqued. My question is, I have always been told and read numerous times that the most important thing would be to make sure in portraits that the eyes are in focus. In this particular image I have done that, but the beak itself is not, given the settings I was using and that my angle of view was slightly above the bird how would I have avoided getting parts of the bird out of focus while others are in focus and does it matter in this particular instance as the eyes are what drew me to take the shot in the first place?”

Mary,

I looked at you camera settings and it said you were using a 70-200 zoom, and you were just about all the way out at 190mm. It also says that you were at F/7.1 at 1/160th of a second.  This could be the problem.

I realize that the distance from the end of the beak to the eyes is not very far, but it might be too great a distance to get it all sharp at F/7.1 with a 200mm lens. At 200mm, the plane of focus is not very much, which is why it’s used to separate the Figure from the Ground. In my new class with the BPSOP, and in my “Stretching Your Frame of Mind” workshops we work on the six principles of Gestalt. One of them is called Figure-Ground”, and it deals with ways to separate the figure (the subject) from the ground (background). The best way is to use a long lens and shoot with a minimum aperture. This is sort of what’s happening with your photo of the hawk.

Here’s what I suggest: First of all I assume you were using a tripod, because if you were hand holding it you already started out with a sharpness problem. Ok, assuming you were on a tripod, I believe it would have taken more DOF to get him sharp from the beak to the eyes…if you were at 190mm.

It also appears that you were over to the right side of the beak, so the distance from the feathers and eye on the left was further away from the features and eye on the right on the right. That would have been enough to not get all of it sharp. Remember that you’re dealing with a long lens so you have to remember that it’s going to take more DOF to get everything you want in focus.

It’s also possible that 1/160th of a second was not fast enough to maintain sharpness. That’s not really all that fast when shooting wildlife.

I hope this helped.

Visit my website at: www.joeBaraban.com and follow me on Instagram: www.instagram.com/barabanjoe. Check out my workshop schedule at the top of this blog. Come shoot with me sometime.

JoeB

Workshop Stuff: Eiffel Tower Exhibition

First place
First place

In my recent Paris Workshop, that incidentally was a huge success, I had ask the class to photograph the Eiffel Tower sometime during the week. Since it’s the most iconic structure in France, or any country for that matter, I thought it might be fun to have a juried exhibition and award a special memento to the photo that was judged (I stayed out of it) by  three independent people (artists in their own right) as being the most unusual and creative photograph taken during the course of the workshop.

Several photos were taken after our farewell dinner at Procope, the oldest restaurant in Paris. A private coach picked everyone up after a fantastic meal and great wine and went to the Eiffel Tower at sunset ( 9:41pm) for one last shoot. I gave the first place winner a Crystal Eiffel Tower made by Swarovski.

The second, third, and honorable mention are the first three in the slideshow. All the rest were finalists.

Visit my website at: www.joebaraban.com and follow me on Instagram: www.instagram.com/barabanjoe. Check out future workshops at the top of this blog.

Springtime in Paris workshop.

JoeB

Personal Pearls Of Wisdom: Make It Don’t Take It

Making pictures is a lot more fun than taking them.

The first workshop I ever taught was at the Maine Media Workshop in 1984, and up until the last few years I’ve been teaching while shooting advertising and corporate photography ever since. That’s thirty years of looking at my fellow photographer’s photos.

Thirty years later, I’m semi-retired and now teaching online with the BPSOP, and still conducting my “Stretching Your Frame of Mind” workshops around the planet.

If I were to pick out one thing that I’ve seen over the course of my teaching career, it would be the fact that the majority of all my students just go out with their camera and take pictures. I wrote a post about it called “I came, I shot, I left”, which somewhat touches on the subject at hand.

One of my favorite lines that I say to my students is, “I don’t photograph what I see because I never see what I want, so I photograph what I’d like to see”. What does that mean you say? It means that I’m in the business of making, not taking pictures. My background isn’t in photography. Truth be known, I didn’t hold a 35mm camera until I was twenty-one. I was an art student who loved painting and design. The day I picked up that camera was the day I changed my favorite medium, a paintbrush, to a 35mm Pentax Spotmatic with a 50mm lens.

I still consider myself an artist. Now, instead of a canvas on an easel where I was making works of art, I have a camera on a tripod, and I’m now making pictures.

If you’re out with a camera over your shoulder with the intent of coming back with your ‘work of art’, and you’ve taken my online class or my workshop, you have an ‘Artist Palette’ with you. You’re using the elements of visual design to help you see things you wouldn’t normally see and be able to make a picture from what you looking at by using one or all of these Elements.

Think about going out and making pictures, here’s what I mean: Before you click the shutter, take some time to walk around your subject, center of interest, or even the entire location your about to shoot in. Shoot it from different points of view. Before you even bring the camera up to your eye, look where the sun or light source is coming from. Position yourself to side light then backlight your subject. I’m not a fan of front light, but there’s time when it works so look for it as well. I wrote a post about looking at things in a new way. It’s also about making pictures.

Think about scouting the location ahead of time to check on the direction of the light. Maybe there’s some props you’d like to bring to help tell some kind of story. Being a storyteller is about making pictures. Maybe adding a person would help, so you drag one of your kids (you do have to pay them something if you want their undivided attention), or a spouse or friend. If you live in or close to a large city, Google up that cities Tourism Bureau or Film Commission for places to shoot; they love to help photographers. What about festivals (lots of photo ops) that come once a year? These are the kinds of things that change your thought process, and now you’re also in the business of making pictures.

Visit my website at: www.joebaraban.com, and follow me on Instagram: www.instagram.com/barabanjoe. Check out my new workshop schedule at the top of this blog. Come shoot with me sometime.

JoeB

My Favorite Quotes: Genesis 1:3

"And there was light".
“And there was light”.

Trust me when I say that I’m very far from being a religious person, but the other day I was listening to a piece on PBS and the book of Genesis was being quoted. I can’t remember exactly what the gist of the conversation was, but the moment this phrase was said, my ears perked up. The direct quote from Genesis 1:3 is,…then God said, “Let there be light”; and there was light.

My ears picked up because I remembered walking back to my hotel in Paris during my workshop there from what was a “bust” as far as the afternoon light was concerned. As you can see in the above photo that it was about as dark gray (and threatening rain) as it gets especially so close to sunset.

I tell my online class with the BPSOP, and my fellow photographers that join me in one of my “Stretching Your Frame of Mind” workshops to always be ready because you just never know when something will happen. As always, I still had my camera attached to my tripod and both were resting comfortably on my shoulder. I was asking no one in particular if I could just have a minute of light, and at that moment, as I always do, I was looking all around me from front to back. As I turned around the sun came out for a matter of seconds, and I was able to capture this photo. Needless to say it made my afternoon.

I guess somebody up there likes me!!!

Visit my website at: www.joebaraban.com, and follow me on Instagram: www.instagram.com/barabanjoe. Check out my upcoming workshops at the top of this blog. Come shoot with me sometime.

JoeB

Anecdotes: Maine Workshop

Not a true Vanishing Point, but close.

Years ago, when the now Maine Media Workshop was just called the Maine Workshop, I took a group out looking for the elements of Visual Design and composition. Now I call it my Artist Palette, and these elements are placed on it so your imagination can easily get to them. We work on this same Artist Palette both in my online class with the BPSOP, and in my “Stretching Your Frame of mind” workshops I conduct around our planet.

Probably twenty plus years ago I was taking a group out late in the afternoon, driving in the countryside outside Rockport (where the workshop Homestead is located) looking for Vanishing Points to incorporate into my students composition. Out of the corner of my eye I saw a man sitting on the railing of his back porch. I quickly noticed that the railing contained parallel lines that were almost converging to a point on the horizon.

I couldn’t tell if it was a true Vanishing Point (which it wasn’t) , but the man was great looking…a true Mainer. I turned around and drove back to see what if anything was worth having my fellow photographers shoot.

We pulled up next to the house and I began talking with this man who turned out to be very warm and friendly, and a great guy to boot. I asked him if I could take a quick photo to show the students how to combine a Vanishing Point with an environmental portrait; as seen in the above photo.

I then had the class take over and just stood back to see what they could each come up with individually while the light was beautiful. I went to put away my gear while thinking that they would try their hand at incorporating a Vanishing Point and a portrait. When I returned, I was surprised (to say the least) that they had positioned this man in a chair and proceeded to photograph him. I couldn’t imagine what they were seeing or trying to see, but since they were having fun, I just let them be….and then I quietly snickered, then a giggle, then I laughed, and laughed.

Not sure what they were seeing.

I still smile when I see this photo I shot of them.

Visit my website at: www.joebaraban.com, and follow me on Instagram: www.instagram.com/barabanjoe. Check out my upcoming workshops at the top of this blog.

JoeB


Life Before Photoshop: IBM

Look ma, no Photoshop

In 1983 I was hired to shoot a series of ads for IBM. One of the ads featured a class of young students painting a mural of the United States. I wanted strong window light coming in from 9 o’clock to side light providing depth to the room. The clock is one of the most important topics I talk about in my online class with the BPSOP, and in my “Stretching Your Frame of Mind” workshops I conduct around the planet.

In the old film days, the days when the word Adobe meant a type of house in the Southwest part of the US, I couldn’t rely on post processing to help create the illusion of depth.; for that matter, for anything. I also couldn’t rely on finding a room that would give me nice sidelight on the kids; let alone count on a sunny day. There was too much money involved for the advertising agency and client to reach a level of comfort in my ability to arrange for everything needed..for example late afternoon light at 9 o’clock.

So, what do you do? You bring out the “big lights”, 12K HMI’s, the lights I often used both in print and when I was acting as a director/cameraman on TV commercials. These lights were 12,000 watt daylight balanced lights that needed a big generator and ballasts to operate…and a package that included a gaffer, assistant, truck and portable generator would run about $2000.00 a day for just one light, CTO gels (warming gels since the light was on the blue side) and barn doors.

An all day shoot.
An all day shoot.

In order to create an even exposure from one end of the kids to the other it took six lights and several hours to set up and shoot. It was the “good old days” where it was fun creating the look on one piece of film and one exposure.

Visit my website at: www.joebaraban.com, and follow me on Instagram: www.instagram.com/barabanjoe. Check out my workshop schedule at the top of this blog. Come shoot with me sometime.

JoeB

AskJoeB: So, what do you think?

So, what do you think?

I just love it when one of my fellow photographers submits an image for me to take a look at and critique. If I can help out by making suggestions that will ultimately have an impact on the way they approach their next photo, then so much the better.

As always, I like to let people read what the photographer had to say. The reason being that so many out there have had a similar experience or have had identical questions. Here’s what Greg had to say:

“Joe,

In your SYFOM II class we worked on silhouettes and you said one of your “favorite ways to show a silhouette is to combine it with an environment that isn’t a silhouette”. I didn’t quite understand this at the time but as our class was ending I was at a local park trying to get a photo of this covered bridge that wasn’t just another documentary photo, like the ones in the park brochure.

I framed the bridge with the trees in the foreground and then this girl walked by with her dogs, as she walked through the covered bridge, I realized she would be silhouetted in the opening on the far side and fired off several frames before she was gone. I chose this angle to show the inside and outside of the bridge and the diamond shapes at the top of the walls, I also like the light coming through the trees. There’s two dogs but only one is visible. I also had to straighten it a little. So, what do you think?”

Harry talks about one of the three classes I teach with the BPSOP. I also share a lot of the same information in my “Stretching Your frame of Mind” workshops I conduct around our planet. One of the lessons in my Part II class deals with the silhouette, and how to incorporate them into our imagery. The silhouette, among other elements on my Artist Palette, is a powerful tool in helping to take your photography what I call “up a notch”.

Here’s what I have to say:

Harry, you have done well ‘grasshopper’. It’s a wonderful photo that will definitely ‘stand the test of time‘.

The reason that the silhouette stands out from the environment around her is what’s called “Figure-Ground“, one of the six concepts that we work on in my third class on Gestalt. By having a dark object against a lighter background, it stands out in the composition. You also have created another concept in Gestalt, this one is called Continuance.By showing the road leading up to the bridge, you have made the viewer an active participant by moving him around your frame.

You have also framed her within a frame, one of the ways to generate Visual Tension that we also work on in my part II class.

You should pat yourself on the shoulder for creating a photograph that will indeed stand the test of time.

By the way Harry, I forgot to mention that I also love the little dab of light in the trees and on the structure, and actually wrote a post about it.

Well done!!!

Visit my website at: www.joebaraban.com, and follow me on Instagram: www.instagram.com/barabanjoe. Check out my workshop schedule at the top of this blog. Come shoot with me sometime.

JoeB

Quick Photo tip: Managing What the Viewer Perceives and Processes

Pass or fail?
Pass or fail?

Since humans rely on their perception of the environment that surrounds them, visual input is a part of everyday life. This is a part of what I teach in my online Gestalt class with the BPSOP. I also talk about it at lengths during my “Stretching Your Frame of Mind” workshops I conduct around our planet.

One of the six concepts we work on is called Continuance, and it’s about directing the viewer to areas in our composition while moving him around the frame.

Instead of putting up my usual photo, this time I put up a diagram that I show to my fellow photographers.  The last time I counted, no one passed the test!!!!

If you can use this concept, and apply it to your thought process, you’ll create images that not only will keep the viewer around longer (isn’t that just what we want?) but can also stand the test of time.

The viewer will look where they're looking.
The viewer will look where they’re looking.

The next time you’re out shooting, think about this diagram, and try to incorporate the theory behind it into a photo. Think of the arrow as an analogy as far as directing the viewer to look in the direction you want. You can also get the viewer to look in the direction you want (or directions) by having people in your photos act like arrows and use their eyes to do the looking. If you can create two directions, all the better.

When I saw the man walking down the cobblestone street in Tuscany, I immediately saw it as a way to lead the viewer in the opposite way the man was walking. It might not be one of my best photos, but it sure does show how important the Psychology of Gestalt is.

Visit my website at: www.joebaraban.com, and follow me on Instagram: www.instagram.com/barabanjoe. Check out my upcoming workshops at the top of this blog.


JoeB

Food for digital Thought: The Vanishing Point

classic Vanishing Point In the pat few years I’ve written several posts that included, to some degree, directional and leading lines and have talked at some length about the Vanishing Point. It’s time to dedicate an entire post on one of the most powerful tools in taking our photos what I refer to as “up a notch”…the Vanishing Point.

Back in the very old days (as in medieval times) when artists, or draftsmen wanted to show linear perspective, they would either overlap objects to indicate position and create a visual sensation of depth, or they might place one set of objects or subjects below each other to try to create the same effect.

In the early fifteenth century, an artist named Fillipo Brunelleschi demonstrated a method to create the illusion of making distant objects appear smaller than closer objects. It was a method of perspective that we now refer to as a Vanishing Point.

Brunelleschi had created a way to create the third dimension (depth) on paper, in a two dimensional plane, existing of only height and width.

In the modern world, describing a Vanishing Point to a person without specialized knowledge would be the point where parallel lines appear to converge.

In my online class with the BPSOP, and in my “Stretching Your Frame of Mind” workshops I conduct around our planet, we work on ways to keep the viewer an active participant when looking at our photos. How we manage what the viewer perceives and processes is an important step in doing just that.

How we can get the viewer to perceive a Vanishing Point goes back to the principle of making things appear smaller as they move away from the lens towards the horizon. A Vanishing Point is an important tool when you’re trying to create depth on a two dimensional plane. Besides depth, it will add realism and a sense of drama; it can be coming from any direction the viewer looks.

A classic Vanishing Point is made up of three elements:

The Point: is the spot on the horizon or just past it. This is where your eye will eventually end up after you’ve composed your photograph and put whatever subject matter or objects you have incorporated into your composition.

The Plane: is the image seen through the camera in two dimensions.

The Line: refers to the parallel lines that appear to get closer together the further away they get. In fact, they remain the same distance apart as they lead to the point on the horizon. These lines are perpendicular to the lens axis and start in front of the photograph. When they reach the point on the horizon, everything you observe comes together, then seems to disappear.

There are those that say that the parallel lines do not need to go all the way to the horizon, as long as they converge at a point somewhere past the middle of the frame; and/or converge close enough to the horizon to be implied.

Here are some examples of a Vanishing Point:

Visit my website at: www.joebaraban.com and follow me on Instagram: www.instagram.com/barabanjoe. Check out my workshop schedule at the top of this blog. Come shoot with me sometime.

JoeB

Student Work: Carousel On Lake Geneva.

Andrea, an online student of mine, asked me to talk a little about her photo of a carousel next to lake Geneva, Switzerland.

The first thing I can tell you is to bracket!!! This image is a little too underexposed. Since the sky is overcast and not especially pretty, why not have it lighter? By making it brighter, you lighten up everything else from the bright spot in the middle of the frame  on the horizon to the flowers, to the lights and horses on the carousel. To me, it’s a better trade than having the sky dark and foreboding.

Speaking of the small bright spot in the middle of the frame, If I had been standing there with you as I usually do in my workshops, I would have had you place the person on the bike about ten feet behind him…why? So that his silhouette would have ‘popped’ out more. By doing that, the viewer would have gone straight to it, even before enjoying the carousel.

I really like how you’ve created a path that goes around the carousel. It will lead the viewer right around the corner and as he takes his imaginary walk, he’ll wonder what’s around the bend. This is about the Psychology of Gestalt and when we can get the viewer to take an active role in out imagery, by giving him lots of ways to enter and leave the frame, and discovering new things as he does it (like the bicycle for example), the longer he’ll stick around…and isn’t that what we want him to do? In my online class with the BPSOP, and my “Stretching Your Frame of Mind” workshops I conduct around the planet, we spend time working with the different concepts in the Theory of Gestalt as it applies to photography.

I like the warmth of the carousel and the coldness of everything else, but one thing I would change is to take a step back so all of the horse’s head is in the photo. If you knew about my “Fifteen Point Protection Plan” and were using it, you would have seen that and decided if you would like the head where the viewer could see it.

Thanks for the submission. I hope this helps.

Visit my website at: www.joebaraban.com, and follow me on Instagram: www.instagram.com/barabanjoe. Check out my workshop schedule at the top of this blog. Come shoot with me sometime.

JoeB