Quick Photo Tip: Always Look Behind You.

I can’t begin to think of how many times I was through shooting at some location and after we had wrapped things up to head back to the car, I turned around to see the dying moments of a spectacular sky streaming light that wasn’t there a moment ago, or a one in a million cloud formation. I can tell you that it’s been years and years and years since I made the mistake of putting all my equipment away before it was absolutely over.

What happens is that once you’ve taken a great photo or series of photos filled with wonderful light you become satisfied, mentally tired, and even a touch on the complacent side of smugness thinking you got all there was to get.  So you sort of become anxious to get to the car and either head home or to the hotel where you’re staying to relax in the bar and mull over the last couple of hours of shooting with a cold beer or a very cold Bombay Martini in your hand, as I have.

Well, I’m here to say that it ain’t over until it’s over, as in dark!!! After forty-five years of shooting, I can tell you that you just never know when something can happen that you had better be ready for or you will surely miss it. As I tell my online students with the BPSOP, and the participants that take my “Stretching Your Frame of Mind” workshops I  conduct around the planet, Mother Nature has an uncanny way of sneaking up on you when you’re not looking to provide you with an extraordinary opportunity to capture her in action. Remember that she’s stingy and won’t give you much time. She’s been known to tease the unprepared mortal, dressed up to look like a photographer, with literally seconds of incredible perhaps even once in a lifetime light.

How do I stay ready? As I’m headed back to the car I keep my camera on the tripod, I make sure I still have shots left on my card, the tripod is over my shoulder, and as I’m walking I keep turning around and looking over my shoulder. Also, even when I’m driving away I’m still looking in the rear view and side mirror. There’s been more than once when I made a quick ‘bat’ turn and went back and grabbed a great shot.

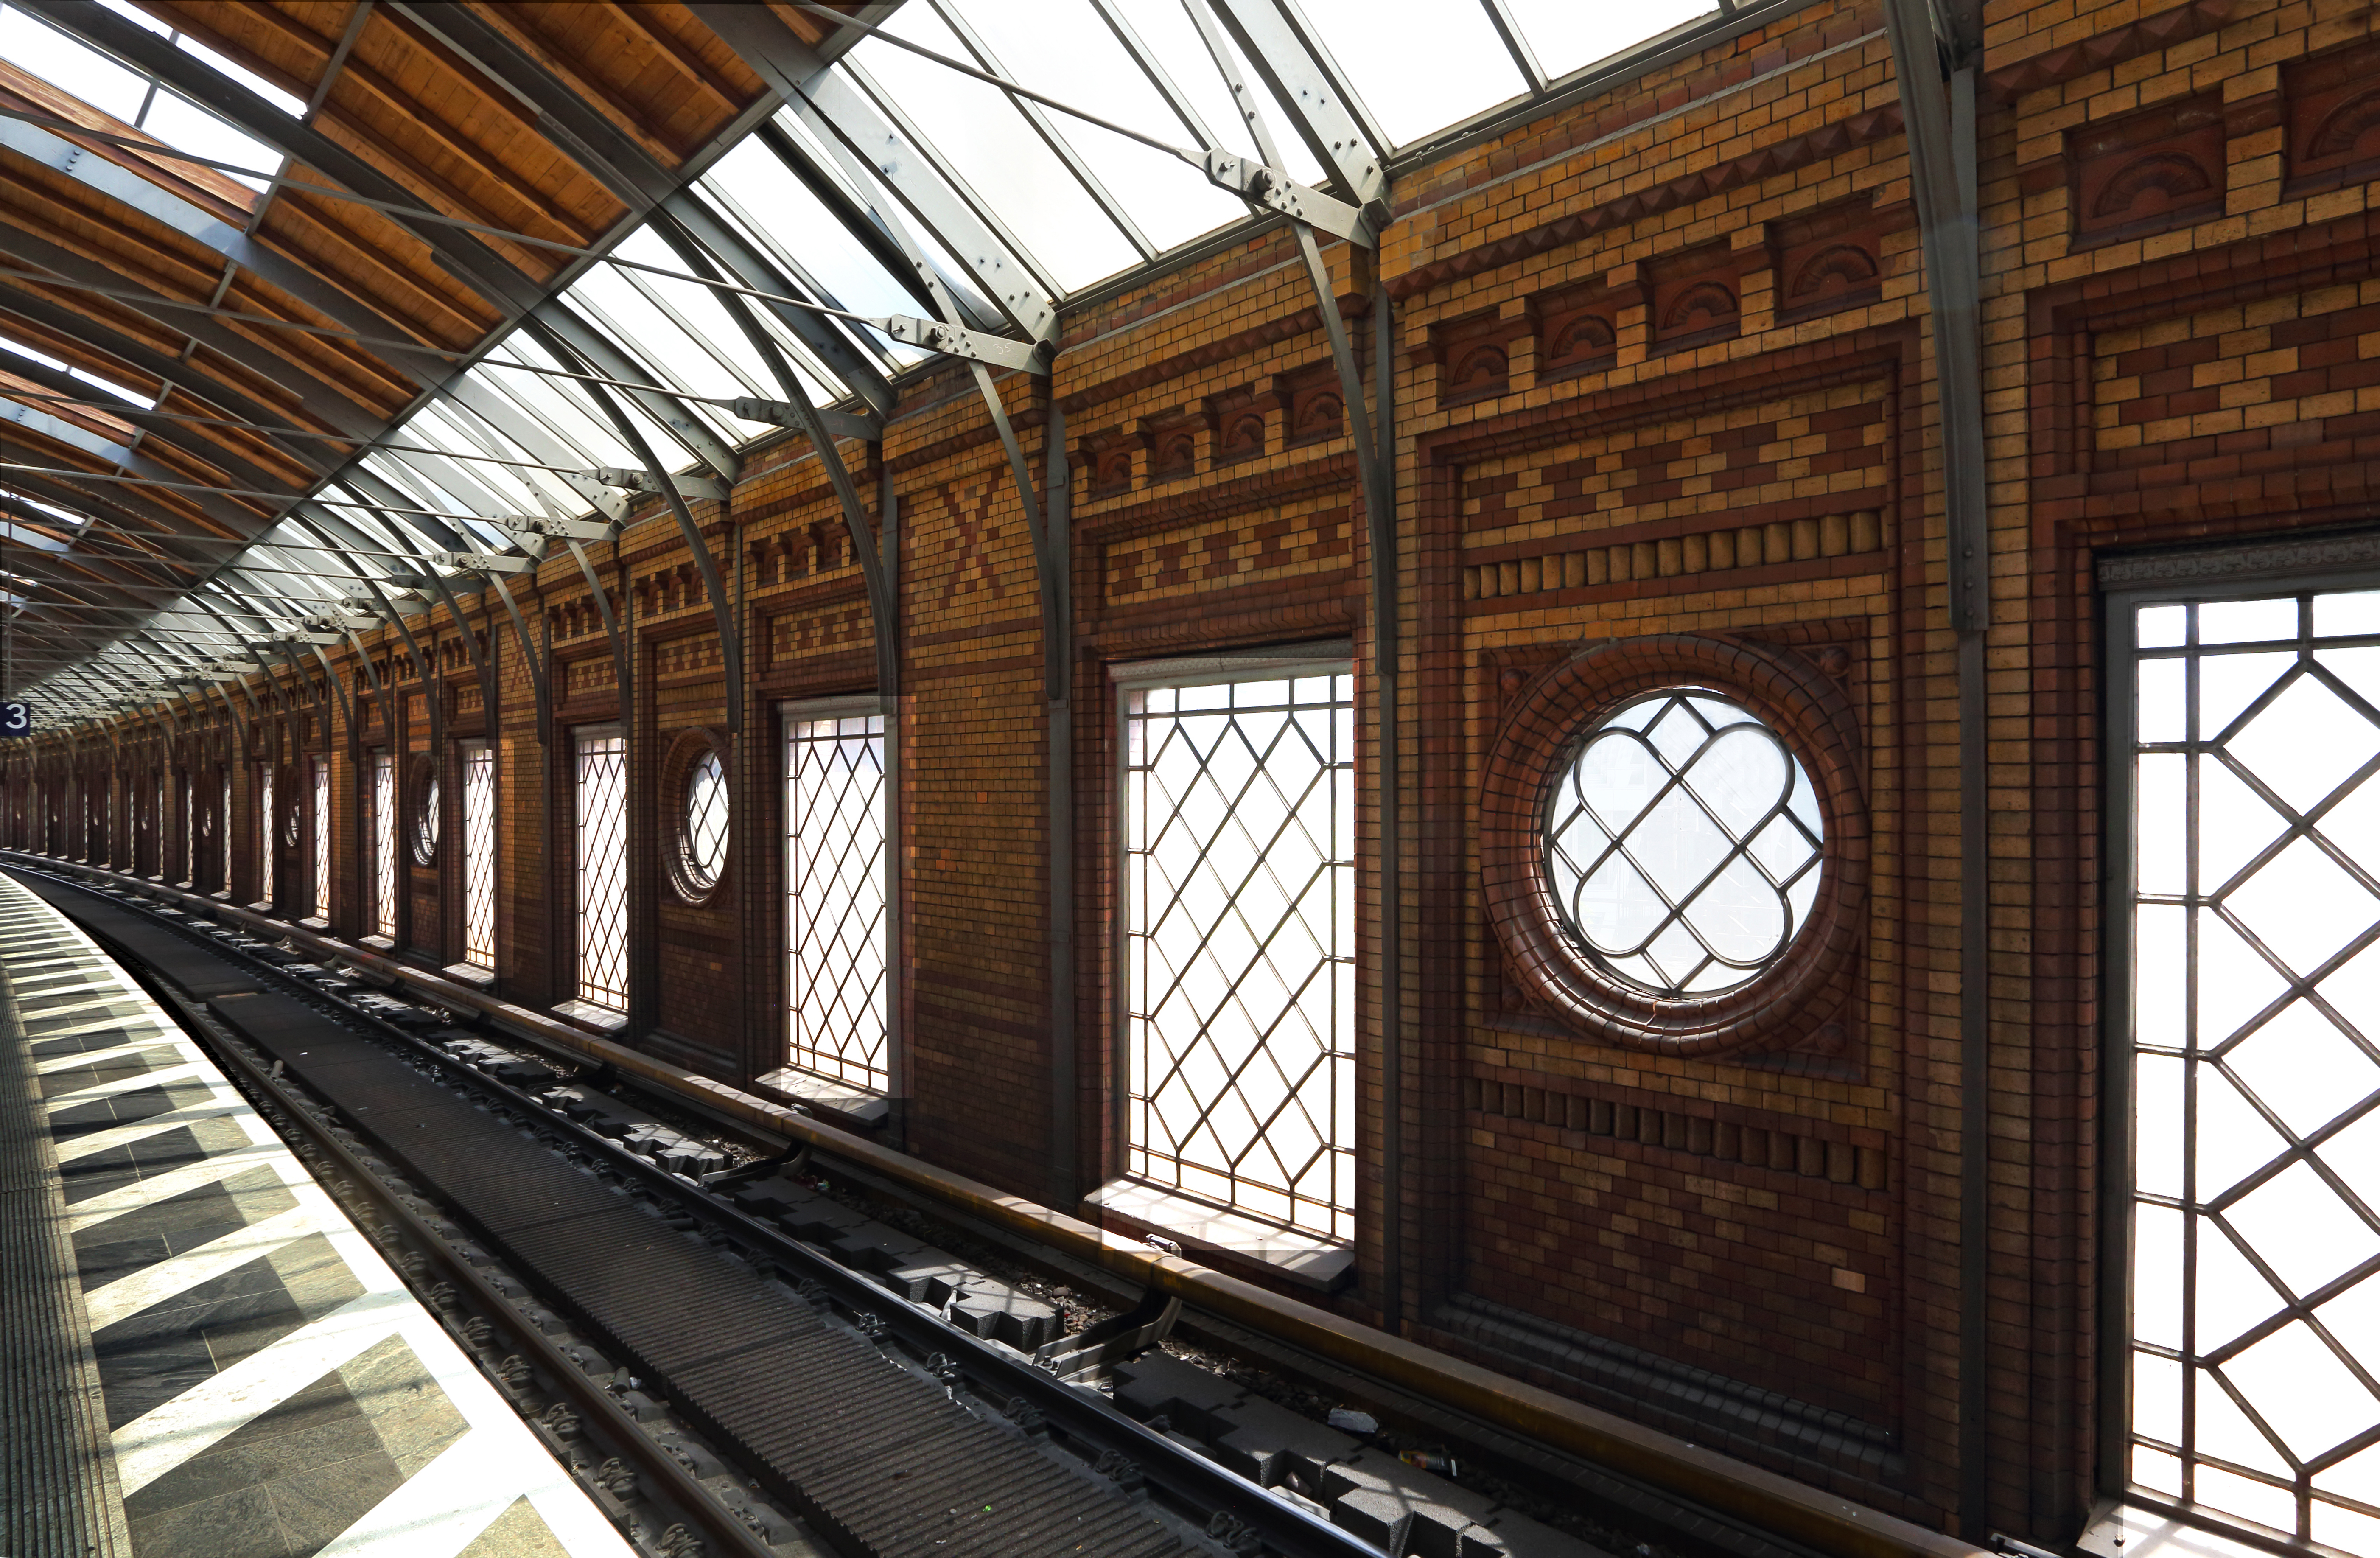
In this photo, we were through shooting the Suez Canal and were eating dinner in a restaurant. I had my 300mm F/2.8 lens still on my tripod right next to me. I turned around as I always do, saw this light, shot the photo and in less time it took me to write this one sentence it was gone.

By the way, I missed the light just once in my forty-five career and once was too much!!!

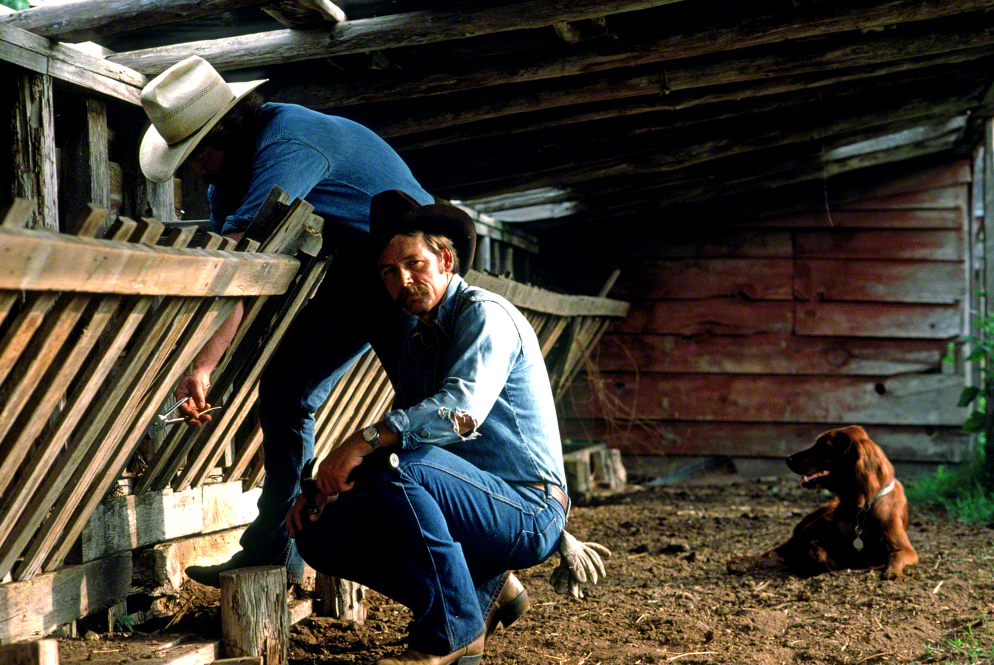
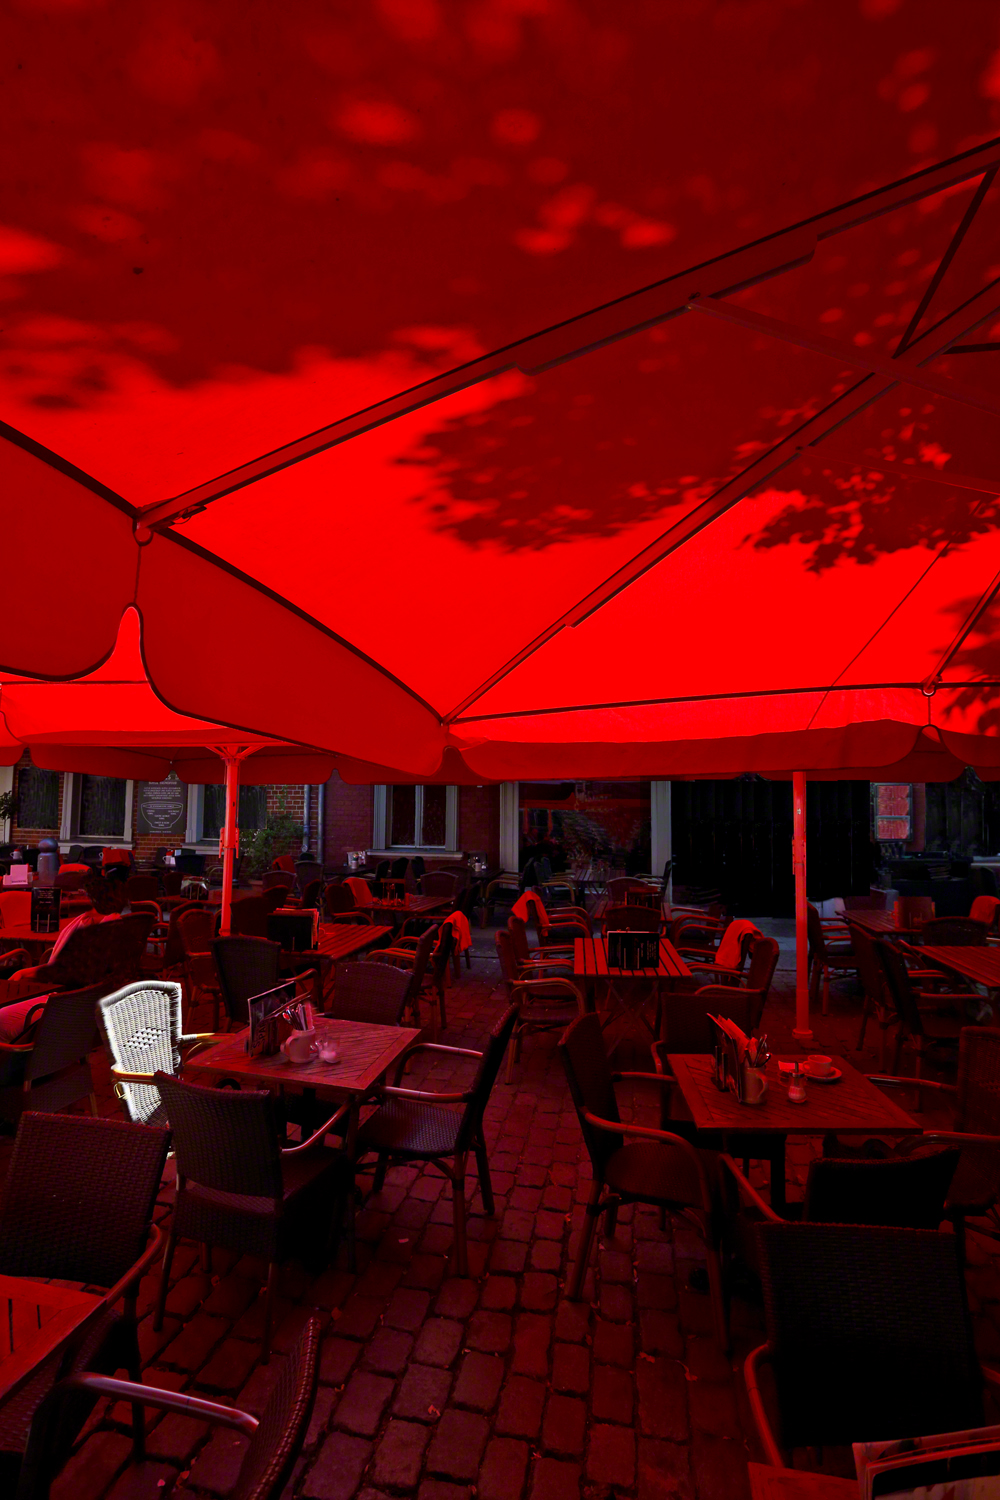
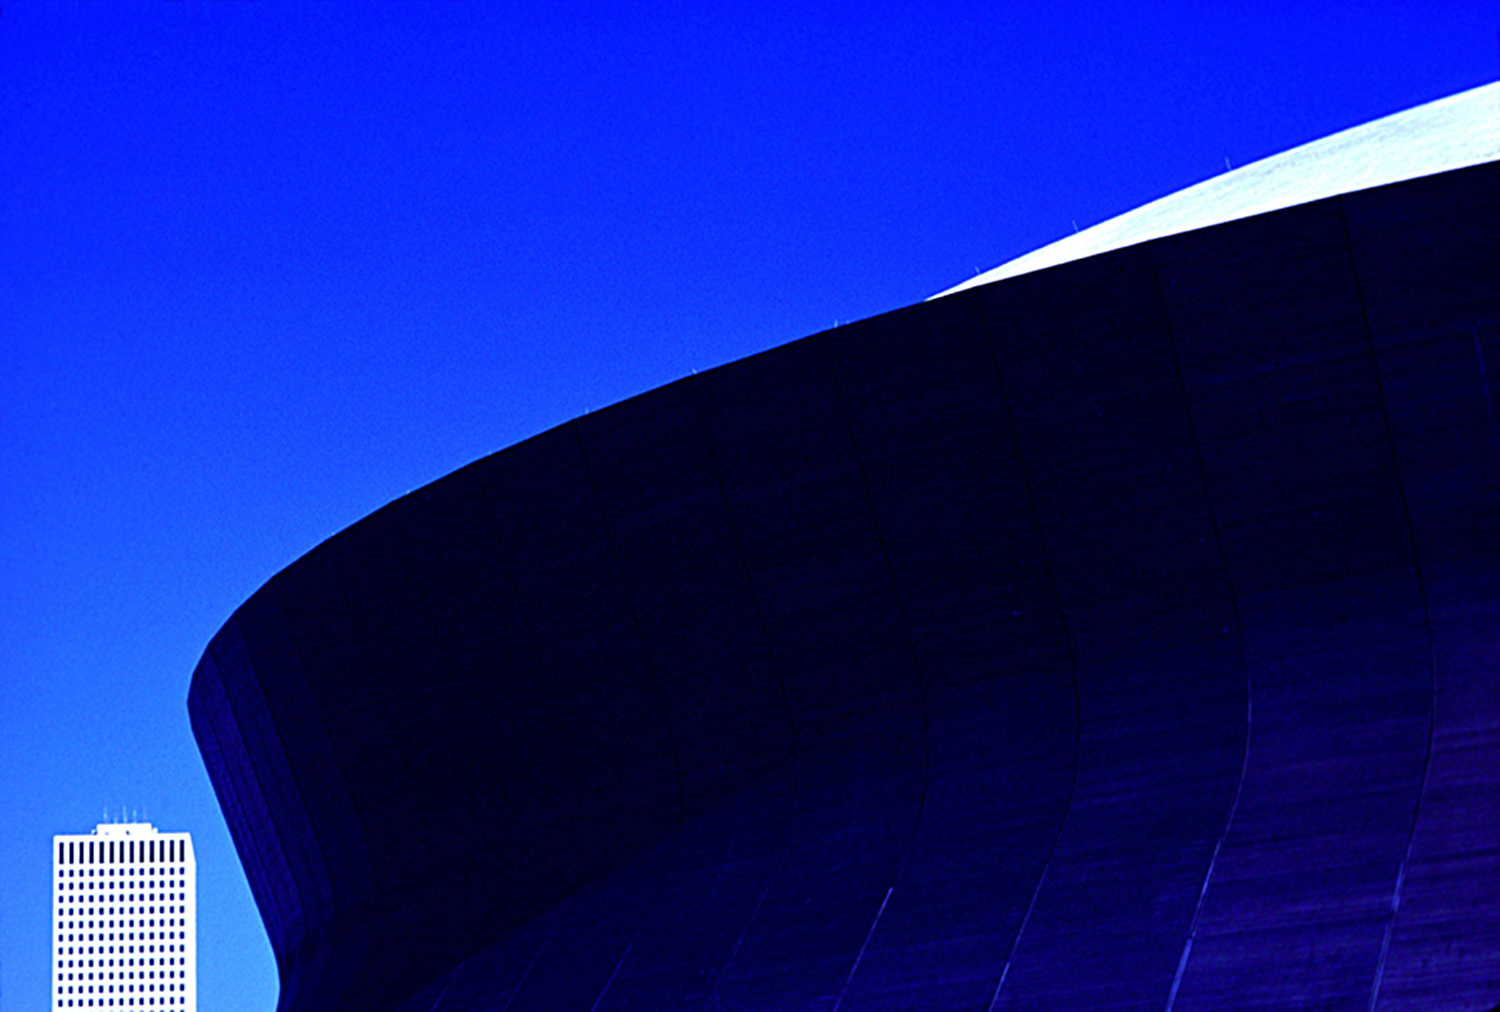
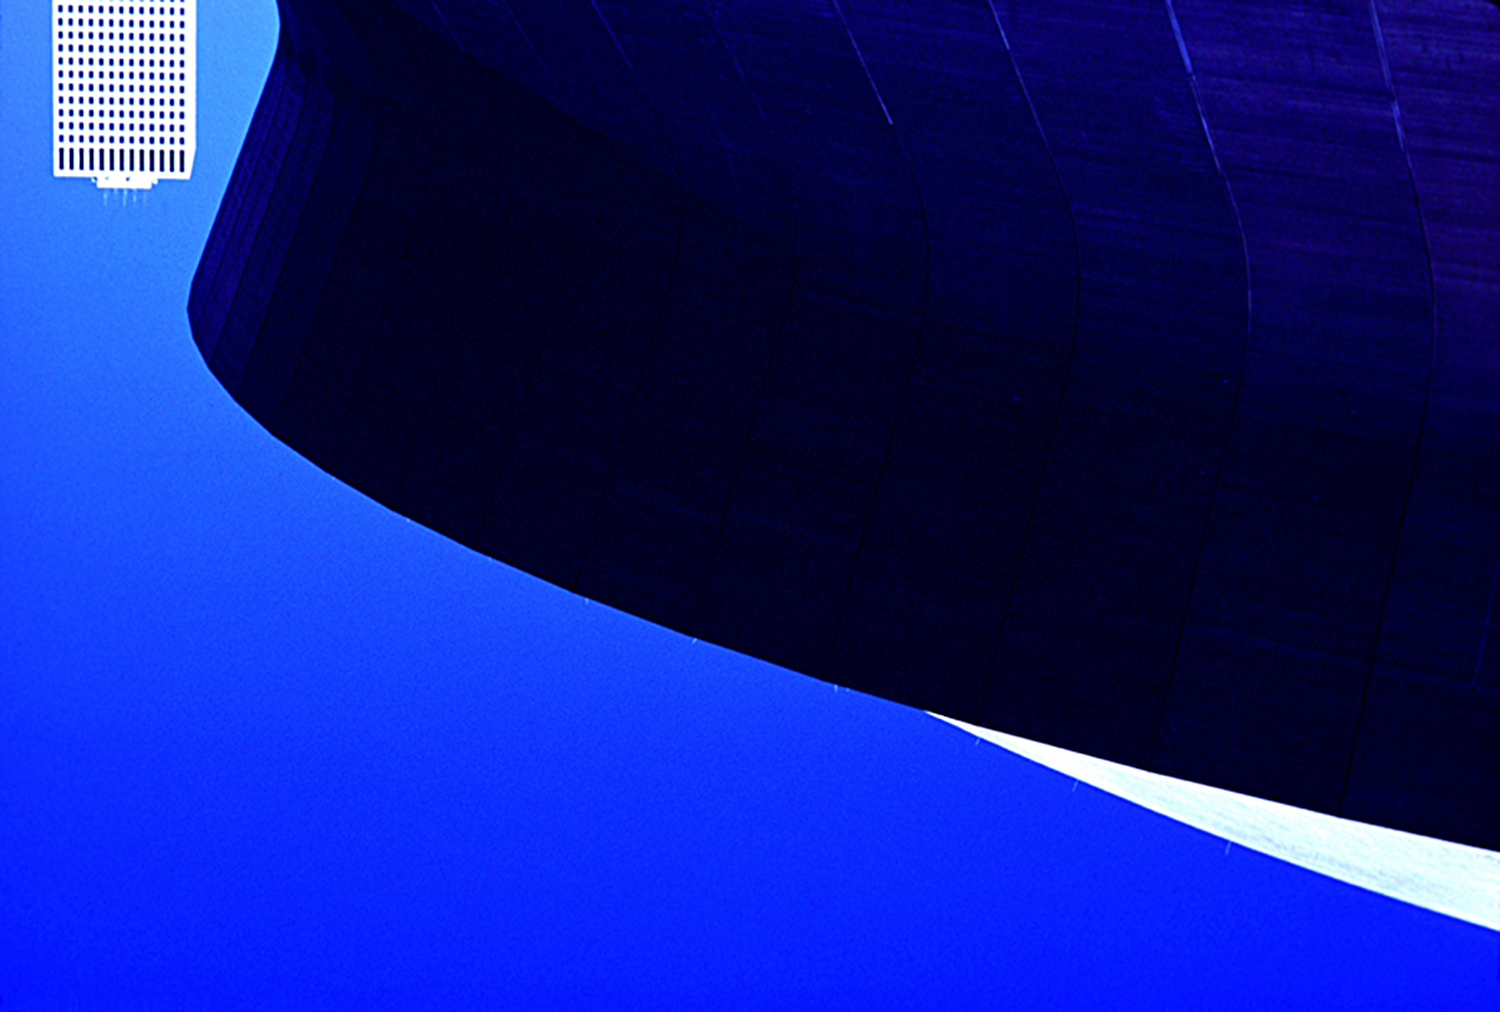
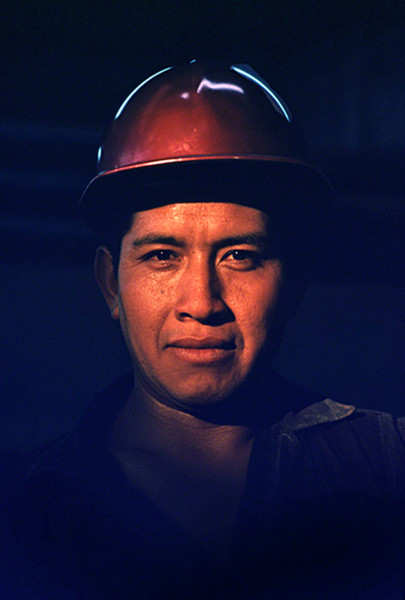
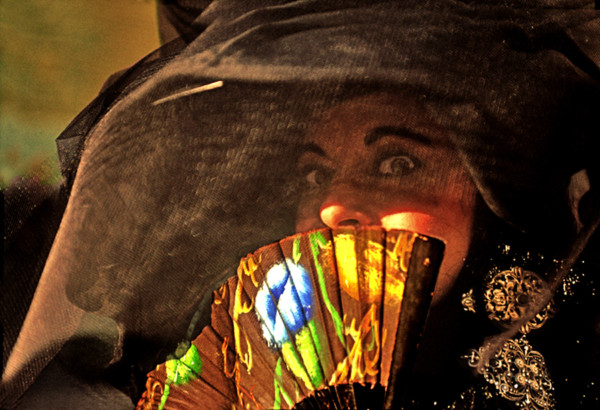
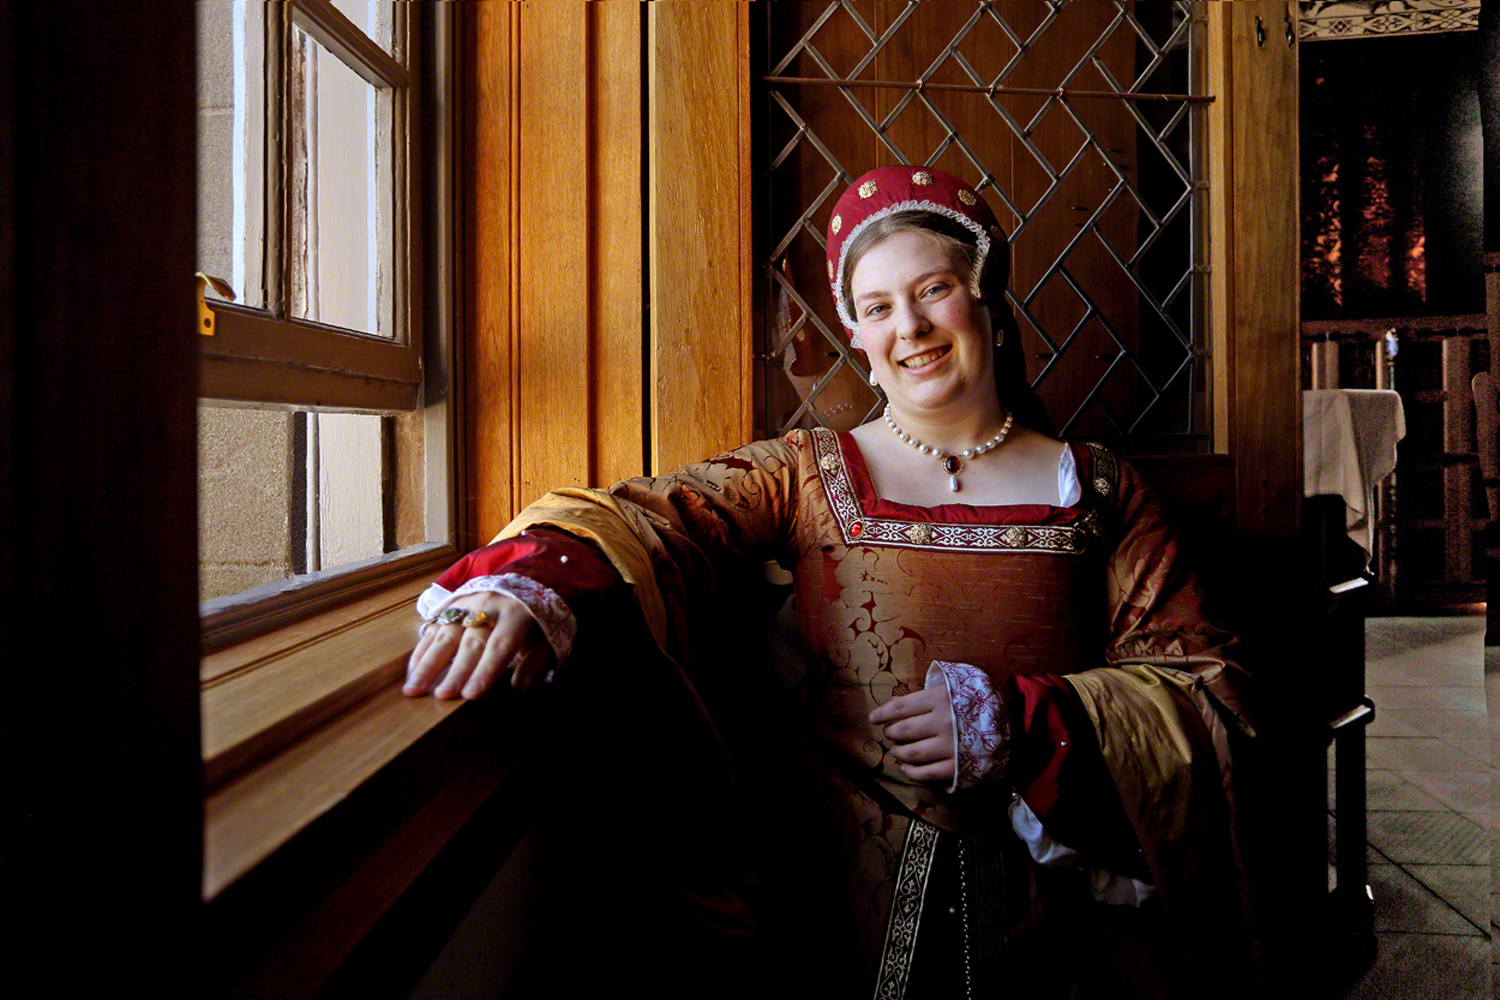
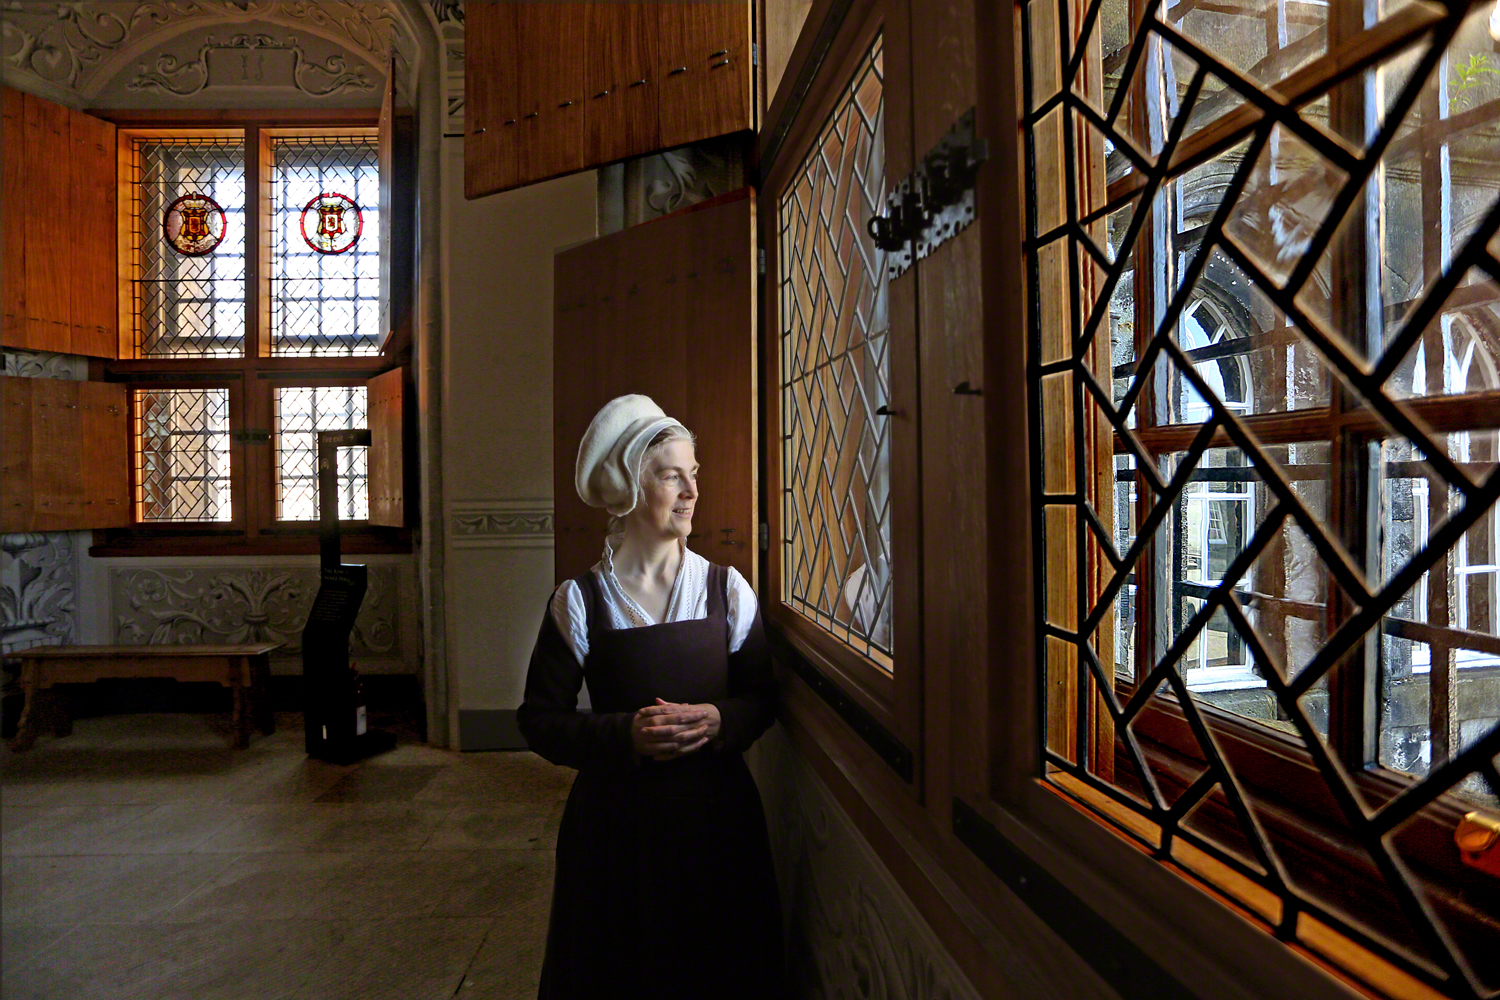
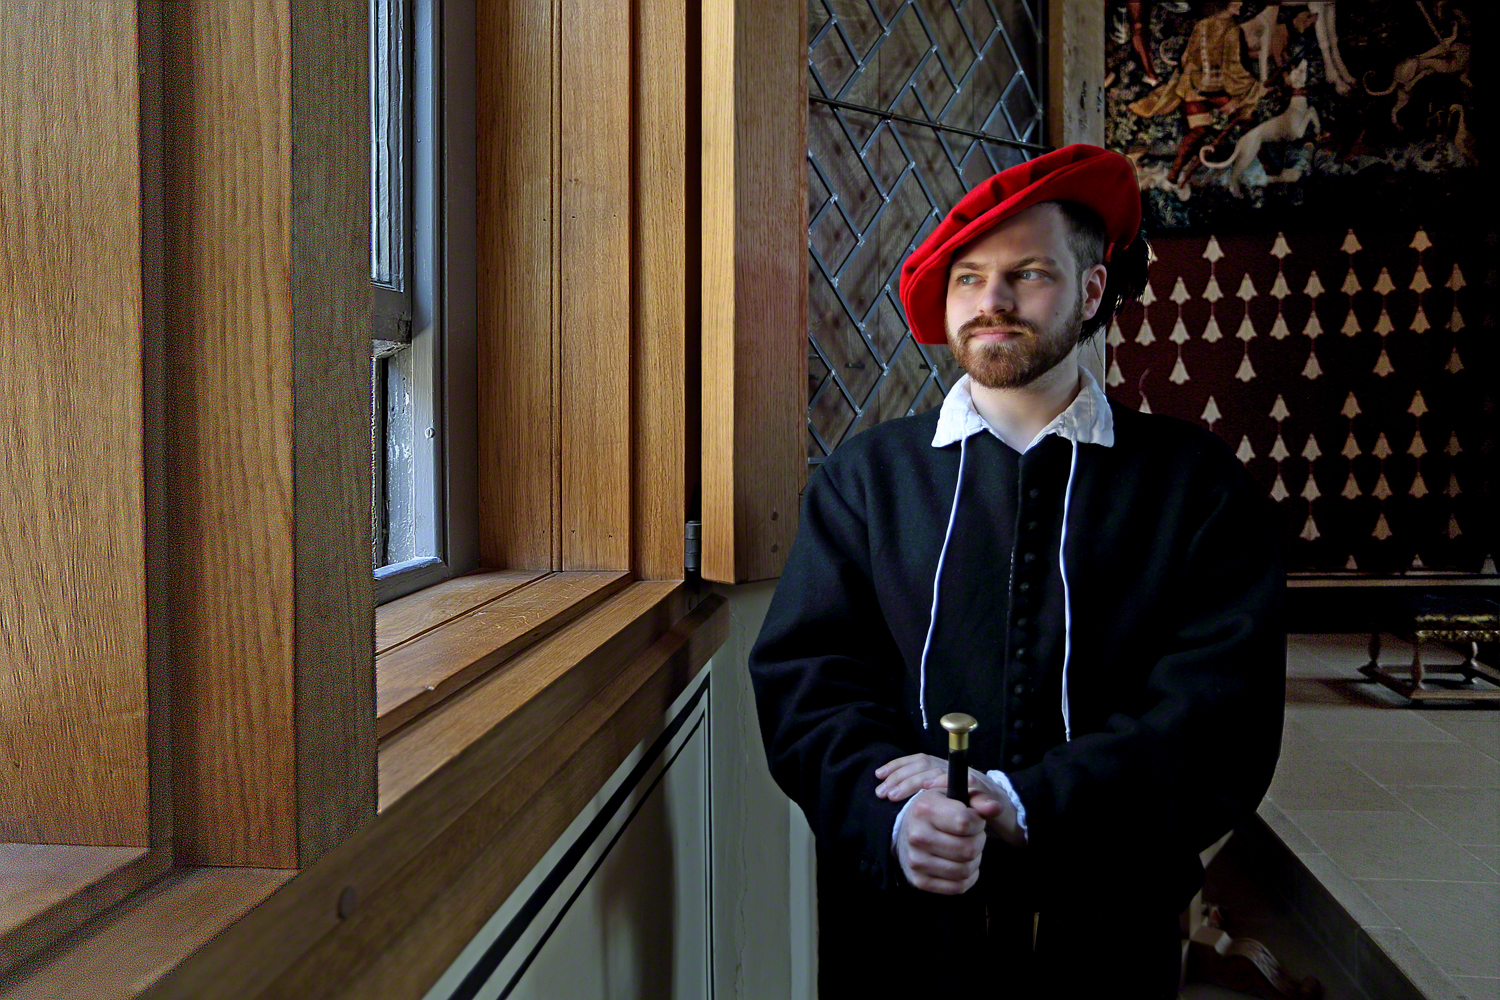
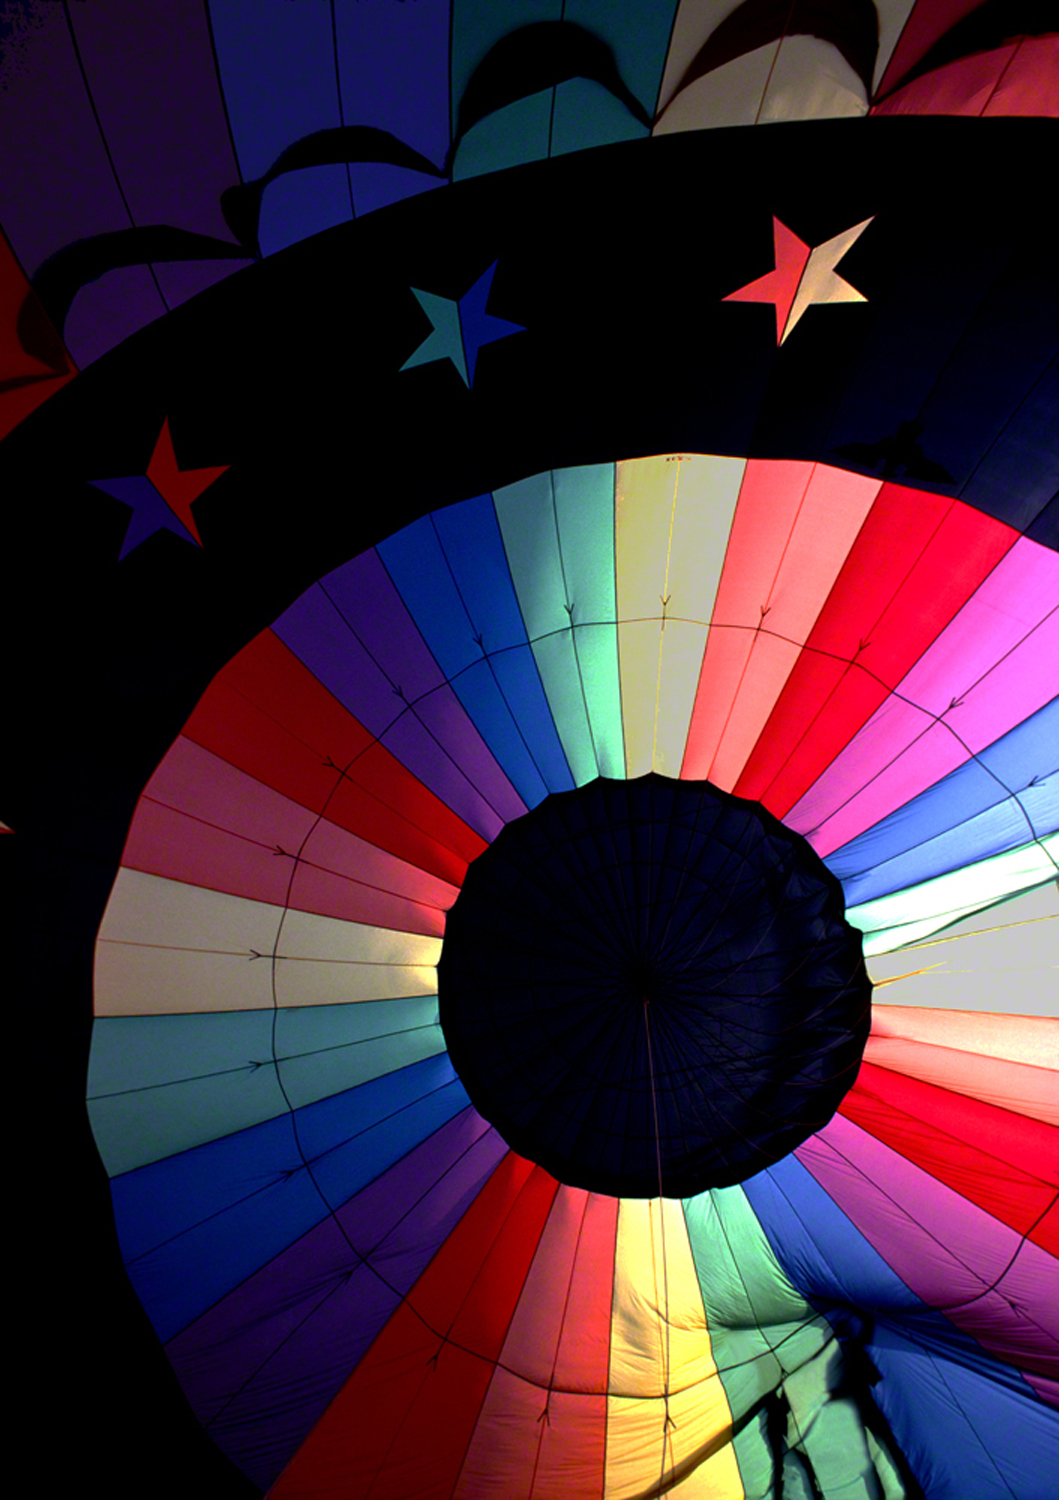
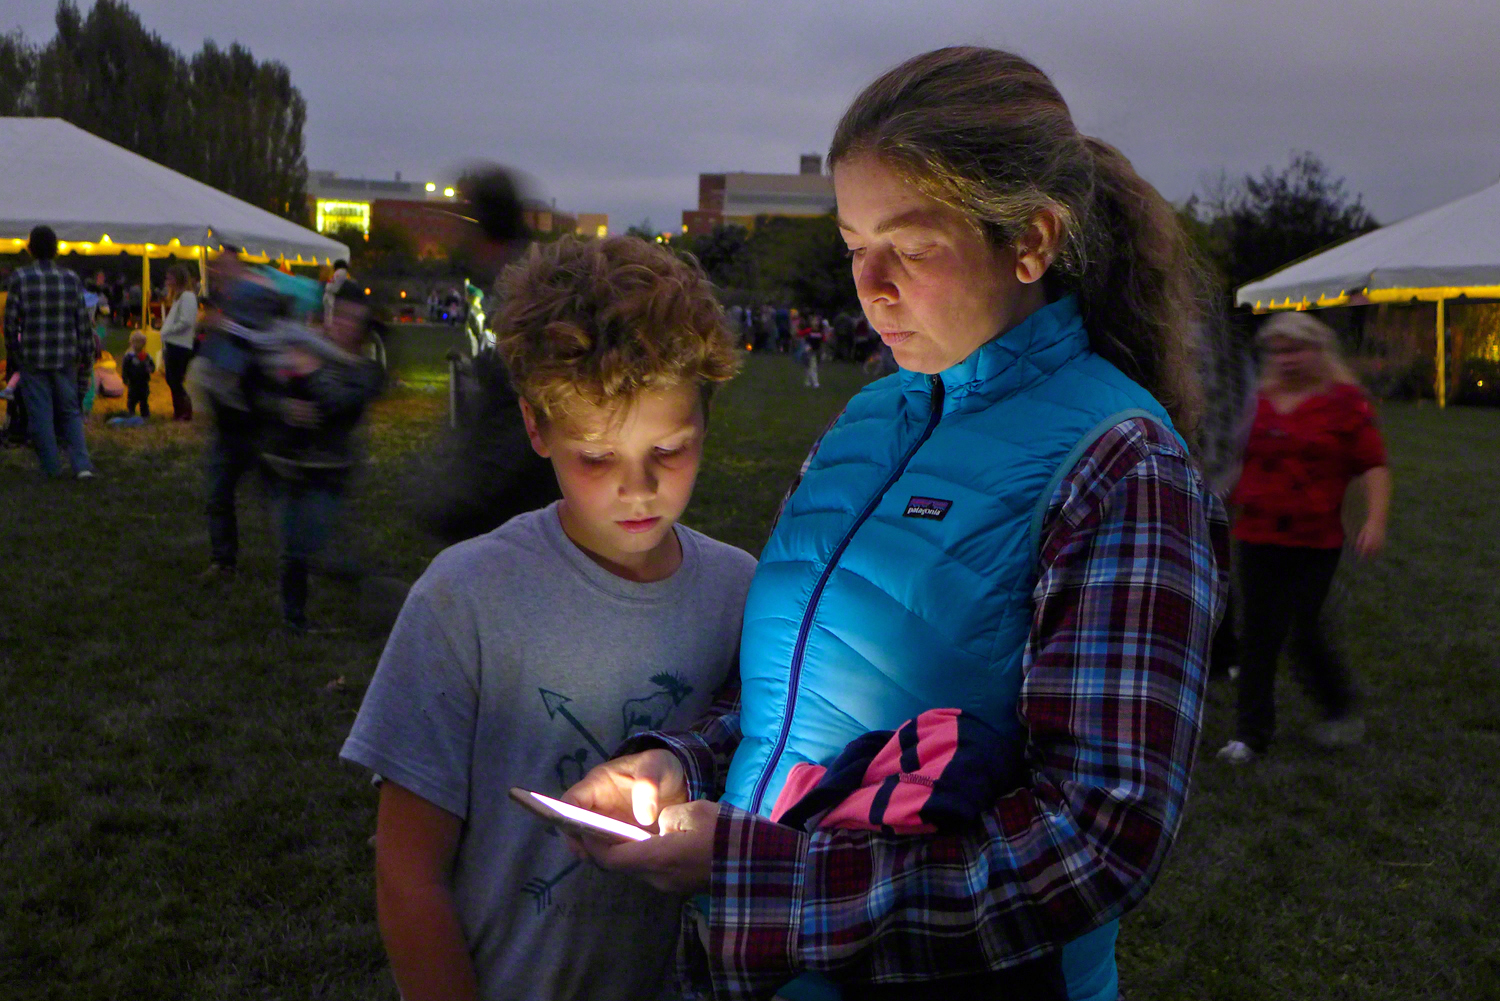
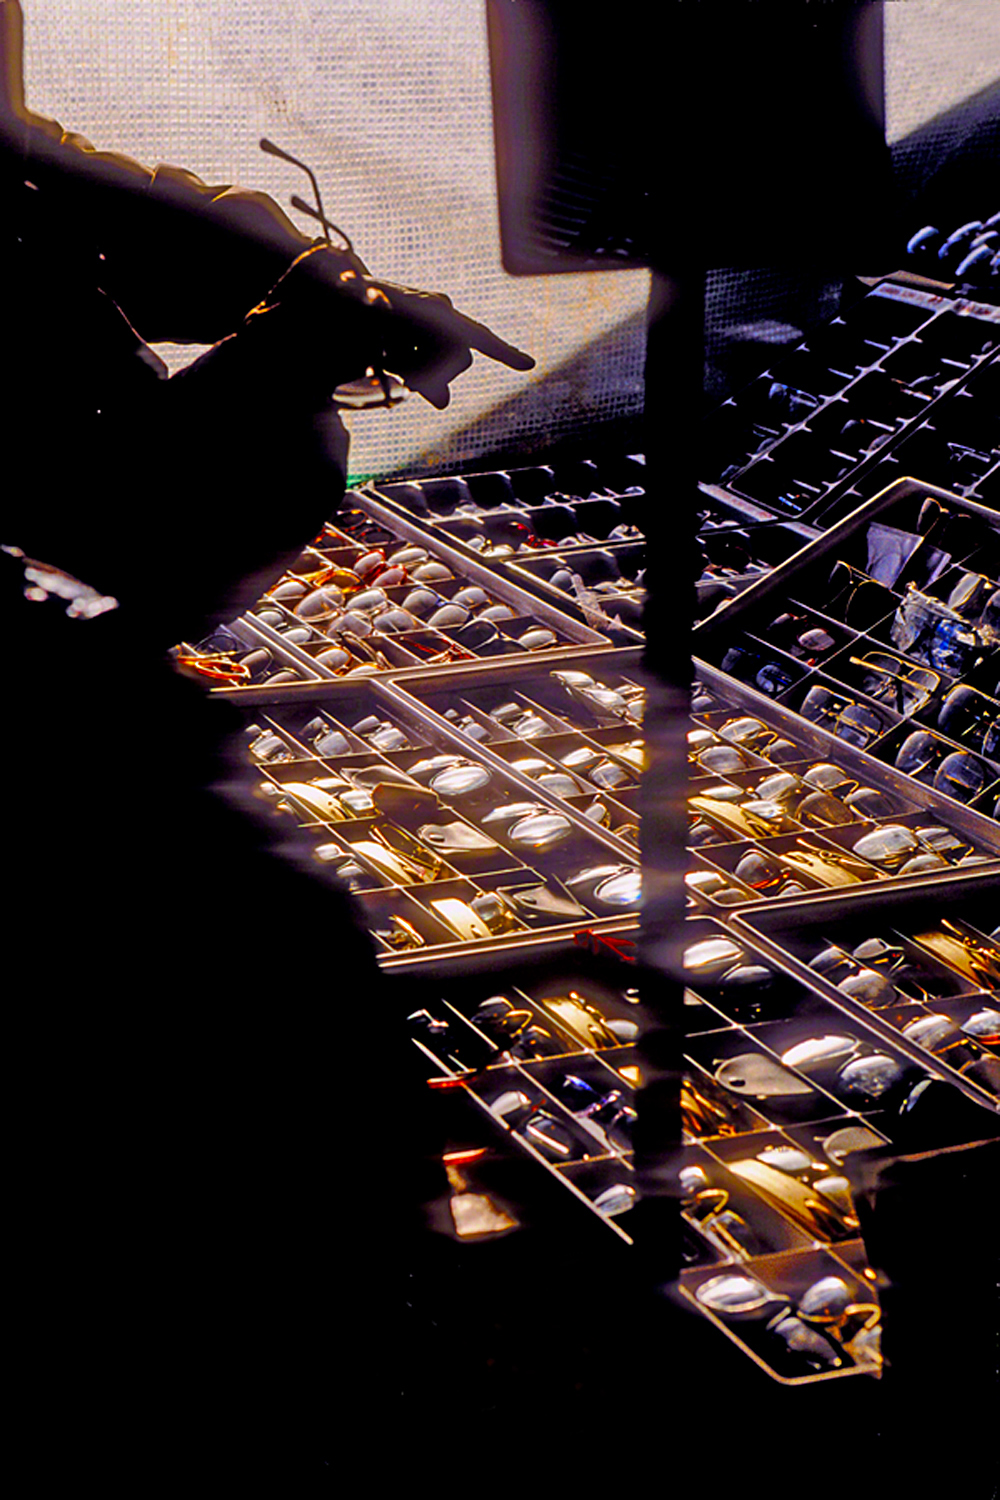
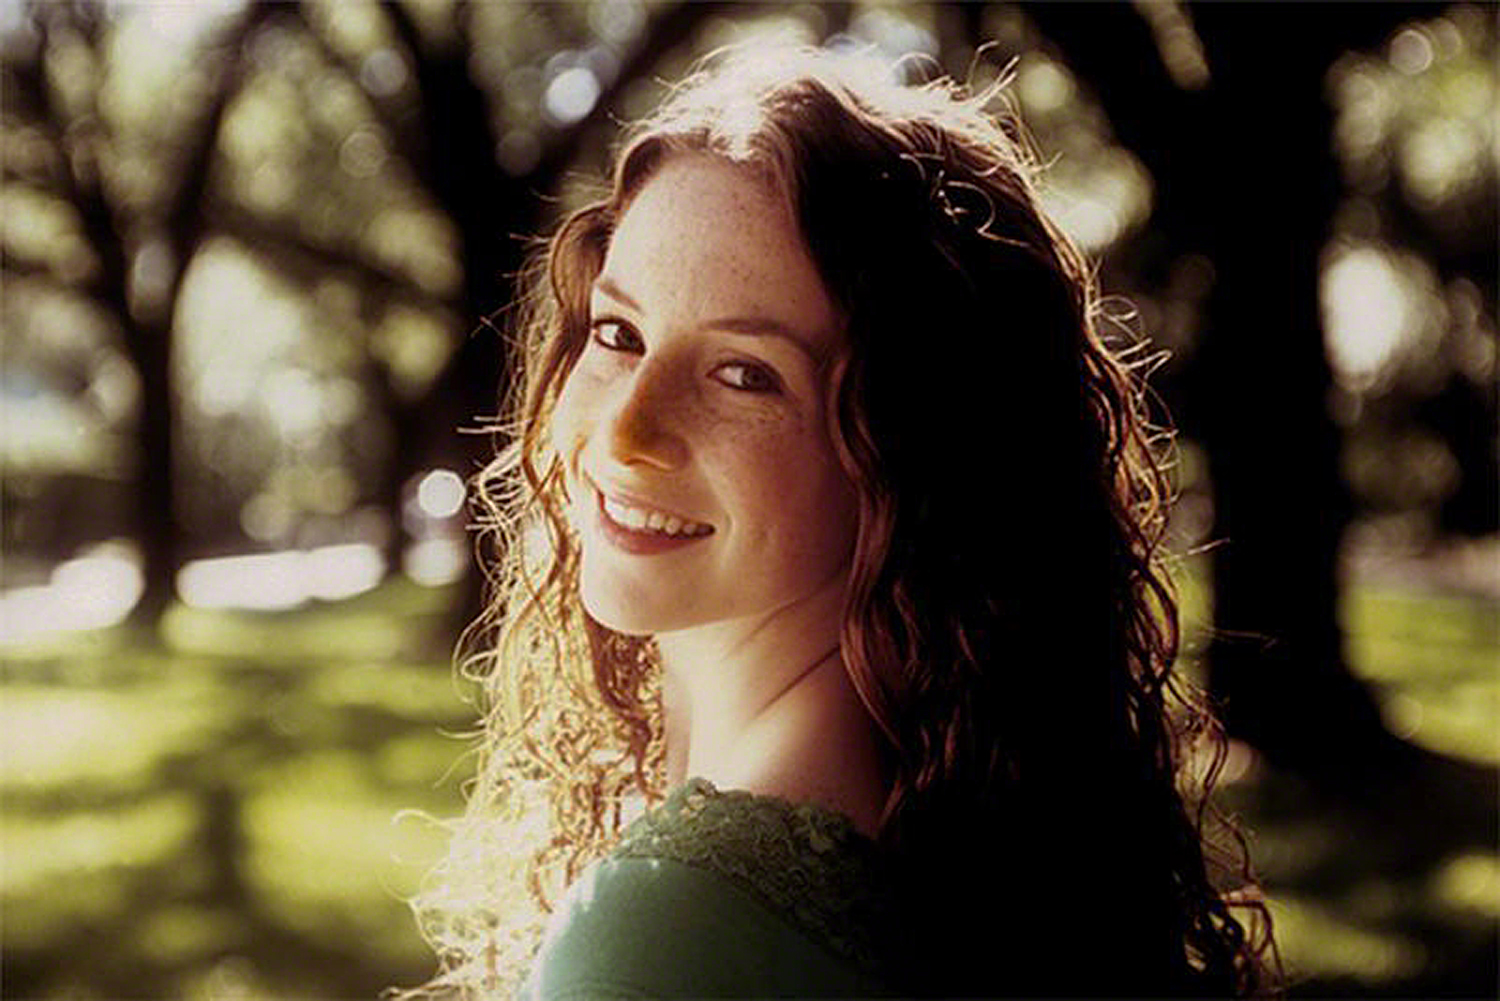
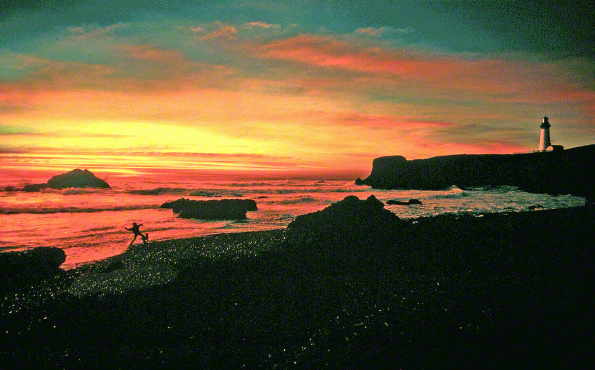
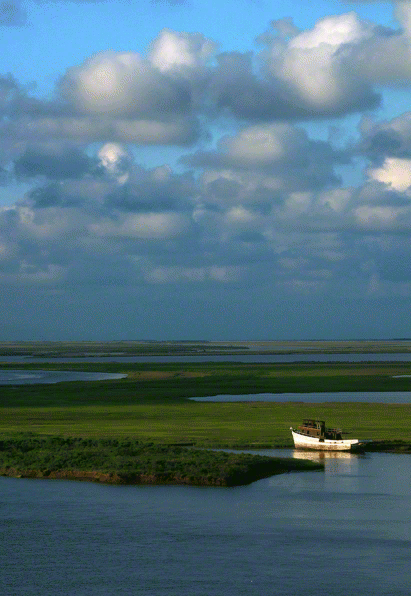
Here’s a few examples of when I turn around.

Visit my website at: www.joebaraban.com, and check out my 2012 workshop schedule at the top of this blog. Come shoot with me sometime.

Don’t forget to send me a photo and question to: AskJoeB@gmail.com

JoeB

Quick Photo Tip: My Least Favorite Light

 Shooting in old barns
Shooting in old barns

To me, the worst light starts mid-morning and end mid-afternoon. These are the times I avoid shooting since I know the photos would have a hard time coming out the way I’d want them to.

There have been times when I had no choice but to shoot in less than ideal light. If, for example I’m traveling and can’t come back to a location when the light is better. Or, the only time someone is available is during those times of harsh light. If the location doesn’t open until the sun is high in the sky, or it closes early. I’m sure there’s other examples that you have experienced like family members who think you need your head examined if you think they’re getting up for a  portrait during the sunrise light…like my daughters for three examples!!

One problem that always comes up is when I’m conducting one of my my “Stretching Your Frame of Mind” workshops. After an early morning shoot we will spend several hours discussing the images that were shot the day before. After lunch we’ll go out and shoot. This is when the light is usually hot and harsh.

So, what do you do? As I also tell my online students with the BPSOP, you look for ways to minimize the sky or hide it completely. Or, you find locations can only be photographed when the sun is high; for example small villages with narrow streets. That’s when you look for areas in shadow next to the areas in the sun; so you can create contrast…one of the ways to generate visual tension.

I’m sure you’ve all seen or taken those pictures where the sky is a whitish blue from being photographed during mid-morning or mid-afternoon. Another idea is to go indoors and shoot the available light coming in from a window.

When you’re not taking one of my workshops, you can go out in the country and look for old barns or antique stores. There’s always subject matter there, you just have to look for it. I’ve had success in junkyards, and those places where old cars go to die is a potential plethora of photo opts.

Here’s some examples:

Visit my website at: www.joebaraban.com, and check out my workshop schedule at the top of this blog. Come shoot with me sometime. I just announced my New York, New York Workshop beginning September 17th ,2019 and ending at noon on the 23rd. This will be my second workshop there and this time we’ll be shooting in all the five boroughs.

JoeB

Quick Photo Tip: Left to Right, Right to Left

Out of the comfort zone

Part of my conversaions with  those that sign up for my online class with the BPSOP is how to make the viewer an active participant when composing our photos.

Humans rely on on the perception of the environment that surrounds them, and we as photographers can manage what the viewer perceives and processes when looking at the information we lay out to him in the form of a photograph.

As Westerners we were brought up to read from left to right. As a result, that’s the way we perceive, from left to right; that’s our comfort zone.

While it’s always nice to keep the viewer in his or her comfort zone, sometimes it’s also good to take them out of that zone of contentment. How you ask? By composing your photos so the viewer has to go move from right to left instead of left to right.

In the above photo, I was at the lower level in the main train station in Berlin and immediately saw this Vanishing Point. I pointed it out to a few of the photographers that had signed up for my “Stretching Your Frame of Mind” workshops I conduct around the planet. A Vanishing Point a very important element of composition to move the viewer around the frame.

Standing in a position to shoot it from right to left, I didn’t have enough time to walk down and show people what it looked like from left to right. Take a look at the image now that I’ve flopped it in Photoshop.

The actual way we perceive

I  certainly don’t condone doing this after the fact, it’s merely a way to show the power we have as photographers to control how the viewer perceives and processes our photos.

So, the next time your out and about with your camera, find a location and subject matter that you can compose either from left to right or right to left and see the amazing difference for yourself.

Visit my website at: www.joebaraban.com, and check out my workshop schedule at the top of this blog. Come shoot with me sometime. I just announced my New York, New York Workshop beginning September 17th ,2019 and ending at noon on the 23rd. This will be my second workshop there and this time we’ll be shooting in all the five boroughs.

JoeB

Quick Photo Tip: Light, A Little Dab Will Do Ya.

A little dab will do ya.

I get the ideas for my posts in the strangest/weirdest places. In this case, you have to be my age to remember this commercial It has always reminded me of the way I go after light:  https://www.youtube.com/watch?v=yxBNW5XJI1o

I love the light, plain and simple, and I’m a firm believer in one of my favorite phrases, “You find the light and you’ll find the shot”. I’ve been following this self-appointed rule for as long as I can remember and it has served me well.

One of my favorite ways to shoot is to find a little dab of sunlight somewhere, usually hidden between larger areas of shadow and or color, and place or see an object or subject in it. When I expose for only the area in light, I can make the shadow area ever more dramatic and interesting…and colorful.

In my online class with the BPSOP, and in my “Stretching Your Frame of Mind” workshops I conduct around the planet, I’m always telling my fellow photographers that one of the best ways to take their photography what I refer to as “up a notch”, is to “see past first impressions”. I usually follow this with a quote by Henry David Thoreau who once said, “It’s not what you look at, it’s what you see”.

What I mean in this context is when you find yourself at some location, look for areas that have a small amount of light hitting somewhere. This is easier to find when the light is dappled, but harder to find when the majority of the scene is in shadow. When you see it, think of ways to utilize it. I can promise you there’s a chance to walk away with one of those illusive “Keepers” we all strive for but sometimes have a hard time creating.

There are people out there that think this is not a good idea and will tell you that you need more light to take good photos. All I can tell you is to run away as fast as you can because they will only beat you up with bad advice and drag you down to their level…Don’t follow the road well traveled, follow your own road and have people follow you.

In the above photo taken during my Springtime in Berlin workshop, I was walking down the street and saw a crowd of people standing in line. I’m always attracted to this because of the possibility that something going on.

What the people were doing is waiting for this restaurant to open, so I walked up to the front to see what it looked like. I’m really curious about everything, especially when I have a camera in my hand…which is most of the time.

There, right in front of my eyes was this chair being lit by the sun coming through a small hole in the red fabric. Needless to say, I was all over it like a tight fitting Lassie costume.!!!

Visit my website at: www.joebaraban.com, and check out my 2019 workshop schedule at the top of this blog. Come look for the light with me sometime.

JoeB

Quick Photo Tip: Knowing What To Shoot When You Get There.

Have you ever arrived at your vacation destination (after planning and looking forward to it for a year), and you were possibly overwhelmed because you didn’t know where, what, and when to shoot. It can be difficult, ever for some professionals. Here’s what to do to simplify your “once in a lifetime vacation” and make it a memorable experience.

In the old days, the days before the internet, we would call or write (depending on the time we had) the Tourism Department of every country, state, and city I was going to be in and would ask for information as to what to see; we would also contact the Film Commission for similar information.

Now, with the inception of the internet, it has become so easy to obtain the same results. These sites are meant to attract photographers to come photograph their city, state, or country. To them it’s free publicity, and photographs are a quick way to spread the word around.

I know what you’re thinking, why go to the places that all the tourists go to and photograph the same things? For me, the reason is simple. Tourists will go to these places after breakfast when the quality light is gone. Or, they’ll go right before or right after lunch, when the light is the hottest. They will usually be through well before dinner so they don’t have to worry about it while sipping their glass of wine.

I go out well before breakfast (sunrise) when the light is the best. Then I have breakfast. Since I’ve been up a the proverbial “crack of dawn”, I’ll go back to my room and rest up (if I can). During the lunch hour, I’m sitting at an outdoor cafe, eating the local fare while sipping a glass of wine figuring out what I want to shoot at sunset during the golden then blue hour. Then I go to dinner and enjoy my dinner while thinking back to what I’ve shot that day.

These are the photographs that I’m looking to have prints made with. These are the important photos because I’ve spent the most time in the pre-planning stage and are taken in the best light.

The above photo represents a lot of time surfing the web looking for places to shoot in Provence in the Fall.

These are areas I cover with my online class with the BPSOP, and locations I’ve scouted out for my “Stretching Your Frame of Mind” workshops I conduct around the planet.

Check out my website at: www.joebaraban.com, and my 2019 workshop schedule you’ll find t the top of this blog. Come shoot with me sometime.

JoeB

Quick Photo Tip: Turn Your Photo Upside Down

A balanced composition

Closing in on fifty years of taking pictures, I can turn the composition I’ve created in the viewfinder upside-down in my mind, without having to physically rotate my  camera to see my photo inverted on the display. So, you’re probably asking yourself why in the world would I want to do this? To make sure my photograph has balance, either symmetrical (formal) or asymmetrical (informal).

Okay, have you ever looked at one of your images and for some reason it didn’t feel quite right to you; and you weren’t sure why? One potential reason is that it wasn’t a balanced composition.

In my “Stretching Your Frame of mind” workshop I conduct around the planet, and in my online class I teach with the BPSOP, students submit photos that (hopefully) represent the assignment or the discussion of the day. In my workshops, I teach photographers how to use the Elements of Visual Design to make their photos stronger. One of the basic elements is Balance. 

Images submitted to me will often have a strong subject or a point of interest on one side, leaving the other side empty, or areas of color or light that aren’t compatible with one another. A good photograph will have an equal amount of color, shapes and areas of light and dark. Each one needs to have a certain amount of value or visual weight (mass) in relation to all the other elements in your photo, and be placed accordingly to create a sense of balance.

In my classes, I deal specifically with the balance between Negative and Positive space. If a student submits a photo that is obviously out of balance, I’ll turn their photo upside down and show it to them. Why you ask again?

Still balanced

Because when the student views his or her photo upside down, they’re now using a different part of their brain to process information. When they’re looking at it right side up, they’re looking at it with the right side of their brain. It’s the creative and visual side. They’re looking at the parts that make up the whole. i.e., Shape, Pattern, Texture, Form, and Color.

When I turn their photo upside down, they’re using the left side of their brain, the analytical side. They’re now looking at the whole first then putting them into a logical order and drawing a conclusion.

In other words, their image is no longer a photo that has a subject, meaning, or tells a story. It’s simply shapes, colors and areas of light and dark; it now reads only as Negative and Positive space. The student immediately sees that their photo is out of balance.

Try it yourself sometime.

Check out my workshop schedule at the top of this blog, and my website at: www.joebaraban.com. Follow me on Instagram: www.instagram.com/barabanbjoe. Come shoot with me and together we’ll look at your photos upside-down!!!

JoeB

My Favorite Quotes: William Shakespeare

What does her eyes say?

William Shakespeare once said, “The eyes are the window to your soul”.

In both my online class with the BPSOP and my “Stretching your Frame of Mind” workshop I conduct around the planet, we work on the elements of visual design and composition. One of the most important elements if not the most important is LINE.

Briefly, a line is a mark made by a continuously moving point across a surface. There are horizontal, vertical, diagonal, round, curved, parallel, zigzag, and wavy lines…not to mention dotted lines and dashes. All these lines have the same thing in common: direction, length, and thickness.

All the above-mentioned lines are straightforward and easy to grasp, but what about ‘implied lines’? What about those lines that are more of an ambiguous nature? For example, all the edges around ‘Form’ are implied lines. A statue of Abraham Lincoln is Abraham Lincoln because his outLINE shows him to be. What about the ‘horizon’ line that people are always forgetting to straighten?

But that’s a whole other issue!!

There’s one more implied Line that most photographers usually don’t consider. It’s that line that runs from the subject’s eyes to the lens.  To my way of thinking, it’s a very important line that connects the photographer to the subject, creating an intimate bond of sorts that also generates a kind of energy field.

Personally, I love that bond and the majority of photos I’ve shot in my career has, for the most part, had my subject looking directly into the camera.

The hard part about having the subject look into the lens is keeping his or her look fresh. It’s very much like asking the subject to smile. If you don’t shoot immediately, the smile starts to lose the freshness.

Since I’ve been shooting people for fifty years, I can tell you that the eyes can talk to you and can portray emotions and feelings as quick as one blink to another.

If you have clicked on the link and read the post that I sent on one click, one smile, you can adapt that thought process to this current post on having eye contact. Remember that the eyes are indeed, the windows to the soul.

Visit my website at: www.joebaraban.com, and check out my workshop schedule at the top of this blog. Come shoot with me sometime.

JoeB

How to Take Memorable Portraits on a Castle Tour

Nothing but window light.

For those of you new to my blog, I teach an online class with the BPSOP, and I also conduct my “Stretching Your Frame of Mind” workshops all over the place. I was going through some old photos of a trip we took after my Paris Workshop. We spent a week in an apartment in St. Andrews, Scotland, right across a small street where the British Open is played.

We decided to take the advice of a newly acquainted friend we met in a pub and check out a castle about an hour’s drive from us. The name of the castle escapes me but it’s really not important as far as this quick photo tip is concerned.

I say that because of the nature of this castle (as well as so many others) is to be “user-friendly”. In other words there were people standing around answering questions dressed up in period clothing; and more than willing to be photographed.

That’s all well and good, but the problem with that is the lighting. It’s a castle so it’s fairly dark which maks it difficult to shoot a decent portrait…unless you are using a flash which is worse!! Of course you always have your trusty phone but the lighting is sill the same. You’re just not going to get the contrast, depth, and visual interest you would if you had better lighting.

There is a solution and it will take your images way up a level. It’s possible if you have models willing to give you some time; especially if you email them a copy.

In the three images I’ve shown, I asked the three people if they would come over and stand next to a window so I could use the beautiful available light coming in…worked like a charm!!

Of course by doing this and exposing for them, the rest of the room became quite dark. This is an easy fix by merely spending a few minutes in either Lightroom or Photoshop. I opened up the shadows a little too much making them appear flat. I then went into ‘Levels’ and made the blacks blacker to add contrast.

It’s called “Crushing the Blacks” and I’ll be writing a post about it in the near future.

So my fellow photographers, the next time you’re traveling and you either read or hear about some castle or any historical building, find out if people are dressed up and walking around answering qustions. Most importantently if they’re letting people take their photo.

Visit my website at: www.joebaraban.com, and check out my workshop schedule at the top of this blog. Come shoot with me sometime.

JoeB

Quick Photo Tip: Worst Case Scenario

  I recently had one of my students taking my online class with the BPSOP send me her photos for my video critique. She had gone to a hot air balloon launch consisting of balloons from several local clubs. She told me that she was very naive to think that she could just wander around among the balloons as they were being inflated and taking off.

It didn’t take long for her to discover that she was not going to be permitted to just wander around. The first reason was because (as she put it) people were frantically running around trying to get their balloons in the air as close to sunrise as they could. The second reason, was for security, and the third most obvious reason was for  liability. As a result she was keeped off the field and even with her telephoto lens the balloons were small in her frame. She was very dissapointed but as I told her a valuable lesson was learned.

In an event like that or any event where there’s mulitple things going on i.e., car races, horse racing, certain marathons, air shows, etc. I say airshows because I also had a student taking my“Stretching Your Frame of Mind” workshops show me some of his photos of an airshow he had recently attended. The airplanes in his pictures were so small, they could have passed for minuature hummingbirds!!

So what do you do? You have to factor in the worst case scenario. You have to be smart and figure (especially in this current age) that you’re not going to be able to get close to your subjects for the reasons I stated above. Do your homework enough ahead of time so the powers that be can make a decision and hand it down the proverbial chain of command.

In the case of the woman in my online class, I suggested that next time well before the day of the hot air balloon launch, she contact some or if necessary all of the clubs. I told her to ask permission to be up close and personal and in exchange give them copies of all the photos she took. Maybe it would work and maybe not; but it never hurts to ask.

In the photo above, I found out about the club’s launch and contacted the president several days before. He agreed to let me take photos, so I met him there well before sunrise as they were beginning to take their equipment out of their van. I used my Sunpath program and my Morin 2000 hand bearing compass to determine (to the degree) where the sun was going to rise.

I wanted to backlight the balloon (so it would glow) being inflated, so I had them lay it out in a straight line aiming it right at where the sun was going to hit the horizon. As it was being inflated I took off my shoes and stood inside it, and as a result got a pretty damn good shot. The silhouettes you see are actually two people had stand there to add some scale to the image.

Visit my website at: www.joebarabab.com, and check out my workshop schedule at the top of this blog. Come shoot with me sometime.

JoeB

Quick Photo Tip: Putting Your iPhone to Good Use

iPhone lighting

Last Fall I spent some time in State College, PA visiting my daughter and two grandsons. Halloween was just around the corner so we went to a well known park to see the winners of the pumpkin carving contest put on by Penn State University.

After walking around checking out all the fabulous pumpkins I turned around and saw my daughter checking out something on her phone with Benny. I immediately went for my little Panasonic Lumix and grabbed the shot.

I’m not a believer in using my talking device to take pictures other than to quickly send one to other family members, but at that moment I saw a much better use for the iPhone.

While composing the shot, a post I wrote some time ago instantly came to mind. Something that was said by one of my all time favorite photographers. W. Eugene Smith once said that available light was any damn light that’s available.

Since that evening I have talked about the post and my reaction to what I was seeing both my online classes I teach with the BPSOP, and also in my “Stretching Your Frame of Mind” workshops I conduct around our planet.

So my fellow photographers, open your mind up to the fact that if there’s a will, there’s a way. Be observant to what’s going on around you, and always remember that if you find the light, you’ll find the shot.

Visit my website at: www.joebaraban.com, and check out my 2018 workshop schedule at the top of this blog. Come shoot with me and we’ll chase the light together.

This coming July 29th will be my 30th anniversary teaching at the Maine Media Workshop. I’ve always picked this time as it’s the week of the Lobster Festival down the road in Rockland. This ofers a unique set of photo ops, different from the Maine Coast, fishing villages and lighthouses. The Lobster Festival is all about color, design, light, energy, people watchng and environmental portraits everywhere you look; some people are there in costumes and loved to be photographed.

In conjunction with The Santa Fe Workshops, on October 2nd I’ll be leading a group in San Miguel de Allende. A beautiful oasis and artist colony, and the entire city is a UNESCO site.

Come join me for a week of fun and photography…what could be better?

JoeB

Quick Photo Tip: Stop, Look, and Listen

I stopped, I looked, and I listened.


I’m guessing that most of you have heard this saying, but how many know its origin? There have been films with this title, numerous songs sung by an assortment of people, and even a game show, but it was originally a slogan made up for a pedestrian safety campaign in the UK.

I recently saw it written somewhere and immediately though of a photo I took at a flea market in Paris a million years ago with my fellow photographers that were taking my “Stretching Your Frame of Mind” workshops I conduct around the planet. To this day I still think about it when I go out street shooting or mention it to the students that take my BPSOP online classes; unfortunately my pet dinosaur didn’t survive the asteroid like I did.

I digress!

Ok, let’s talk about each word and how in the hell it could possibly relate to the art of “making” interesting pictures. To make it easier to explain my thought process, let’s use these words as they narrate the photo above.

STOP: While walking around looking for interesting subject matter and how said subjects interacted with the light (light is everything), I immediately stopped when I saw these sunglasses and the way the light was dancing on them. They seemed to be sparkling, and as I slightly moved from left to right different parts of the sunglasses were in what is known as “The Law of the Light”, and would glow.

I knew that I had one piece of the puzzle and needed a couple more pieces to make a visually interesting photo…one that would also tell a story; I decided it was worth hanging around.

LOOK: As I was standing there I observed several people walking by giving an occasional glance to the sunglasses but weren’t interested enough to stop. I thought that if I would just be patient and wait long enough I might just get lucky and add another piece to the puzzle; and perhaps complete the work of art I was beginning to form in my mind. I was looking for just the right person.

LISTEN: My patience was rewarded as a couple of women stopped and began studying the rows of sunglasses. I non-nonchalantly moved closer to put myself in a position to capture whatever might happen next, while listening to their conversation. They were asking each other which pair they liked and one of them (the one not in the photo) pointed to a single pair.

At that moment I brought my little Lumix DMC-LX5 up to my chest ( in crowded places my small Lumix is more discreet) so it would be closer to my eye just in case I got lucky, and when you get lucky be ready. The other woman reached out her hand and pointed to the pair she liked, and when she did I grabbed the shot. I was ready for it!!!

I still have two spots open for my Springtime in Berlin workshop to begin the end of May.

Visit my website at: www.joebaraban.com and check out my 2018 workshop schedule at the top of this blog. Come shoot with me sometime. I’ve a couple of openings in my Springtime in Berlin workshop this coming May 23rd. A fantastic city with so many great locations we’re going to be shooting.

JoeB

Quick Photo Tip: Using Linear Perspective

Linear perspective

In the first week of my four week online class with the BPSOP, we work on linear perspective. I don’t call it by this name, I call it a Vanishing Point since the name rings more bells than the former. It’s also a topic in my “Stretching Your Frame of Mind” workshops I conduct around our planet.

The first known picture to make use of linear perspective was created by the Italian architect Fillipo Brunelleshi. It was developed as a way to create the illusion of depth from a three dimensional world onto a two dimensional representation of it in the form of a painting.

This was done by using a vanishing point to have all the lines in a painting converge at a point at, near, or just passed the horizon. A vanishing point within an image will move the viewer around your composition, appearing to him as the continuation of real space.

To create a classic vanishing point, one must consider three elements: Point, Plane, and Line. The Point is the spot on or close to the horizon. The Plane is what the camera see in two dimensions. The Line is the parallel lines that begin behind the camera and converge at a point at, neat, or just past the horizon.

I like portraits with a vanishing point in them

Line, as I tell my students, is the most important of all the elements of visual design. Without Line, none of the other elements…Texture, Pattern, Shape would exist. You and I, planes, trains, and automobiles would cease to exist…why? Because we all have an outLINE.

Not only is linear perspective a great tool to use in great light, but it’s also a way to come home with strong photos when the light isn’t so good; a vanishing point is important enough of a device that will emphasize line rather than light or color.

Btw, I’ll often put my subject in a vanishing point as see in the photo above. It adds visual interest to the portrait.

This February in conjunction with the Santa Fe Workshops, I’ll be returning to Cuba for the fourth time. My next springtime workshop will Berlin next May; an incredibly beautiful city.  Come shoot with me sometime.

If you send me a picture and question to: AskJoeB@gmail.com, I’ll create a video critique for you.

JoeB

Quick Photo Tip: One Shot Per Smile

I had her turn around while smiling

I have spent a considerable amount of time (in my fifty years of being a photographer) shooting people, either in the studio or out on location. As a result, I have a good understanding of ” the way people smile”…believe it or not!!!

I have described this to my online classes with the BPSOP, as well as actually shooting with people that take my “Stretching Your Frame of Mind” workshops I conduct around our planet.

One smile one shot in Sicily

I compare a smile to what I call the peak of action. The peak of action can best be though of as an apple being tossed up in the air. There’s a point in time when the apple is no longer going up, but has not begun coming down; that split second is what I refer to as the peak of action.

How does this relate to portraiture? I have seen it hundreds of times when I look at other people’s photos of people smiling, and have actually watched students taking pictures of people.

One smile one shot in France

What happens is the photographer tells the subject to smile and while the person continues to smile the photographer starts clicking away. There’s an inherent problem with that approach and I identify that issue with the peak of action.

How long can a person keep the same smile as he had in the first second of being told to do so? The first second of the smile (the apple not going up or down) is going to be the freshest and the most genuine, after that the smiles begins to fade ( the apple on its way down) and becomes a mere direction given by the photographer.

One smile one shot in Texas

How do I approach this potential problem? By giving the initial smile just one click of the shutter release; one shot per smile.

I ask my subject to smile and at that moment…that peak of action, I’ll take one exposure. I say something or make some minor adjustment, then ask for that smile again. This keeps the smiles fresh and natural.

In the featured environmental portrait at the top of this post, I had my daughter turn her back to me. I told her that when I called her name I wanted her to recognize my voice and begin her smile while turning around greet me. At that point the smile was as fresh as it was going to be and as seconds went by her smile would begin to diminish; just enough to make it look like she was being directed to smile.

One smile one sot in Myanmar

We did this about a dozen time so I could get a dozen different adjustments in my composition.

So, my fellow photographers, the next time you’re taking pictures of people whether they be friends, relatives, or strangers, try just giving each smile just one click.

By the way, I’ve found this technique to have no geographic boundaries, as you can see in the additional pictures.

This February in conjunction with the Santa Fe Workshops, I’ll be returning to Cuba for the fourth time. My next springtime workshop will Berlin next May; an incredibly beautiful city.

If you’ll send me a photo and question to:AskJoeB@gmail.com, I’ll create a video critique for you.

JoeB

Quick Photo Tip: It’s a Walk in the Park

A walk in the park

One of the best places for photo ops is in a well known park in a well known city on a weekend. That’s when all the musicians, entertainers, food vendors, artists, and really strange people come out to peddle their wares….or wear weird clothes and talk to themselves.

What one can almost always find is at least one artist that will capture your soul forever on a plain white piece of paper, and who wouldn’t want their precious kiddos (or older family members) to be remembered as the sweet innocent child they are? If they are willing to hold still long enough.

This artist/subject relationship makes for a great photo, and I’ve taken this photo in a few countries; usually with great results. The key is to have your POV where both the artist and the subject are in the same composition. It’s also great if you can get the kid’s parents somewhere in your composition as well.

There’s something about this temporary bond between artist and subject that’s so different to the bond that’s created when I take photos of people. Perhaps it’s the choice of the medium. The camera is a colder approach, perhaps it’s because it’s a machine where the pencil, crayon, or pastel is more organic and less threatening.

My background in art comes from years of studying painting, drawing, and design., and I can say that the feeling between holding a camera and a piece of charcoal is very close.

I took the above photo during my “Stretching Your Frame of Mind” workshop I conducted in New York City. Several people had taken my online class with the BPSOP so they had seen some of my examples of shooting in a park, and were excited that I had chosen this location in Central Park to shoot in.

Shot in the main plaza in Madrid.

So my fellow photographers the next time you’re going to be traveling to a well known city, try to arrange it so you have free time on the weekend to go to a park. You’ll be glad you did.

Visit my website at: www.joebaraban.com, and check out my workshop schedule at the top of this blog. Come shoot with me some time. Next February in conjunction with the Santa Fe Workshops, I’ll be returning to Cuba for the fourth time. My next springtime workshop will Berlin next May; an incredibly beautiful city.

Send me a photo and question to: AskJoeB@gmail.com, and I’ll create a video critique for you.

JoeB