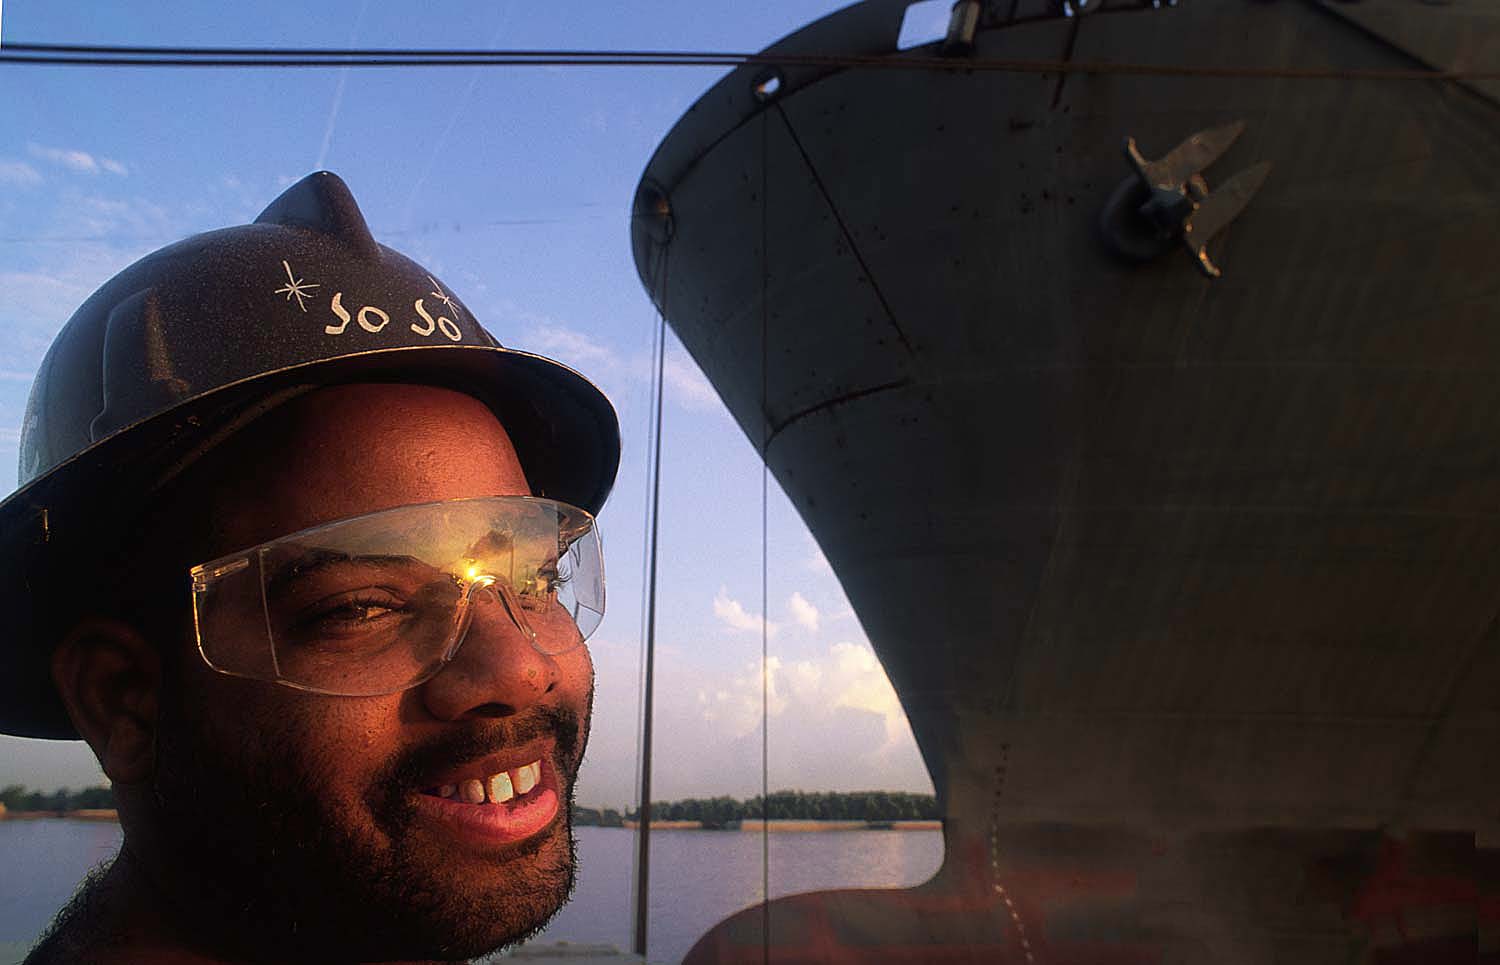
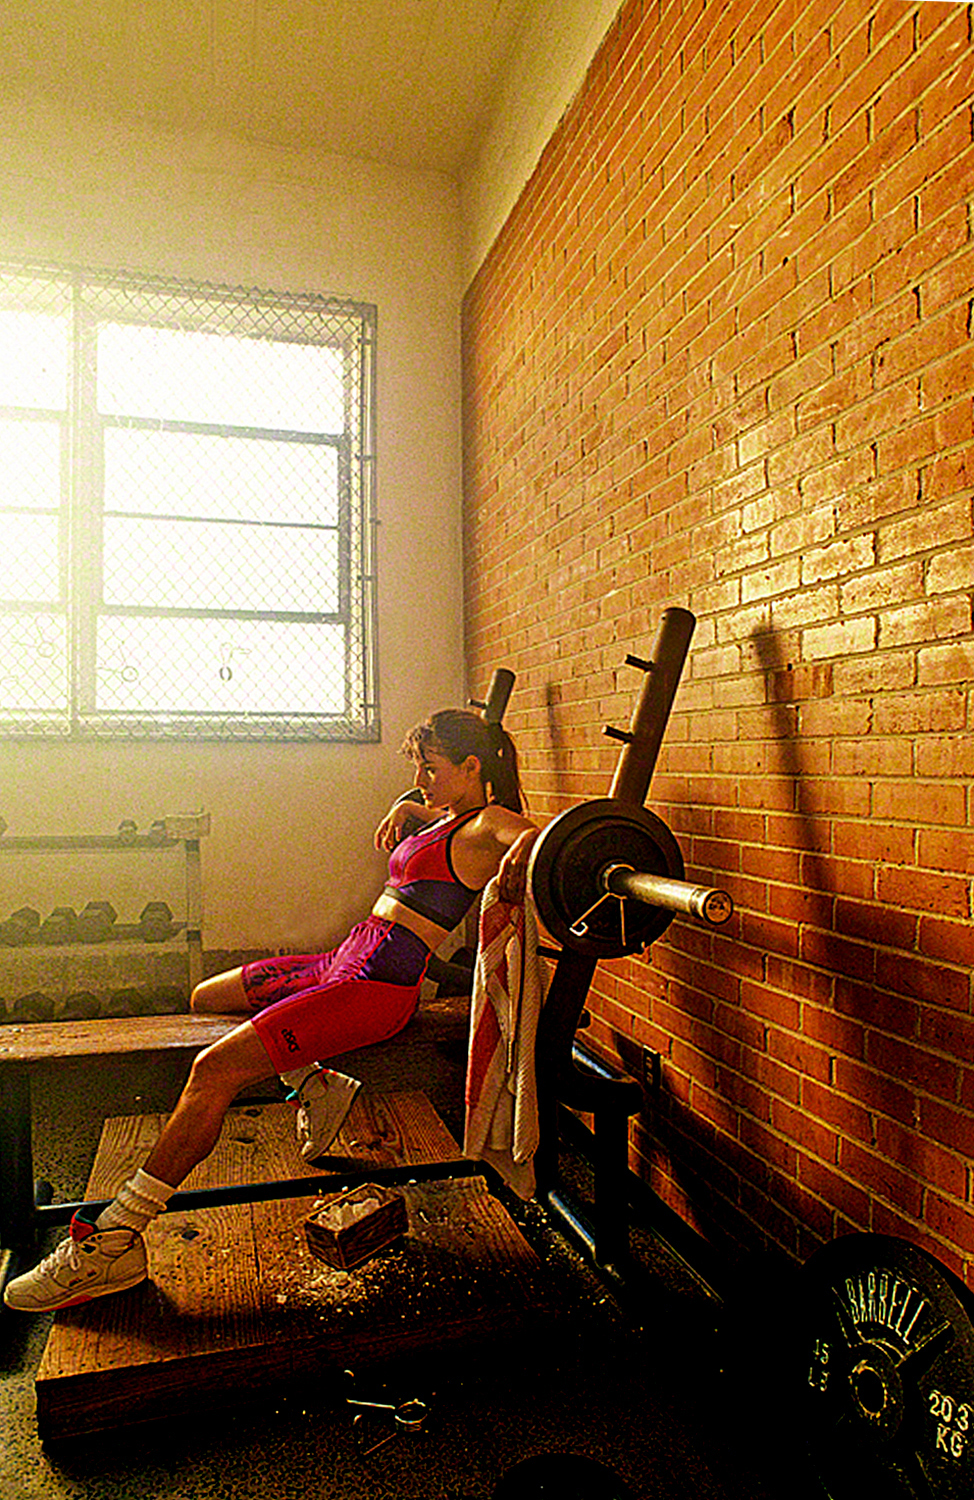
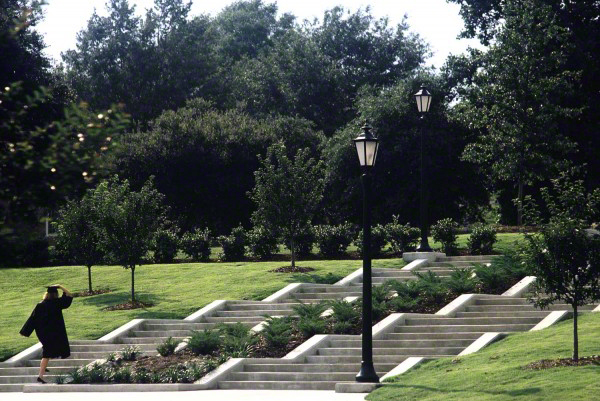
I’ve seen it happen all the time, and once upon a time long, long ago I was even guilty of it; as in the above photo. It’s why I tell my online class with the BPSOP and in my “Stretching Your Frame of Mind” to check your frame for any of your equipment right before you click the shutter.
Sometimes we get so wrapped up in composing our photos that we forget to take out a camera bag, a photo stand, reflector, or even the tripod that might be lurking somewhere in plain sight. It may be hard to believe, but for those of you that have never been guilty of this I can assure you that it’s not as hard to do as one might think.
Going hand in hand with this is the fact that if you’re not paying attention to said equipment, it can disappear in less time it takes to blink an eye. I’ve seen so many of my students walk away from their camera bags to look at something from a different point of view, start shooting and forget to go back to it. Strange as it may sound, I’ve had students discover their camera bag some distance away when looking at the LED display of photos they just took with a telephoto lens.
YIKES!!!
Want a good piece of advice? When you’re shooting on a tripod keep your bag on the ground right in the middle of the tripod. That way it keeps it out of your photo and keeps it from becoming the proud possession of someone who has just stolen it. Try a photo backpack or a vest. If you’re walking around handholding your camera, keep your gear between your legs; unless it’s in a bag you have over your shoulder.
I tell my fellow photographers to buy the best equipment they can since it’s a lifetime investment. If you buy the best you can in the beginning, you’ll only have to cry once. This same philosophy holds true with having to replace a piece of equipment that vanished while you weren’t watching…that is by not having to cry when you have to buy it again.
visit my website at www.joebaraban.com, and check out my workshop schedule at the top of this blog. Come shoot with me sometime.
Here’s a really quick tip that will help you take your photos what I refer to as “up a notch”. It may be written as a quick tip, but I assure you that it’s anything but quick. I say that because it’s one of the biggest problems my online students with the BPSOP and in my “Stretching Your Frame of Mind” workshops I conduct around the planet have. My fellow photographers will invariably concentrate on the subject or center of interest and forget about everything and anything else…especially the horizon line.
Line is the most important of all the elements of Visual Design. Without line, none of the other elements I teach would exist. In fact, without line, planes, trains, automobiles, and even people wouldn’t exist as well. Why? Because we all have an outLINE. That said, the most important line is the horizon line, and when I see a horizon line that’s not straight it’s a sure sign that a novice took the picture. Don’t get me wrong, It’s not a judgment, merely an observation. In my opinion, the only time the horizon line wouldn’t appear straight is if you were in the Space Shuttle.
You would think that it’s an easy fix, and you would be partially right. If you’re on a tripod, like I am early in the morning or very late in the afternoon, you simply straighten the horizon right away and then forget about it. It will continue to be straight right up to and including the part when you actually take the photo. Of course, if you want to be a tad on the lazy side, you can always fix it later in front of a computer monitor. It won’t make you a better photographer, but it will keep your Lightroom and Photoshop skills honed as far as post-processing goes…if that’s your cup of tea!!!
However, most people don’t like being in complete control so they persist in hand holding their camera. The inherent problem is in the fact that you have to look at the horizon line while you’re composing, and then again right before you take the photo. That’s going to make it hard to concentrate on a host of things like capturing the moment, human and non-human gesture, body language, the peak of any action, etc., etc.
I’ve been shooting for fifty-three years and I can count the times on one hand that I forgot to look at the horizon line….and would have enough fingers left over to hold a martini glass.
The next time you go out shooting, look at the horizon line and remember these words. It will take your photos “up a notch”.
🙂
Visit my new website at www.joebaraban.com and check out my workshop schedule at the top of this blog. Come shoot with me sometime.
I spent my entire career shooting assignments around the planet, and most of the time I had been fortunate enough to have an interpreter with me. Someone from the company I was shooting for would go with us and if I have someone in the photograph, they could explain to the subject exactly what I wanted him to do.
Occasionally, even with the interpreter explaining to the subject, it could still lose something in the translation. If I only have a few minutes of great light left, it can get a little on the stressful side of normalcy.
So, what did I do when I wanted to set up a photo with a person that didn’t speak English, and I was losing the light? If I was lucky enough to have a translator, I simply told him to tell the subject to change places with me, and tell them to “do what I do”. Then, I actually would act out what I wanted them to do. It’s a lot easier than you might think.
In my online classes with the BPSOP, I will often tell a photographer to try doing that when he or she is trying to get their subject to do something and there’s a language barrier.
It ‘s easier to explain (by a demonstration) when I’m walking alongside someone in my “Stretching Your Frame of Mind” workshops I conduct all over the place.
Just kidding!
So, my fellow photographers, If you don’t have a translator, which is usually going to be the case, give it a try. I will tell you that it will be a whole lot easier if your camera is on a tripod, and you’re shooting either at sunrise or at sunset.
They will get it immediately!!!
Visit my new website at www.joebaraban.com, and check out my upcoming workshops at the top of this blog. come shoot with me sometime.
One of the recurring questions I get from students in my online class with the BPSOP, and the “Stretching Your Frame of Mind” workshops I conduct around the planet is how do I shoot in bad light?
Whether it’s hot and bright midday light or on a gray flat day, I approach it virtually the same way. Minimize or don’t show the sky. One exception is when you have a flat location like a landscape where everything is either above or below the horizon line.
You can bring out your graduated Neutral Density filters. The reason why I say that is because if you have the same object that’s both above and below the horizon line, the part of the subject above the line will be as dark as everything else in the composition above that line, but the part below the horizon line won’t. Making the photo look contrived and fake. I’m a firm believer in not letting the viewer know what I’m doing. It has to look real!!! That is if I want to have a good night’s sleep.
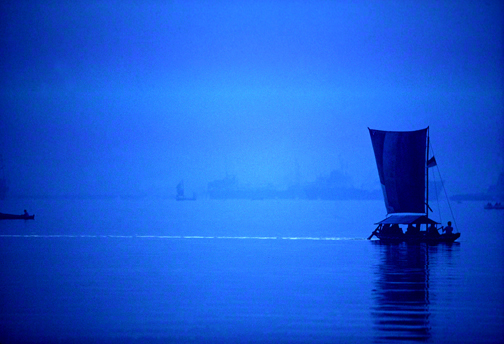
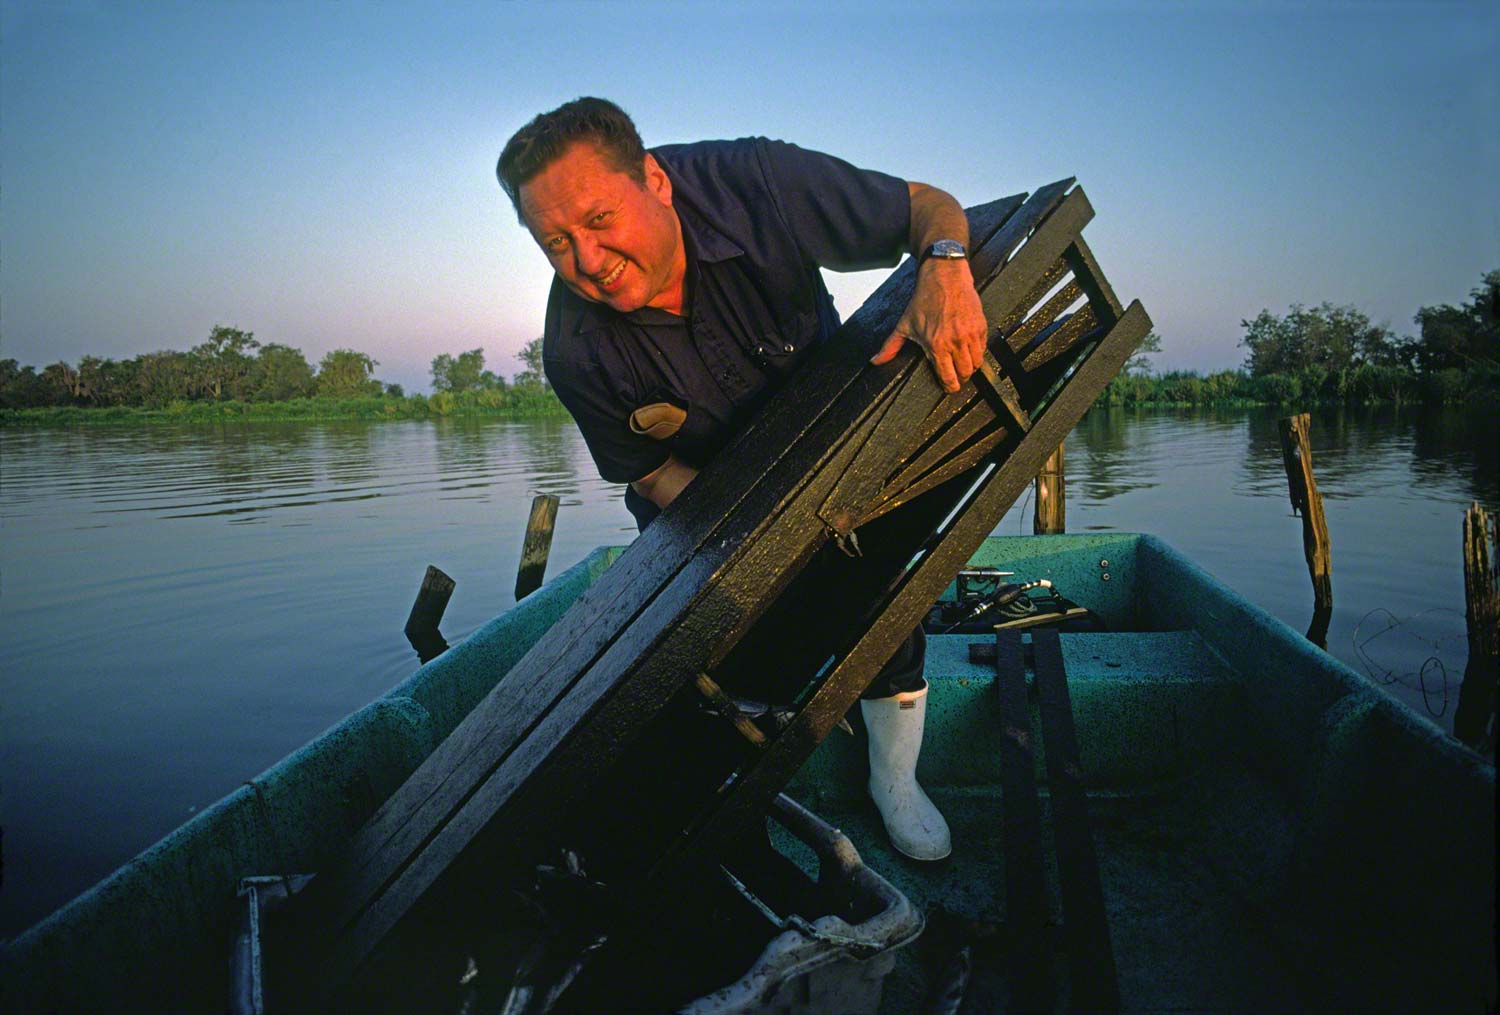
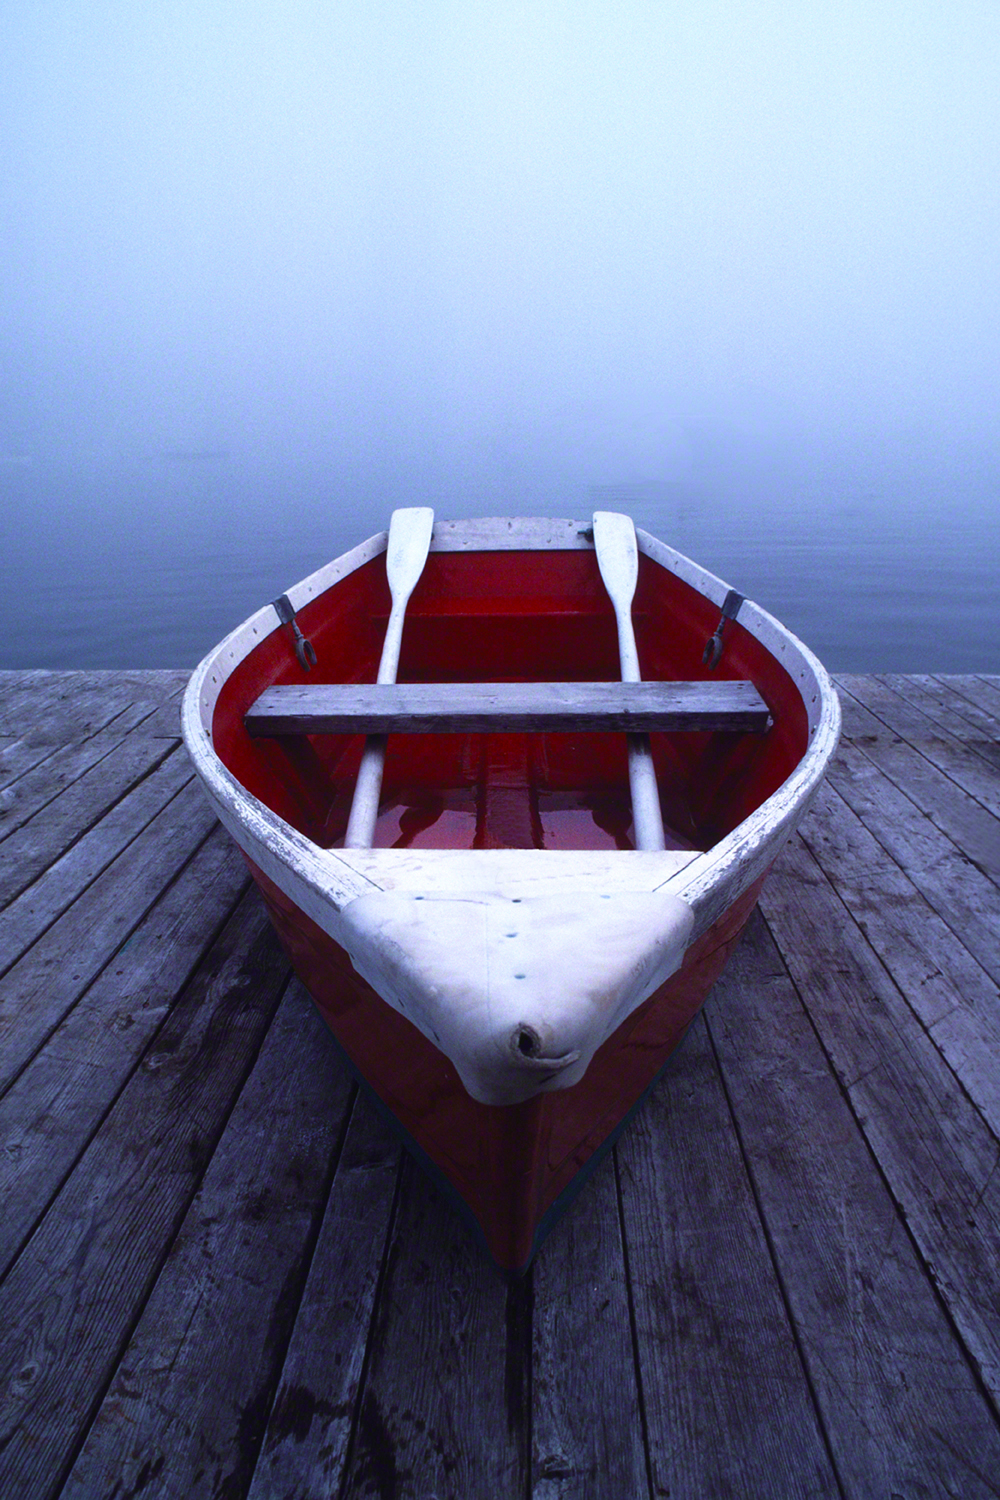
If I can’t minimize the sky on a gray day, I want to put something in it or change the way the sky looks. You have to take control of how the viewer is going to perceive the morning. Make sure it won’t matter to him by making an overcast day work for you. In this photo, of the two men standing in the boat, I broke up the foggy, overcast sky into four sections and created an ‘X’ to do it with.
Introduce color to a gray day. Put it “up close and personal” to the lens and hide the gray, or arrange colors as a graphic design tool.
Try incorporating the elements of Visual Design into your composition: Pattern, Shape, Texture, and Line, will make a big difference when you make these elements the subject or one of the subjects.
Take a look at some photos I shot in not so good light:
Before reading this post, for all of you that have taken my part I and II classes, the school is bringing back my Gestalt class for a month, starting the first week in May. Here’s the link: https://bpsop.com/courses-1/
In my opinion, based on fifty years of being not only an Advertising, Corporate, and Editorial photographer, but a teacher for almost forty of those years as well, I’ve found that there are two kinds of pictures.
In my daily critiques during one of my “Stretching Your Frame of Mind” workshops I conduct all around our planet, I see first hand the photos that are being shot. I’ll often be standing next to someone that’s actually shooting….anything!!!
I also critique countless images sent in by one of my online students with the BPSOP…so, I’ll ask them what kind of photos is this going to be for. Is this shot going into the family and friends slideshow that will be seen on a Saturday night while eating pizza and beer, or is it going to be more serious and perhaps wind up on a website?
If it’s the former, then I say shoot away and let the explanation be told with a slice of Pepperoni Pizza as your pointer. It really doesn’t have any content as far as a photo with more things to look at than a flower arrangement outside a tourist store in some village in France; or some clown with a monkey begging for spare change in some square.
However, if it’s something more important to you (while also being in the slideshow), then it will need layers of visual interest. In other words that flower arrangement now has a small child smelling one of the flowers while the owner is watering the rest of them. Now it tells a story, a visual story that doesn’t need anyone talking…while chewing.
Here’s what I suggest, don’t separate pictures into different categories. Make all of them important, and you’ll come out better for it moving forward.
Visit my website at www.joebaraban, and check out my workshop schedule at the top of this blog. Come shoot with me sometime.
One of the first posts I wrote when I started this blog (way back when) was on one of if not the most important tools my online class with the BPSOP, and in my “Stretching Your Frame of Mind” workshops I conduct around the planet takes with them…my “Fifteen Point Protection Plan”.
This “15PPP” as I refer to it is designed to help photographers look for things they don’t want in their composition, and to put things they should include. From that time to the present I’ve found myself expanding on this topic since it just wasn’t enough help. Now besides my protection plan, I’ve been including two additional ways to protect yourself from what I call unwanted UFOs. I tell my fellow photographers to not only run through the fifteen points but to also check the four corners and what I describe as the “Border Patrol”.
What I mean is to run your eyes along the edges of your frame; the edges that border your photo. Run them along one side, then the next, then the next, until you’re back to where you started. Doing this, along with the four corners and your Fifteen Point Protection Plan will keep you from discovering these annoying elements before you click the shutter and not in front of your computer screen…that is if you’re lucky enough to see it even then.
What’s your go-to lens? The lens you will put on if you’re just walking around the narrow streets in one of the various medieval villages hunting for that elusive wall hanger? For me, it’s the 17-40mm.
To digress a touch, I’m not a proponent of always using one lens as in one of the prime lenses that so many of the people in my online class with the BPSOP, or in my “Stretching Your Frame of Mind” workshops I conduct around the planet always have on.
I find those lenses to be limited since they have such a shallow DOF, which is why I don’t own one. If you’re of the kind that just uses that lens, then, for the most part, your photos will tend to look the same; especially when you’re shooting on a program and not paying attention to what’s in focus and what isn’t.
As I said, I keep my 17-40mm lens on, and it’s not because I use the zoom a lot…because I don’t. It just gives me a good range of focal lengths when shooting in tight and narrow locations.
It’s always interesting when I tell my fellow photographers that I use it to shoot everything from landscapes to portraits; especially environmental portraits. As long as I keep my camera level, I can get ‘up close and personal’ to my subject while showing a lot of their surroundings.
If you don’t pay attention to whether your camera is level, especially when you place your subject close to the edge of the frame, there will be distortion and not the good kind.
So next time you go out shooting slip on a wide-angle lens and see what it’s like. It will take some getting use to but you’ll find that the reward is well worth it.
Btw, all three photos were shot with my 17-40mm lens.
Visit my new website at www.joebaraban.com, and check out my upcoming workshops at the top of this blog. Come shoot with me sometime.
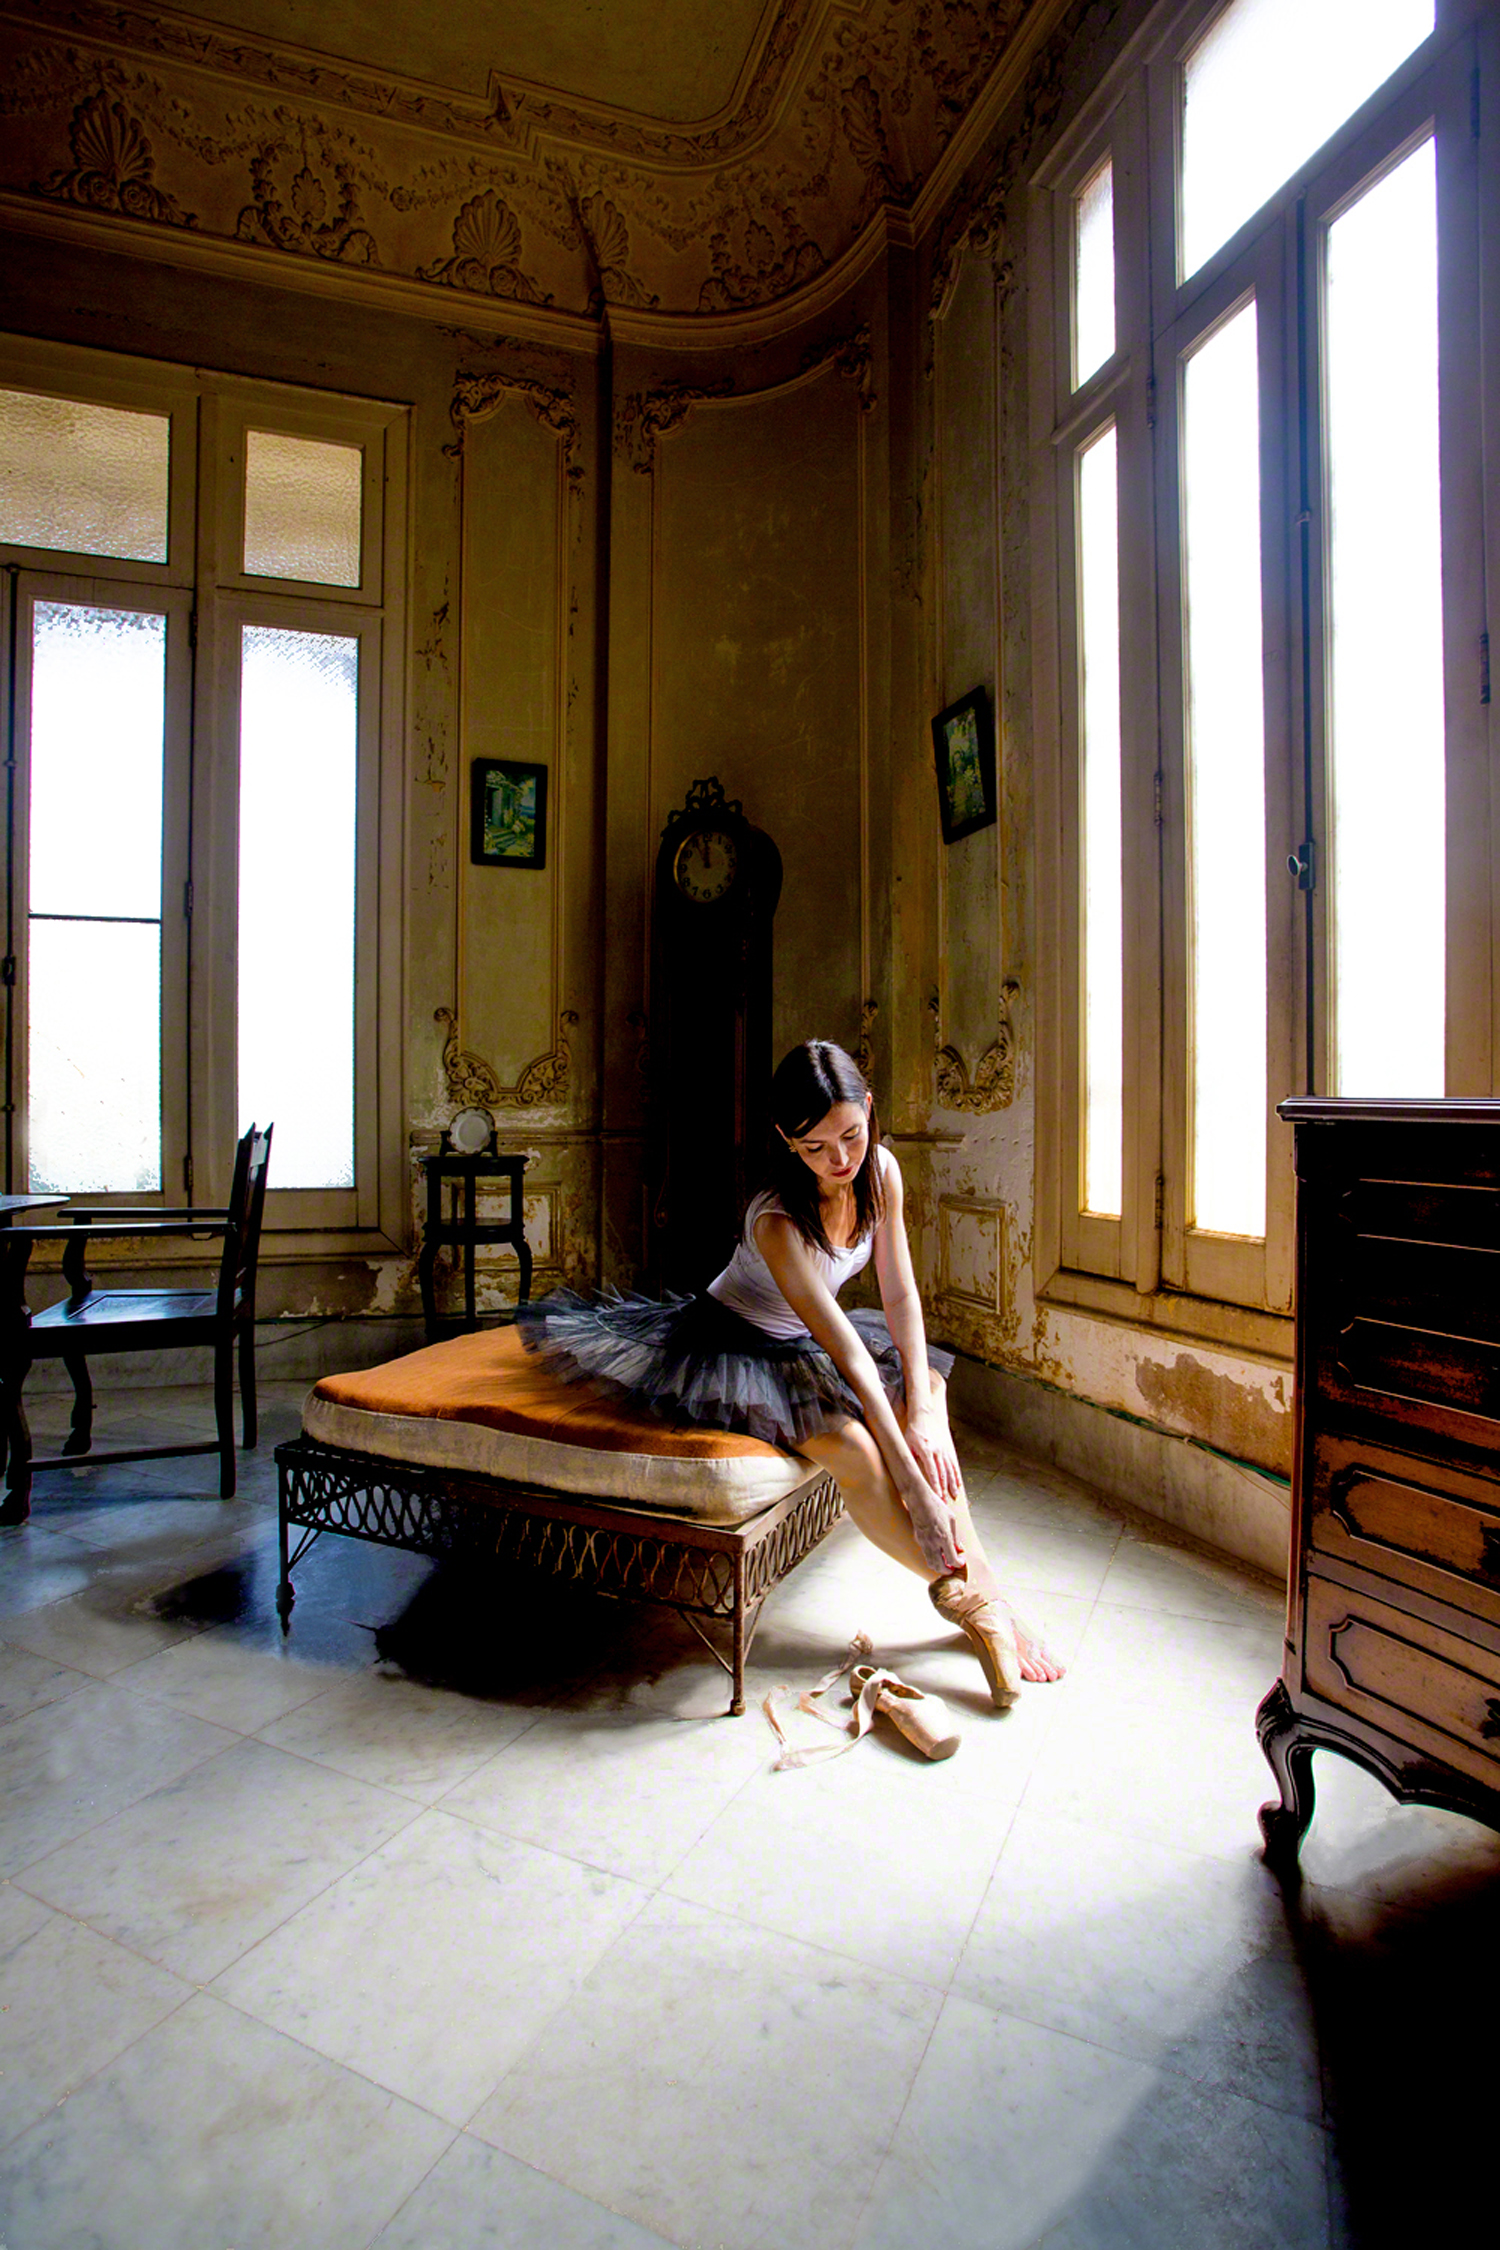
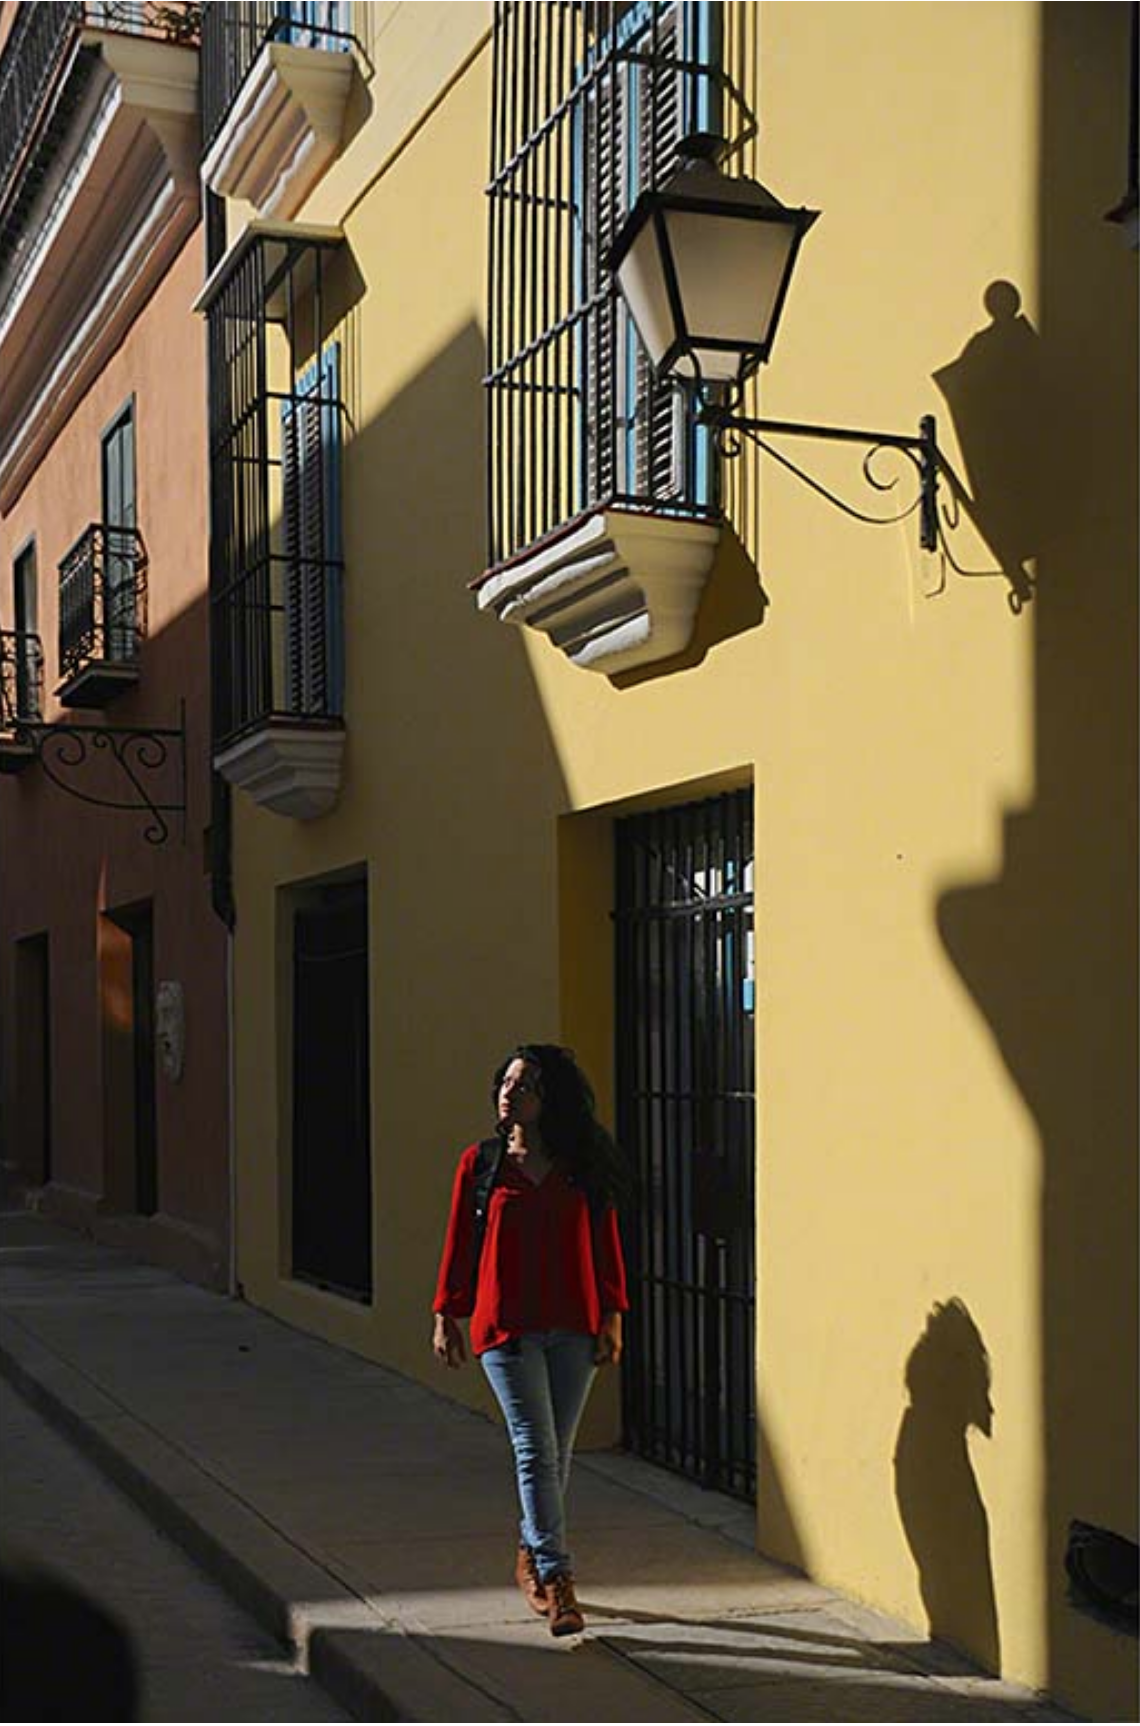
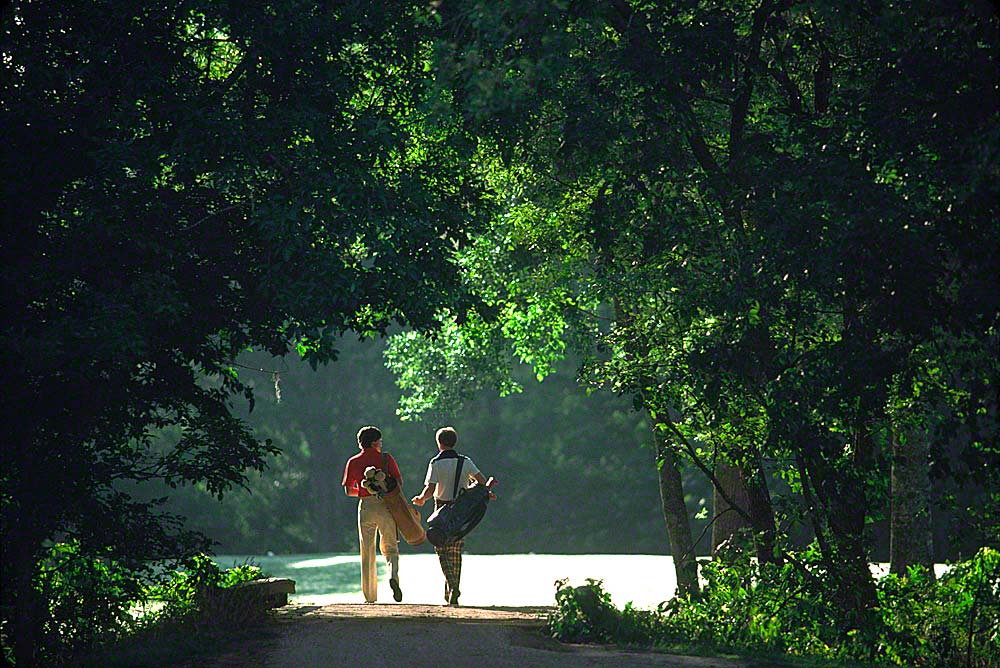
A good way to incorporate action with nice late or early light is to have your subject walk through an area that consists of a small or dappled area of light while you’re shooting. Easier said than done you say? Not if you set it up ahead of time.
As I tell my fellow photographers that take my online classes with the PPSOP, and in my “Stretching Your Frame of Mind” workshops, to me light is everything. If you can find the light, you can find a shot. Since I’m usually setting my photos up so I can have control, I’m always trying to use the light to my advantage. I like to staged things and then shoot reportage. What I mean is that I like it to look like it was a ‘grab shot’, and I just got lucky with the light. Well, truth being told, I just don’t have the time or sometimes the patients to wait for things to happen. I want things right now because it’s odds on that what I’m waiting and hoping for will never happen the way I want.
Walk them through the light.
As I said, I like to make photos that appear to be as if they were really happening. One of the ways is to have my subject or subjects walk through a spot of light. I’ll have them start several feet back from where I plan to click the shutter. I set my camera to continuous shooting and tell them to start walking and talking. If they start far enough back, by the time they hit the mark (in the light) they’re in a natural gait. The arms and legs are moving naturally, they’ve forgotten about me, and they’re talking and listening normally. It’s all about “stopping the action and leaving it uncompleted”; one of many ways to create Visual Tension” that I teach in my class and workshop.
In the photo to the left, I had the woman walk through my frame. I set my camera on continuous and when she approach the mark (the small area of light), I started shooting. In order to hit the mark, and at the right exposure, I stood her in the spot I wanted and took a couple of shots to determine what I was after as far as being a little underexposed. Once I determined the right look, I backed her up and began the process.
Walking to the light.
In the photo of the two golfers, I did virtually the same thing only this time I had them walk to where the shade ended and the bright (backlit) light began.
Visit my website at www.joebaraban.com and check out my workshop schedule at the top of this blog. Come shoot with me sometime.
Be sure to send me a photo and question to AskJoeB@gmail.com.
Using a wide angle lens to create the illusion of depth.
In general terms, perspective refers to the relationship of objects. It’s not the definition that’s important here, what’s important is how to control perspective and use it in as a tool to make our photographs stronger.
Since the camera has one eye, that being the lens, it can only see in two dimensions: height and width. By controlling perspective we can imply a third dimension by adding depth, as well as the illusion of space and distance. In other words, we can “trick the eye” into seeing more like our eyes and less like a camera. What we want to accomplish is to create layers of interest which in turn creates depth.
With my online class with the BPSOP, and also in my “Stretching Your Frame of Mind” workshops I conduct around the planet, We work on ways to create depth in our imagery.
There are several ways to create depth: manipulating LINE (a fundamental element of design), value (the lightness or darkness of a color), or color can create the illusion of depth. Depth can also be generated by cutting, dividing, or rearranging the space. Overlapping shapes or objects (one of my favorites) create depth. Arrangement of lights creates the illusion, as when light is contrasted against dark values.
Color can create the illusion of depth by placing bright or warm saturated color near the front of the scene. As color recedes into the background, its value becomes less saturated (caused by water crystals in the air that scatter the wavelengths), and finally becoming bluish gray as it reaches the horizon.
The best way by far, is the wide angle perspective. Hands down, the wide angle lens is the best tool in your bag to create the illusion of depth. They can manipulate perspective by altering space and distance. They can also offer maximum sharpness from the foreground all the way to the background.
Here’s some examples of the different ways to create perspective, including “anchoring the subject in the foreground” to create the illusion of depth, and using a wide angle lens to do so:
It was the lens I had with me…100mm macro or the 17-40mm Zoom?
It seems that there’s no geographic boundaries when it comes to people fretting over lens. People from literally all over the world sign up for my online classes with the BPSOP, and photographers from all four corners of the globe take my “Stretching Your Frame of Mind” workshops I conduct all over the globe.
“What’s the best lens to have”?, I hear all the time. Actually if I had a dollar for every time I did hear that, I would be writing this post from my Island with a blue and frothy drink sitting on a table dangerously close to me.
The best lens to have is the one you have with you. I never worry about which lens to have on my camera. Whatever comes up in front of me I’ll deal with no matter what I’m shooting with; I have enough to worry about!!!
I’m certainly not suggesting that you use just one lens. In fact, I wrote a post about always using one lens.
I’ve seen fairly short people in my workshops walk off the elevator with a backback that I wouldn’t be able to carry. It almost as tall as they are and filled with just about every lens offered by the camera’s manufacturer.
One woman in particular comes to mind that walked ( slumped over) all around the grounds at the Palace of Versailes with a huge backpack stapped to her back. I asked her what in the world did she have with her. She said that she had seven lens with her…seven lens!!! When I asked her why would she torture herself like that, she said that she’s afraid of not having the right lens when she saw something interesting…wait! what?
You don’t need seven lens unless you’re a working pro on assignment. Otherwise, think about what you’re after and put the corresponding lens on and have access to maybe one more. For example, I might have a 100mm macro lens on and carry something like a 17-40mm zoom; two totally different lens.
Having said that, I would probably use the macro for portraits as well as it’s intended use, and the wide angle zoom for close-ups…to creat depth. I’ll explain this in the next post.
So my fellow photographers, it’s not the lens nor the camera, it’s the ten inches behind the camera that really matters.
Visit my website at: www.joebataban.com, and check out my workshop schedule at the top of this blog. Come shoot with me sometime.
I usually try to stay away from seriously technical stuff, because to be honest most of it is above my pay grade!!
🙂
I feel so relieved having to ‘come right out’ and admit it. However, I feel like I should still contribute my two cents worth. This is because questions about exposure keep coming up in my online classes with the BPSOP, and recently in my “Stretching Your Frame of Mind” workshops I conduct all over our (round) planet. I’m going to try and make this as simple to understand as I tell all my fellow photographers.
In photography, the “Dynamic Range” is the relationship between the darkest and lightest areas in a photo, generally going from pure black to pure white; pure black is pretty much impossible to achieve since there’s always a little detail in those areas.
There’s ‘High Dynamic Range’ which is achieved on a bright sunny day where there are areas in the sun and areas in the shade. ‘Low Dynamic Range is when it’s an overcast day or there’s little to no difference in your composition’s highlights, middle tones, and the shadows.
When photographers submit images, the one thing that they don’t pay attention to is the differences between the brightest part of the composition and the areas that are in shadows. If they’re shooting out in the light, then any centers of interest in the shadow are too dark. Conversely, if they’re shooting in the shaded areas the brightest area is blown out and all detail is lost…not good unless you’re consciously trying to do that.
Btw, when photographers are always listening to what the meter in their camera tells them, they really don’t have control…but I digress!!
Our eyes are simply amazing. As good as some of the current digital cameras are as far as the range between the bright areas and the areas in shadow their sensors can see, they’re no match for the human eye.
Cameras have a narrower dynamic range than the human eye and get somewhere from 5 to 15 stops depending on what article you’re reading. This means that on a bright sunny day you often have to choose whether you “blow out your highlights”, or you make the shadows lacking any detail. The human eye can perceive about 20 to 24 stops of dynamic range in ideal circumstances; depending on who you’re listening to.
Low Dynamic Range
Btw, it’s always better to shoot in RAW so you can take advantage of all the embedded data and open the shadows enough to see a lot more detail.
One of, if not the most important aspects of Dynamic Range is that photographers never think about it; admittedly because it’s hard to control. Often, there’s just no way to have a range of tones in your images. It’s vital to have an understanding of your camera and it’s meter. I can tell you from years of shooting and teaching that the meter in your camera is going to be wrong most of the time. This is why I really push students to shoot on manual so they do have at least a little control.
Case in point: I had a student that was shooting in the barn on her ranch, trying to take a portrait of her favorite horse. The barn doors were opened so she could also show several horses in a corral just outside.
It was a bright sunny day when the sun was almost overhead, and inside the barn was considerably darker. The range of exposure between the outside and inside was too great to get the entire photo exposed properly.
The inherent problem is that our eyes can see all the color and detail in the barn and when looking outside, they will automatically adjust. The camera can’t do that, it’s either one or the other.
In other words, you can get a beautiful well-exposed portrait of your horse and the outside will be void of any detail, or you can expose for the outside, and you’ll lose everything on the inside.
So here comes the dilemma, or at least as far as I’m concerned.
There is a way to come out with a well-exposed photo, and that is combining two or three photos into one or as they call it…HDR
I say to each his own, but to me, that’s computer art and not photography. I’ve been shooting for fifty-three years, and in that time I have never had to blend more than one photo….and my pictures have been coming out pretty good.
Look for alternatives…ways to solve the problem in the camera. I have found that by thinking before shooting I’ve come home with photos I can share with others.
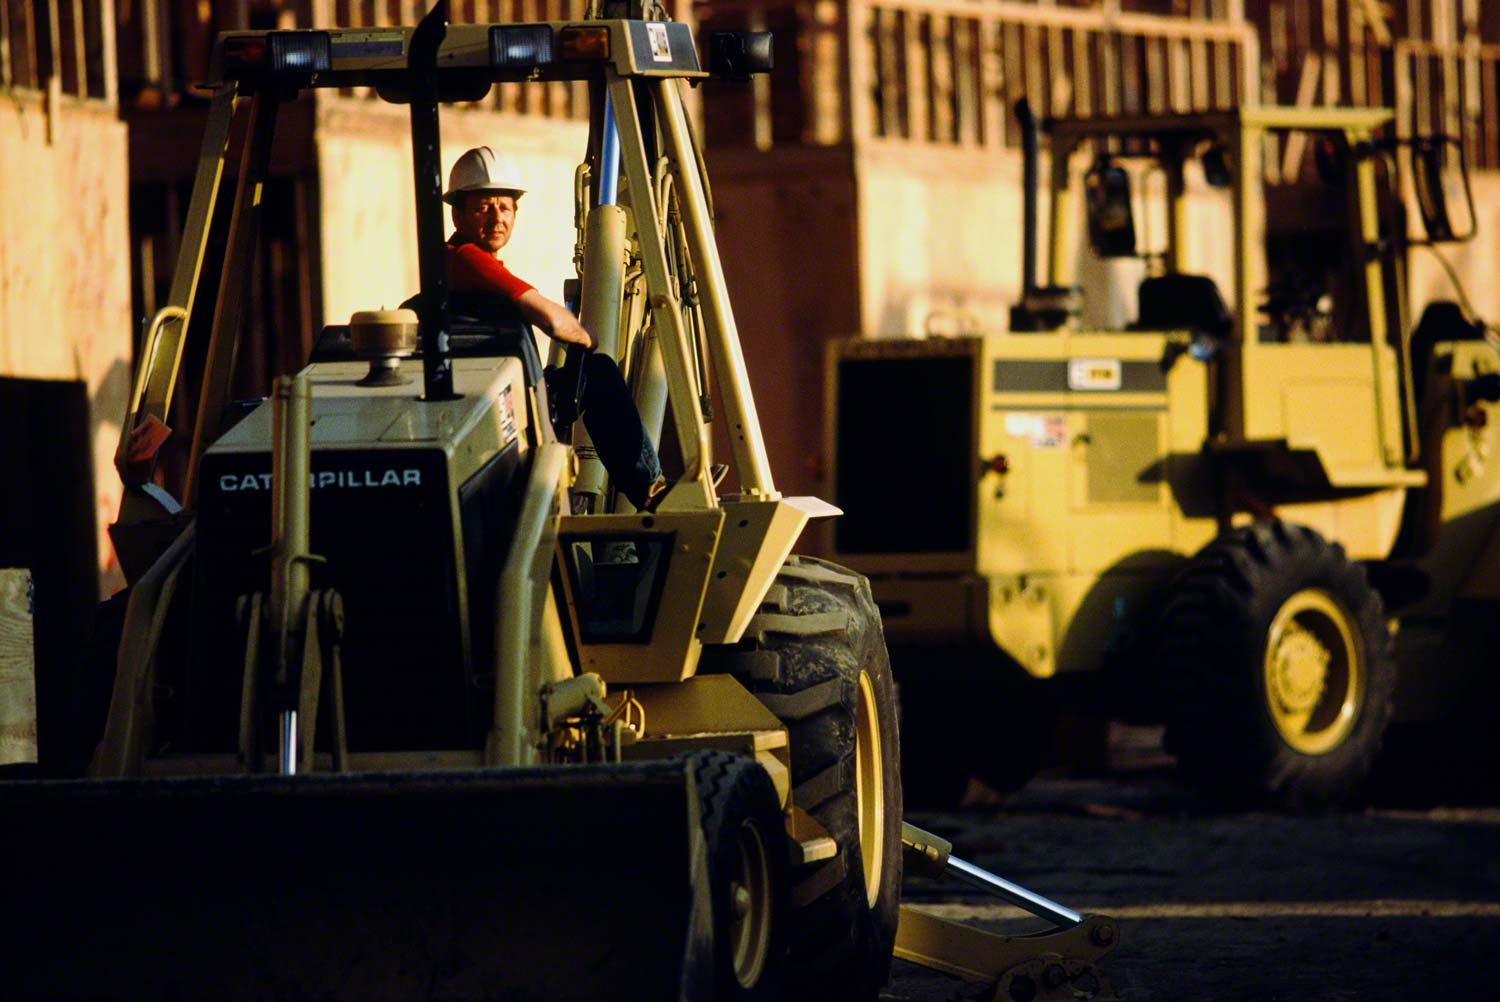
As I tell my online students with the BPSOP, and those that take my “Stretching Your Frame of mind” workshops I conduct around the planet, you just never know when that illusive keeper will cross your photographic path. When I say illusive keeper, I’m talking about that 0ne in fifty images that passes through you camera on any given day of shooting.
Most of the photographers I teach, as well as those that I respect as great shooters all have certain criteria in judging what each considers a keeper, or better yet an “OMG” photo. My standards are set extremely high and they keep getting higher if that’s possible!!! Since I know that these kinds of photos come and go in a blink of an eye, mostly because of the sometimes fleeting light, I want to be ready just in case.
It stands to reason that one of the best ways to have a shot at your keeper is to always have a camera with you. Which I do!!! This reminds me of the tag line for the Texas Lottery that reads, “You can’t win if you don’t play”. The good news is that your chances of coming home with that “OMG” photo is a lot better than winning the Lottery.
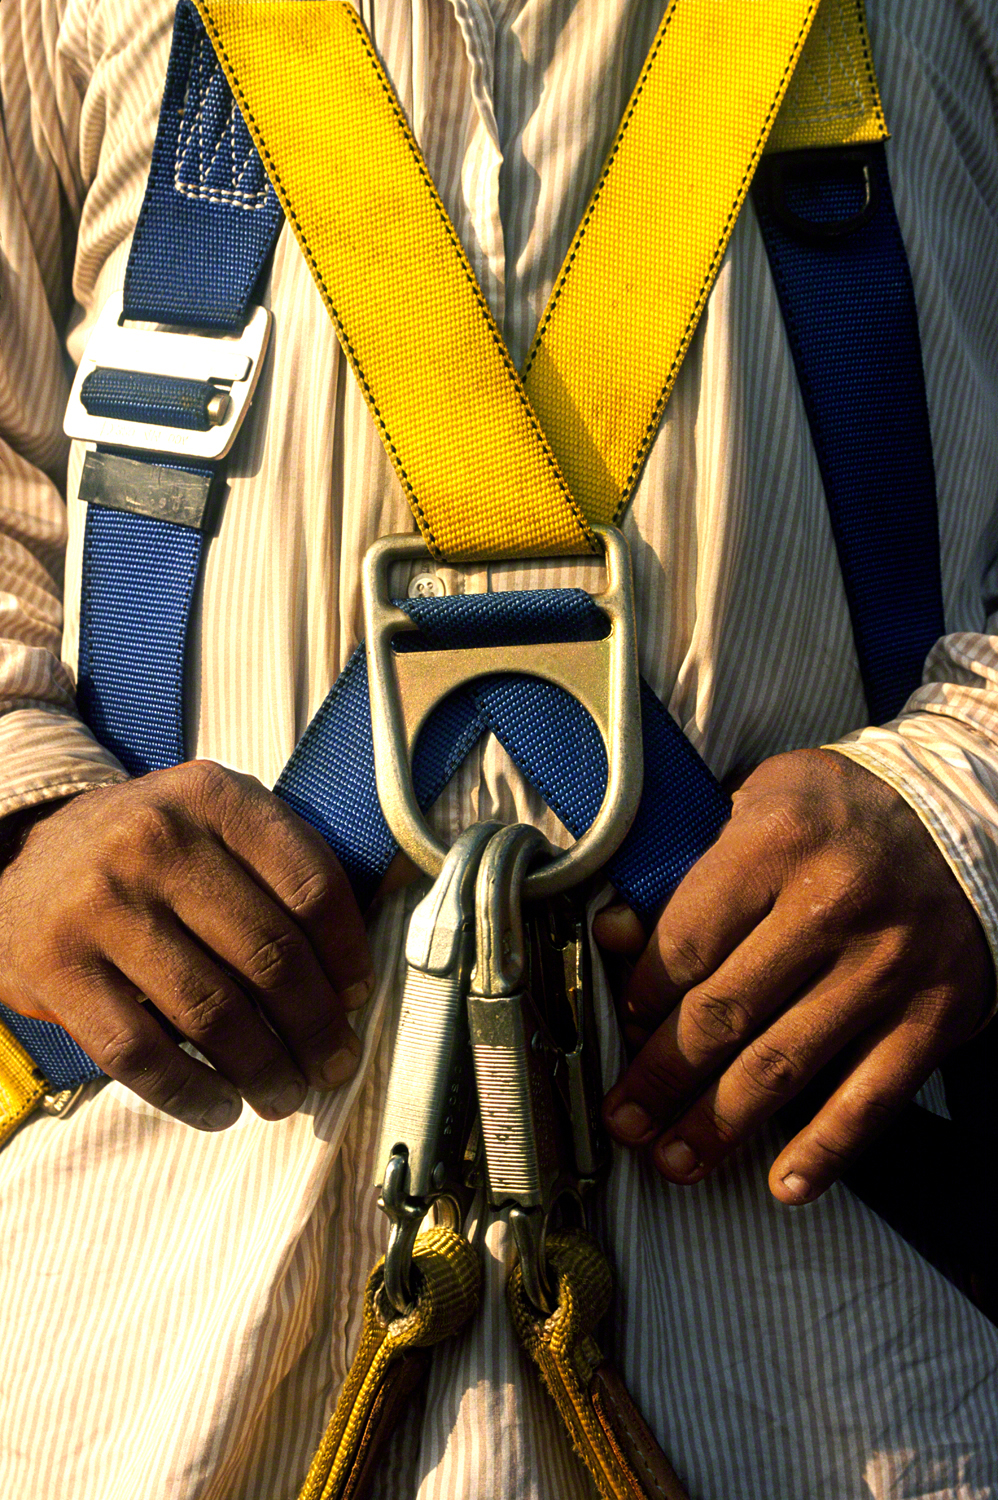
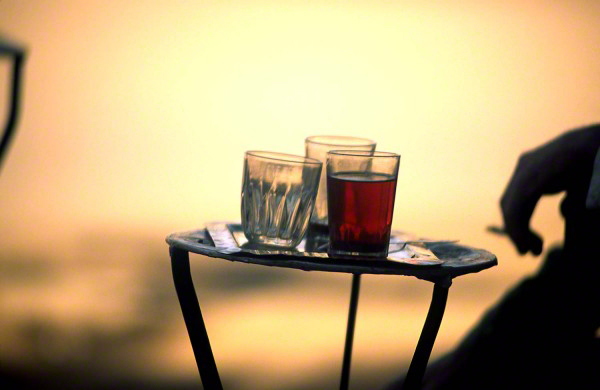
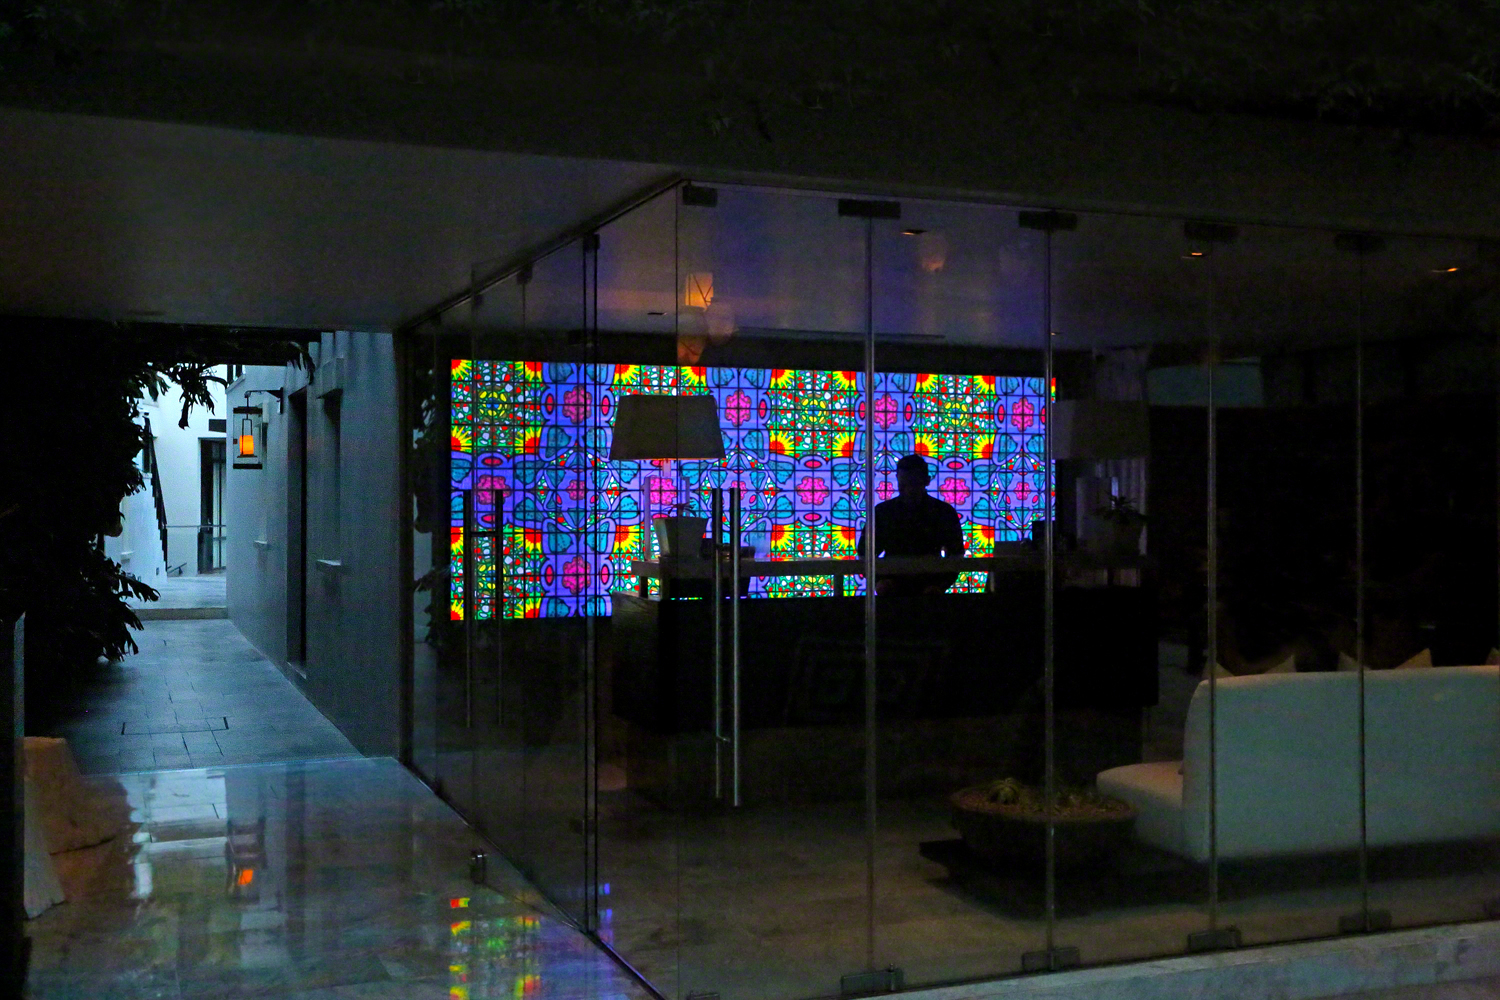
In the above photo, I had just sat down in an outside bar on the second floor of the hotel I was staying at. As always, I had my camera with me and saw this happening right before my very eyes. Since it screams Line, the most important of all the elements of visual design, I took a picture of it.
Wherever I’m sitting, walking, running, or riding, I’m constantly moving my eyes around my immediate environment. It’s like I have a built in 2X3 rectangle and I’m seeing everything in an imaginary viewfinder. I’m especially looking for light hitting or falling on an object or person. It may be as obscure as a thin shaft of light, or it might be in an unusual shadow that it creates. My eye is also attracted to any movement that occurs in my peripheral vision.
Looking for anything that’s weird or quirky because of some brief juxtaposition of elements or a reflection is a good source of keepers. Try to anticipate something that might be happening and have your camera “close to the vest” when it does. Chances are it won’t last long.
Last, remember what Eddie Adams (a Pulitzer prize winning photographer) said, “When you get lucky, be ready”.
Here’s a few examples of being an observer of my surroundings:
As I tell my online students with the BPSOP, and those that take my “Stretching Your Frame of mind” workshops I conduct around the planet, you just never know when that illusive keeper will cross your photographic path. When I say illusive keeper, I’m talking about that 0ne in fifty images that passes through you camera on any given day of shooting.
Most of the photographers I teach, as well as those that I respect as great shooters all have certain criteria in judging what each considers a keeper, or better yet an “OMG” photo. My standards are set extremely high and they keep getting higher if that’s possible!!! Since I know that these kinds of photos come and go in a blink of an eye, mostly because of the sometimes fleeting light, I want to be ready just in case.
It stands to reason that one of the best ways to have a shot at your keeper is to always have a camera with you. Which I do!!! This reminds me of the tag line for the Texas Lottery that reads, “You can’t win if you don’t play”. The good news is that your chances of coming home with that “OMG” photo is a lot better than winning the Lottery.
In the above photo, I had just sat down in an outside bar on the second floor of the hotel I was staying at. As always, I had my camera with me and saw this happening right before my very eyes. Since it screams Line, the most important of all the elements of visual design, I took a picture of it.
Wherever I’m sitting, walking, running, or riding, I’m constantly moving my eyes around my immediate environment. It’s like I have a built in 2X3 rectangle and I’m seeing everything in an imaginary viewfinder. I’m especially looking for light hitting or falling on an object or person. It may be as obscure as a thin shaft of light, or it might be in an unusual shadow that it creates. My eye is also attracted to any movement that occurs in my peripheral vision.
Looking for anything that’s weird or quirky because of some brief juxtaposition of elements or a reflection is a good source of keepers. Try to anticipate something that might be happening and have your camera “close to the vest” when it does. Chances are it won’t last long.
Last, remember what Eddie Adams (a Pulitzer prize winning photographer) said, “When you get lucky, be ready”.
Here’s a few examples of being an observer of my surroundings:
A lot of the inspiration for writing these posts comes from either dicussing a photo a student taking my BPSOP online classes has submitted or from a fellow photographer that has taken one of my “Stretching Your Frame of Mind” workshops I conduct around our planet.
This post comes directly from working with a photographer during my last workshop in Berlin; walking the streets in Pottsdam.
We were walking past a shop that had two doors. One wooden door with small panes of glass that was open wide, and a screen door that was closed and being used as the main door for patrons to enter.
This photographer was about to walk by because the screen door was closed. I stopped him and pointed out the fact that if he was to shoot through the screen and controlled the DOF, he might get something interesting.
It had never occurred to him to try anything like that, mainly because he never considered the screen as being anything but in sharp focus; since that’s the way his eyes were seeing it.
After reminding him that he was there to “stretch his frame of mind”, we set out to try and incorporate the screen into his thought process and add a ‘layer of interest’ to his photo.
I had him compose what he thought was an interesting composition made up of silhouettes, color, and light. Then I had him try different F/stops ranging from the aperture being wide open to closed down to F/22.
Well, I have to tell you that it was an epiphany for him, and wound up being something that he could use all the time; depending on the circumstances.
The important thing to remember is to manually focus so you can have complete control. You’ll want to focus on the subject on the other side of whatever it is you’re shooting through and then use your aperture to try different degrees of sharpness.
It’s amazing that because of the digital era where practically everything is done for you, a lot of my fellow photographers have no idea that you can actually focus the camera all by yourself!!!
Visit my new website at: www.joebaraban.com, and check out my workshops at the top of this blog. Come shoot with me sometime.