When I’m teaching either with my online class with the BPSOP or with my “Stretching Your Frame of Mind” workshops I conduct around the planet, students are always asking me the best way to use fill flash when shooting portraits outdoors. I have a simple and quick response to them.
I tell them that in my fifty-two year career, I’ve never, and I mean not once used fill flash outdoors. I don’t even like to use it indoors. I can honestly say that I’ve never missed it because my portraits do just fine without it. So, you’re thinking, what do I do?
Here’s my set-up. How much simpler can you get?
I use a collapsible reflector with white on one side and silver on the other. 90% of the time I use the white side. I’ll occasionally use a larger piece of Foam-board when I have a larger area to cover, as in a full length shot. All I ever need is a stand that won’t fall over, an A-clamp, and a reflector. It’s a hell of a lot easier than figuring out ratios when I’m losing the light. Why complicate my life? There’s enough things I have no control over that does a good job messing with my head. Why cloud it up even more with something that I love and have control over.
It’s unbelievable how many times I see an outdoor portrait lit with a flash. It’s a look that’s been beaten to death, and usually the photographer doesn’t know what he or she is doing which makes it worse. I realize it’s a matter of personal preference, and for me I like a natural look. The kind of look that has never gone out of style and never will.
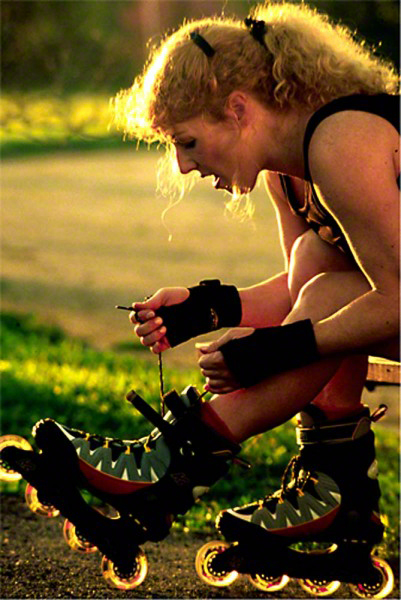
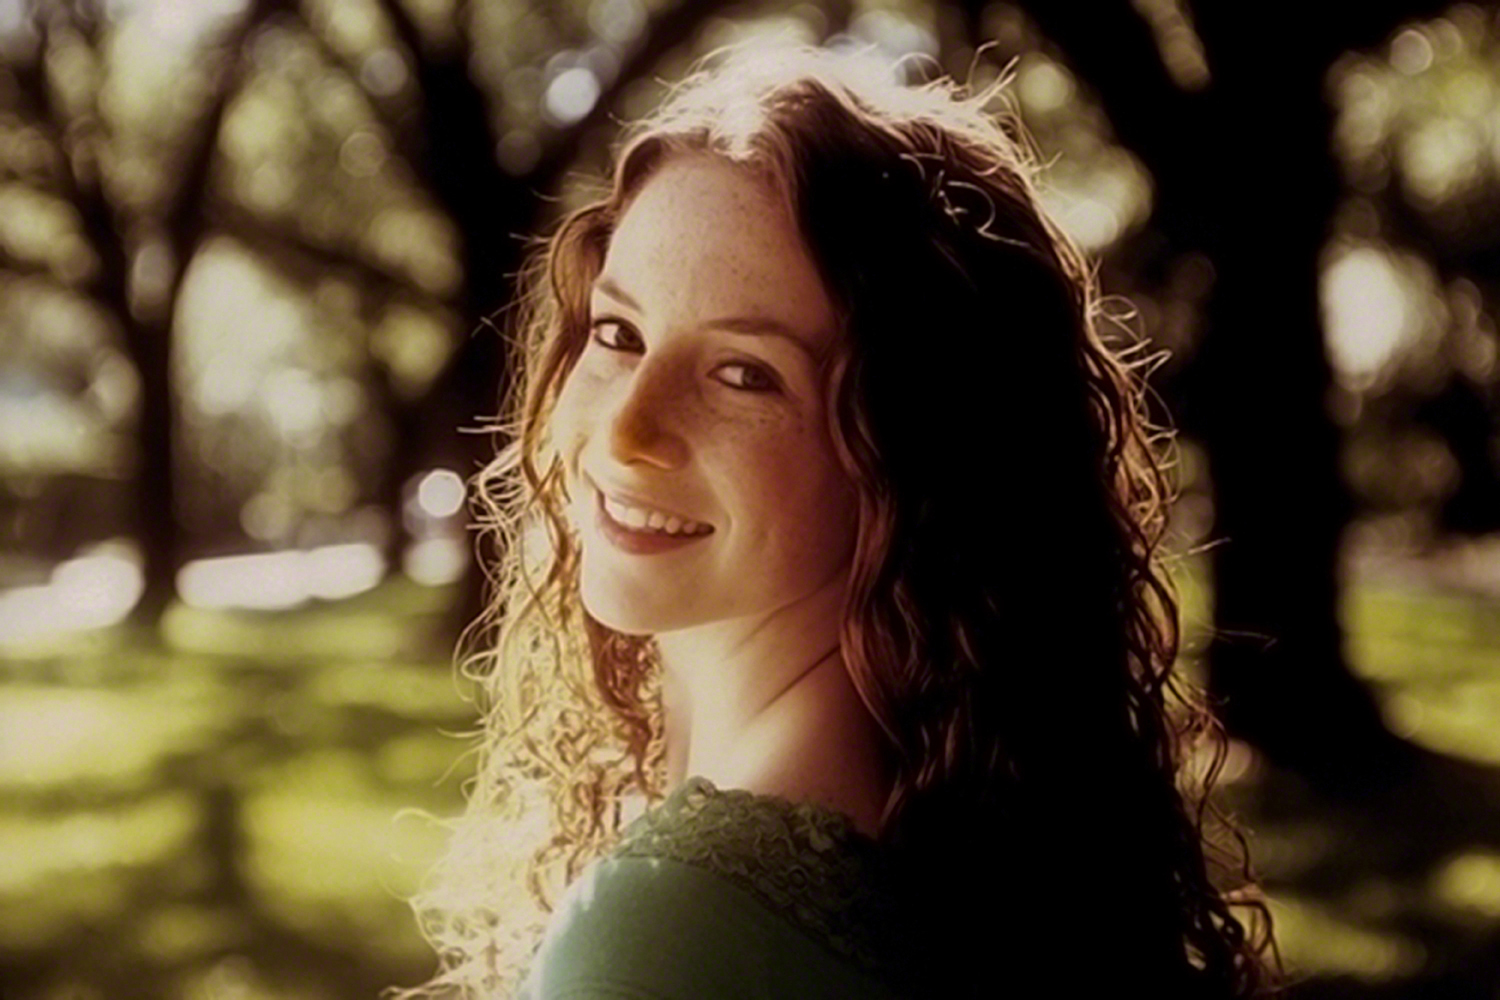
Take a look at some of my portraits lit with only a white reflector or a larger piece of foam board:
One of the items from my Bag of Solutions That I never leave at home is a pair of Walki-Talki’s. I’ve had a pair near me for years, and when I use to buy them they were $1500.00 for a pair of Motorola’s that had a five-mile reach. Today, you can buy a pair for under $100.00, and the investment would be well worth it…why, you ask?
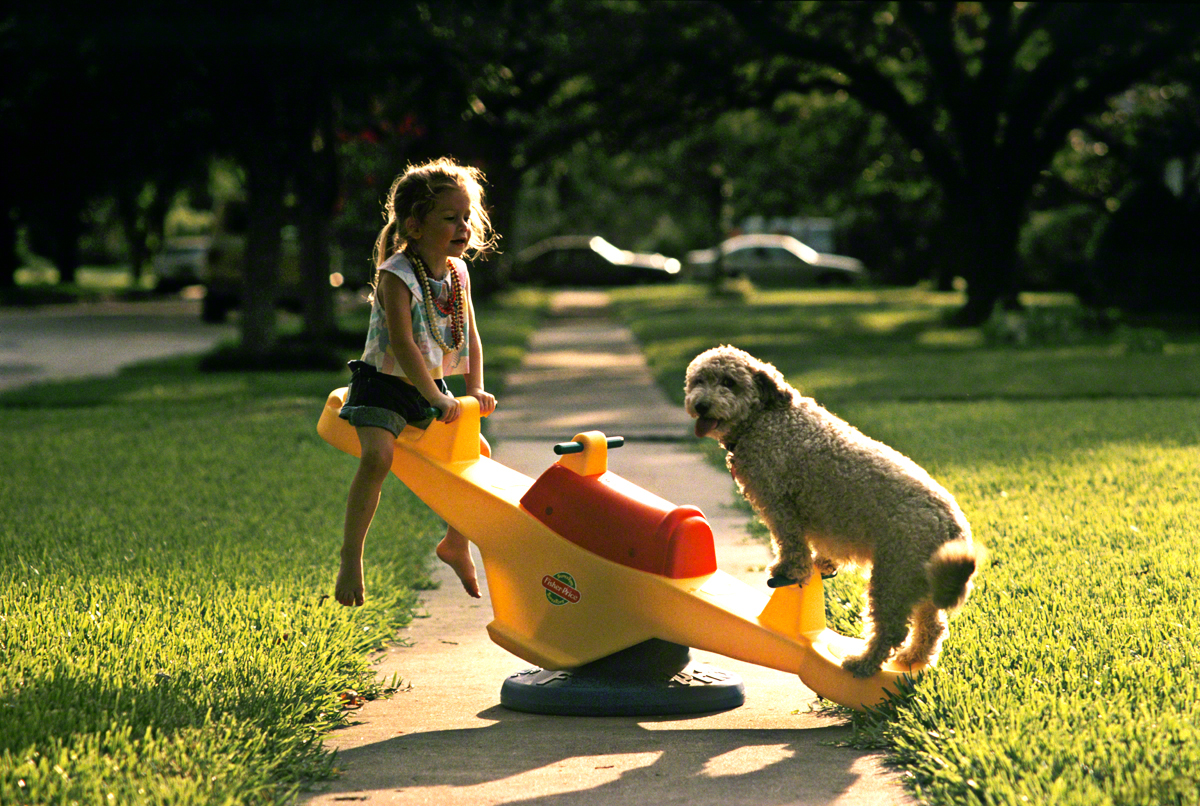
Because it will add another dimension to your photography. I often like to put someone in my photo to either give scale to my composition, or just to be able to have someone standing, riding, or sitting exactly where you want him/her to be so i can get back and shoot with a telephoto lens. Whether it’s indoor or outdoor, to have that kind of control could be the difference between a good photo and a great photo.
What I do is hook one of the Walki-Talki’s to the subject (somewhere out of sight), and hold the other in my hand while I compose my shot. If I want my subject to move over a step in either direction, or to rearrange his or her body language, or to create some Negative Space between them and whatever it is around them that’s making it hard to define their shape, I merely direct them through my Walki-Talki.
Of course, this means that I’m on a tripod so I can have one hand free. As I’ve said a thousand time to the online class I teach with the BPSOP, or in my “Stretching Your Frame of Mind” workshops I conduct around the planet, I want complete control of my photography and be able to do whatever it is that I’m able to conjure up in my imagination. That means any combination of shutter speeds and aperture settings I want, and be able to have my hands free to do whatever…like holding a Walki-Talki.
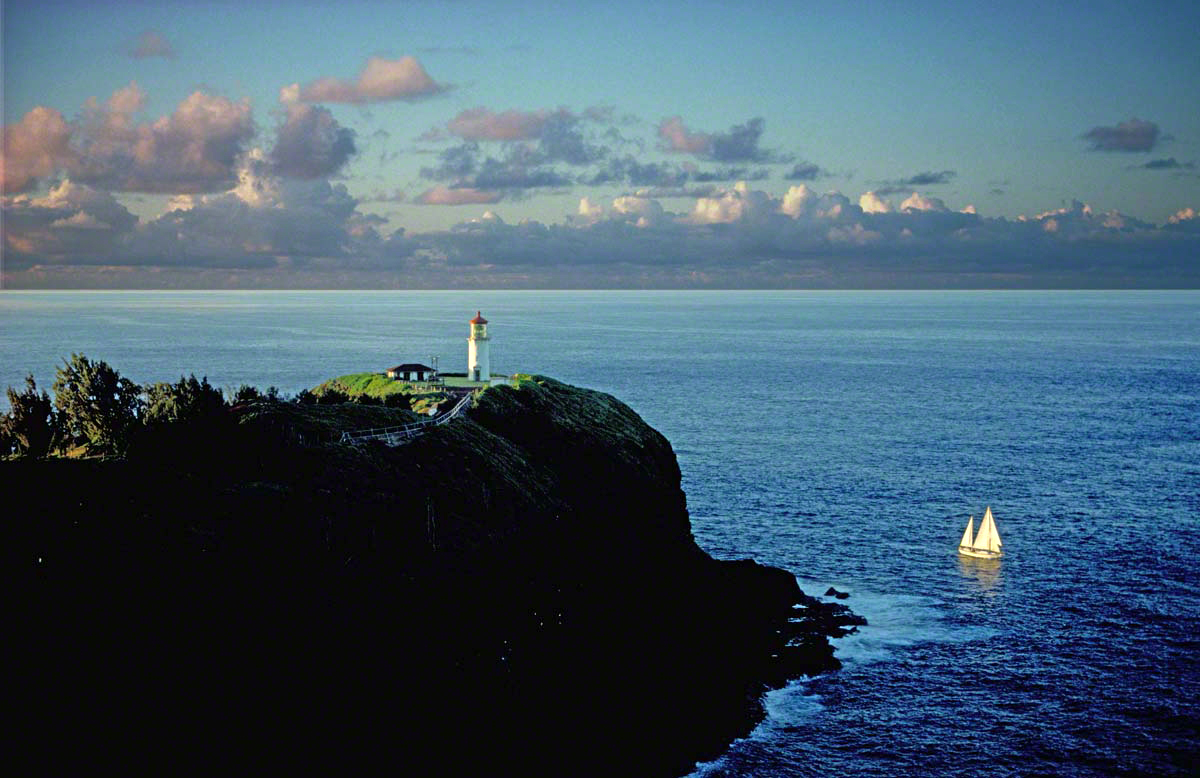
OK, the top photo: I was shooting an advertising campaign for United Airlines, and for five weeks all I had to do was to come up with pretty pictures for their upcoming ads. We chose this location as it was a favorite among tourists. I chartered the sailboat and put one of my assistants on it (tough duty). He had a Walki-Talki with him, so I could direct the sailboat back and forth around the lighthouse. All the tourists around me went nuts because they thought it was accidental that the sailboat was there and gave them the opportunity to take back home a memorable picture. I think I was the only one there with a 600mm F/4 lens!!!!
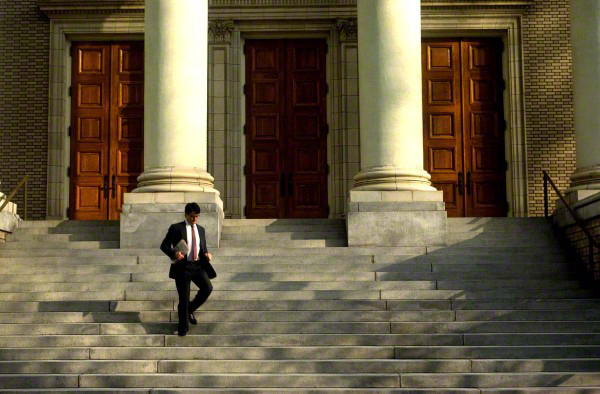
Here are a few examples of using Walki-Talki’s to create interesting photographs that anyone can take without the expense of chartering a sailboat or having an assistant!!
When I’m teaching either with my online class with the BPSOP, or with my “Stretching Your Frame of Mind” workshops I conduct around the planet, students are always asking me the best way to use fill flash when shooting portraits outdoors. I have a simple and quick response to them.
I tell them that in my fifty-three year career, I’ve never, and I mean not once used fill flash outdoors. I don’t even like to use it indoors. I can honestly say that I’ve never missed it because my portraits do just fine without it. So, you’re thinking, what do I do?
Here’s my set-up. How much simpler can you get?
I use a collapsible reflector with white on one side and silver on the other. 90% of the time I use the white side. I’ll occasionally use a larger piece of Foam-board when I have a larger area to cover, as in a full-length shot. All I ever need is a stand that won’t fall over, an A-clamp, and a reflector. It’s a hell of a lot easier than figuring out ratios when I’m losing the light. Why complicate my life? There are enough things I have no control over that does a good job messing with my head. Why cloud it up even more with something that I love and have control over.
It’s unbelievable how many times I see an outdoor portrait lit with a flash. It’s a look that’s been beaten to death, and usually, the photographer doesn’t know what he or she is doing which makes it worse. I realize it’s a matter of personal preference, and for me, I like a natural look. The kind of look that has never gone out of style and never will.
Take a look at some of my portraits lit with only a white reflector or a larger piece of foam-board:
In my August online class with the BPSOP, and right before my “Stretching Your Frame of Mind” workshop I conducted in Spain, I was asked what I take with me when I go out shooting. My reply is simple, I make it real easy for my poor tired little brain.
When I go out walking in some city with fellow photographers that are taking one of my workshops, I take two cameras. I have a Canon Mark III with a 17-40mm lens on it that I have over my shoulder, and I have a very small Panasonic Lumix DMC-LX7 with a 24-90mm lens that I have around my neck
That gives me a range from 17-90mm, and for the most part it’s all I need. When looking at my website, you never know what photo was shot with what camera. When asked, I tell people that it’s not the camera, it’s the ten inches behind it that really matters.
I’ve seen photographers carry a backpack that has a whole lot of lens in it. That’s great if you have the time to switch out a lens, but when you’re walking around ‘street shooting’ you would never have that kind of time. Your subject would be long gone or old and gray waiting for you to decide what to put on your camera.
If I’m going to be at a location that I have either scouted or thought about I might take a speciality lens besides my normal equipment. For example, I did a workshop in New York and we went to Coney island. I thought it would be ineresting to tak a 600mm lens and put it on a tripod. I stood in one location and with the camera free to move on the tripod, I scanned the boardwalk looking for interesting subjct matter; the point of this was to knock everything out of focus so the background would be a sea of muted color.
Btw, I have also put my 100mm macro on and shot portraits with it. I like to use the wrong lens for the right subject…or the wrong subject with the right lens…you just never know!!!!
Visit my new website at: www.joebaraban.com, and check out my workshop schedule at the the top of this blog. Come shoot with me sometime.
When I’m online with my class with the BPSOP, or traveling with my “Stretching Your Frame of Mind“ workshop, I often refer to my “Pearls of Wisdom”. One of them is, “My bag of solutions”.
What I mean is how do I solve a problem that’s come up unexpectedly? If I could only get a couple of feet higher, or have to stand out in the water, or pick up any trash, or how about fixing something that might be broken or needing a piece of tape to hold something while I shoot. Here’s what I often carry in my car when I’m going out. You just never know when you’ll need something!!!I don’t necessarily carry everything all at once, but I have before on personal long road trips and assignments. Although I consider this list equipment, I call this my “bag of solutions”:
Tripod
Bean bag
Small table tripod
Six foot ladder
Spray bottle with water/glycerin mixture
Photo stand with a sand bag to keep it steady
A-clamps (to secure the reflector and umbrella to the stand).
White reflector or white piece of foamboard.
Duct tape (very important)
Fifty feet of garden hose (for ‘wet downs’)
Mikita (or another brand) 14 or 18 volt rechargeable screw gun
Rubber boots
Chest waders
Knee pads
Blanket
Walki-Talki’s
Plastic tarp
Broom
Rake
Garbage bag
Golf Umbrella
Change of clothes
Small Red line tactical flashlight for light painting
Model/minor/property releases (important if you plan to sell the photos)
Ice chest with water, soft drinks, beer, and Martini fixers’ (after the wonderful sunset)
Did I leave out anything?
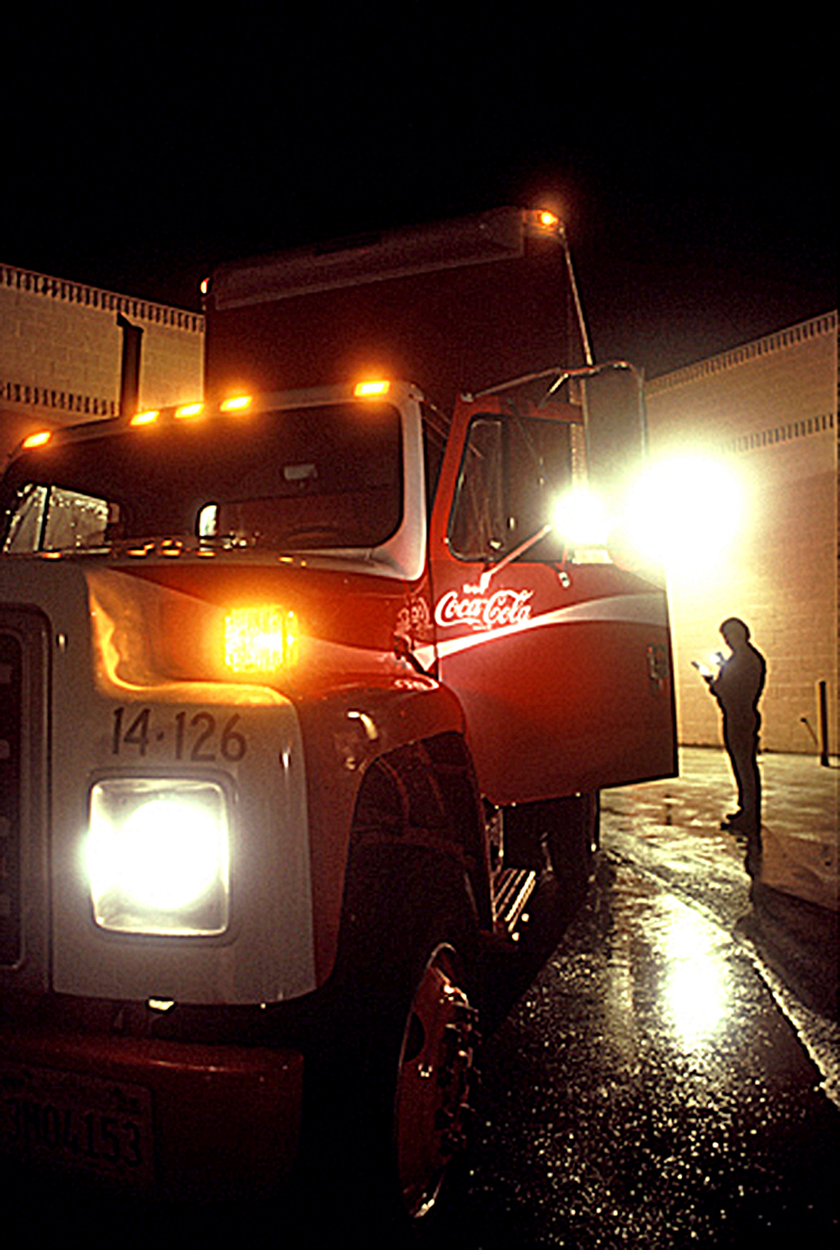
In the photo above that I shot for the Coca Cola Bottling Annual Report, I used the broom and rake to clean up the area, the fifty feet of hose (every bit of it) to wet down the pavement, the small mag light to light up the lettering on the truck’s door, the duct tape to secure the flashlight to the six foot ladder, and the garbage bag to clean up whatever trash I created.
Check out my website at: www.joebaraban.com and come shoot with me sometime.
Have you ever wished you were at a location at sunrise when instead, you were there at sunset? The wrong time at the right place?
Here’s the reason my work looks like it does:
For most of my career, I’ve known exactly where the sun would come up (to the degree), and exactly where it would set…anywhere in the world, on any date I choose. I also know exactly what time (to the minute) it will hit the horizon coming up and going down. I know how long ‘dawn’ is (the glow in the sky) prior to the actual sunrise, and how long ‘dusk’ is (the after glow in the sky) after the sunset.
I use a computer program called “Sunpath“. Whenever I know where I’m going to be shooting and when I’m going to be there, I put that information into it and it prints out a chart. From that, I know where I need to be to get the early morning light and late afternoon light.
Now, I use a “hand bearing compass” that you can get online. It’s called a Morin 2000, and it looks like a hockey puck. Inside it is a wheel with the 360 degrees marked on it. You can sight with it like you would a camera. When you go to the site, there’s a demonstration of how you use it.
I picked the date New Years Eve. 2011, and the location is for Crockett, Texas where I have my private “Stretching Your Frame of Mind” workshop for two couples.
Remember that these times will be when the sun actually hits the horizon. If you look at this chart, you’ll see when the first light of dawn occurs and how much time you have before the sun comes up. The same with how long you’ll have shooting in the after glow (dusk) until it’s dark. Look where it says dawn and dusk.
Now with this information, I can plan all my shots that I’ve scouted beforehand with my readings and compass. What I do is stand at a location I want to shoot, and look through my compass. The wheel inside floats in water, so what I do is point the compass to the appropriate degree from my readings (keeping it level with the ground).
I’ll know if a mountain or a building will block the sun right at sunrise, and I’ll know when the sun will break clear, and what time it will.
If you look at the bottom of the chart, you’ll see a graph. The graph charts the sun all day long. If you follow the curved line, you’ll notice a series of small black dots on it…that’s the sun. That’s the altitude of the sun in degrees. I have an instrument called an ‘Inclinometer’ . This device measures the altitude. So, together with the compass and the Inclinometer (you can get it in one instrument from Suunto called a tandem), I know where the sun is going to be all day long; from the time it hits the horizon on its way up to the time it hits the horizon on its way down.
This way, I can move to another location and return to that spot when the sun is clear of any obstacles…also, it sure is nice knowing exactly where the shadows will be all the time…24/7/365!!!!!! A lot of people always asks me how my color is so saturated, and the light always looks good…well now you realize that it’s not by chance. I always know where to stand, when to stand there and how long I have to stand there!
The Inclinometer is important for me to being precise, but the compass (Morin 2000) is all you would need if you think you can’t figure out the the altitude.
Finally, I’ve been told that the iPhone has an application that will give you the readings, but here’s the problem I have with that: First, it won’t tell you until your standing there. I’ll know a year in advance. Second, what happens when you don’t have service? I’m pretty sure you couldn’t get service in Big Bend National Park, with anyone!!! Of course, that’s subject to new technology.
I can get a GPS reading on my cell phone, but it’s not as accurate as looking through the Morin2000, and what happens if I don’t have a signal? Also there is a free download called a Photo Ephemeris that will also give you the information, but it’s very complicated and “above my pay grade”.
Having this kind of knowledge and tool is SOOOOOO powerful in creating photographs. I’m sure you can imagine!
With this knowledge, you’ll know if the glow behind a skyline, and it’s reflection on a body of water, will look the best at sunrise or sunset.
For people that have or will take a week workshop with me know, or will find out how ‘uncomplicated’ this really is. It may only seem difficult, but in reality it’s quite easy. You’ll get it in fifteen minutes on the first day.
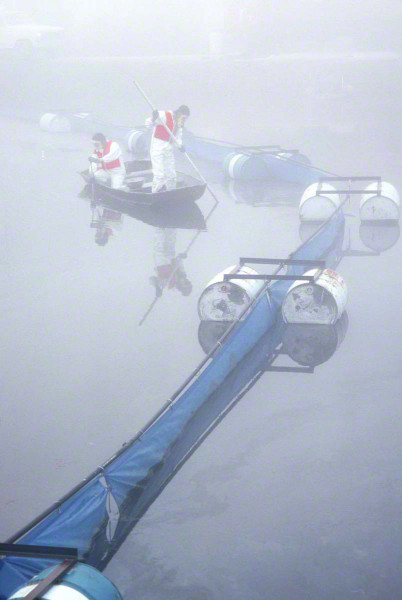
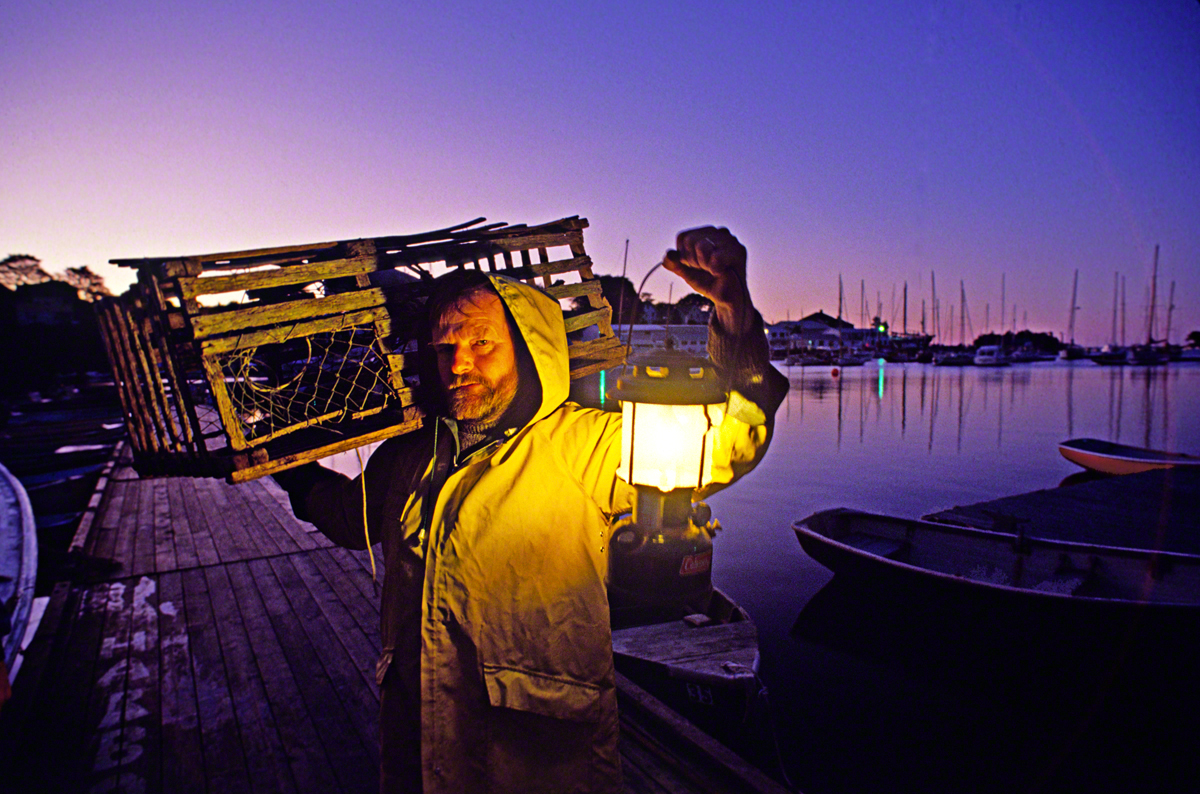
The above photograph is an image I took while teaching my “Stretching Your Frame of Mind” workshop at the Maine Media Workshop. The class wanted to see how I go about setting up a photograph, from scouting locations with Sunpath and my compass, to gathering props, and a way to light him. By the way, this was one of my students we turned into a Lobster-Fisherman. At first, he didn’t want to put the trap over his shoulder because he said that they never did that.
I had to convince him that it was “taking license for the sake of art”!!!!!!
Based on my readings, I knew ahead of time that the sun was going to rise behind him and give me that glow.
Below is another example of having to know exactly where the sun was going to set.