Photo Ops: Window Light

Nothing like window light!

When I was starting my career almost fifty-four years ago, there wasn’t a lot of money for equipment, especially lighting equipment. That is if I even knew what to do with said equipment if I had the money to buy it. I relied on my training in Art to get me through any lighting scenarios. What I mean is that I used available light to paint and that often meant using window light. As a result, when I grew up I was confident enough to use the same available window light for just about any kind of job that walked in the door of my first photo studio.

In fact, in the early days, I had a small space that was the bottom floor in an old house. My lighting set-up was a large window in the front of the house that faced North. I lit everything there from portraits to still lifes. At the time, I didn’t realize that it was the best possible way to light people and by the way, during the last few years, it has made a huge comeback.

In my online class with the BPSOP, and in my “Stretching Your Frame of Mind” workshop I conduct around the planet, I always suggest available window light and at the same time stressing to avoid fill flash like it was the plague. Even on a gloomy day, there’s going to be enough light coming in from the outside to create a quality portrait. In the winter months, I tell the students that don’t think there’s anything to shoot until the thaw, to shoot indoors using the light from a window. Even when I could afford to take lighting with me on assignments, I would still look for available light from a window first since I was always tried to create it with my strobes and softboxes.

As is the nature of window light, side lighting is going to be the easiest way to light people. I prefer this light since it adds depth to the subject’s face. What I mean by “adding depth” is to make one side lighter than the other, and use a small white reflector to bounce a little light back on the dark side. This falls under one of the basic elements of visual design I teach in my classes called Form.

Form refers to the three-dimensional quality of an object and has but two dimensions: height and width. To create the third dimension, namely Depth, you have to side-light the object; otherwise, it will appear flat with no sense of shape and volume.

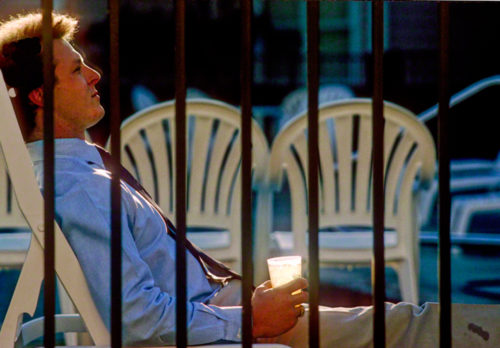
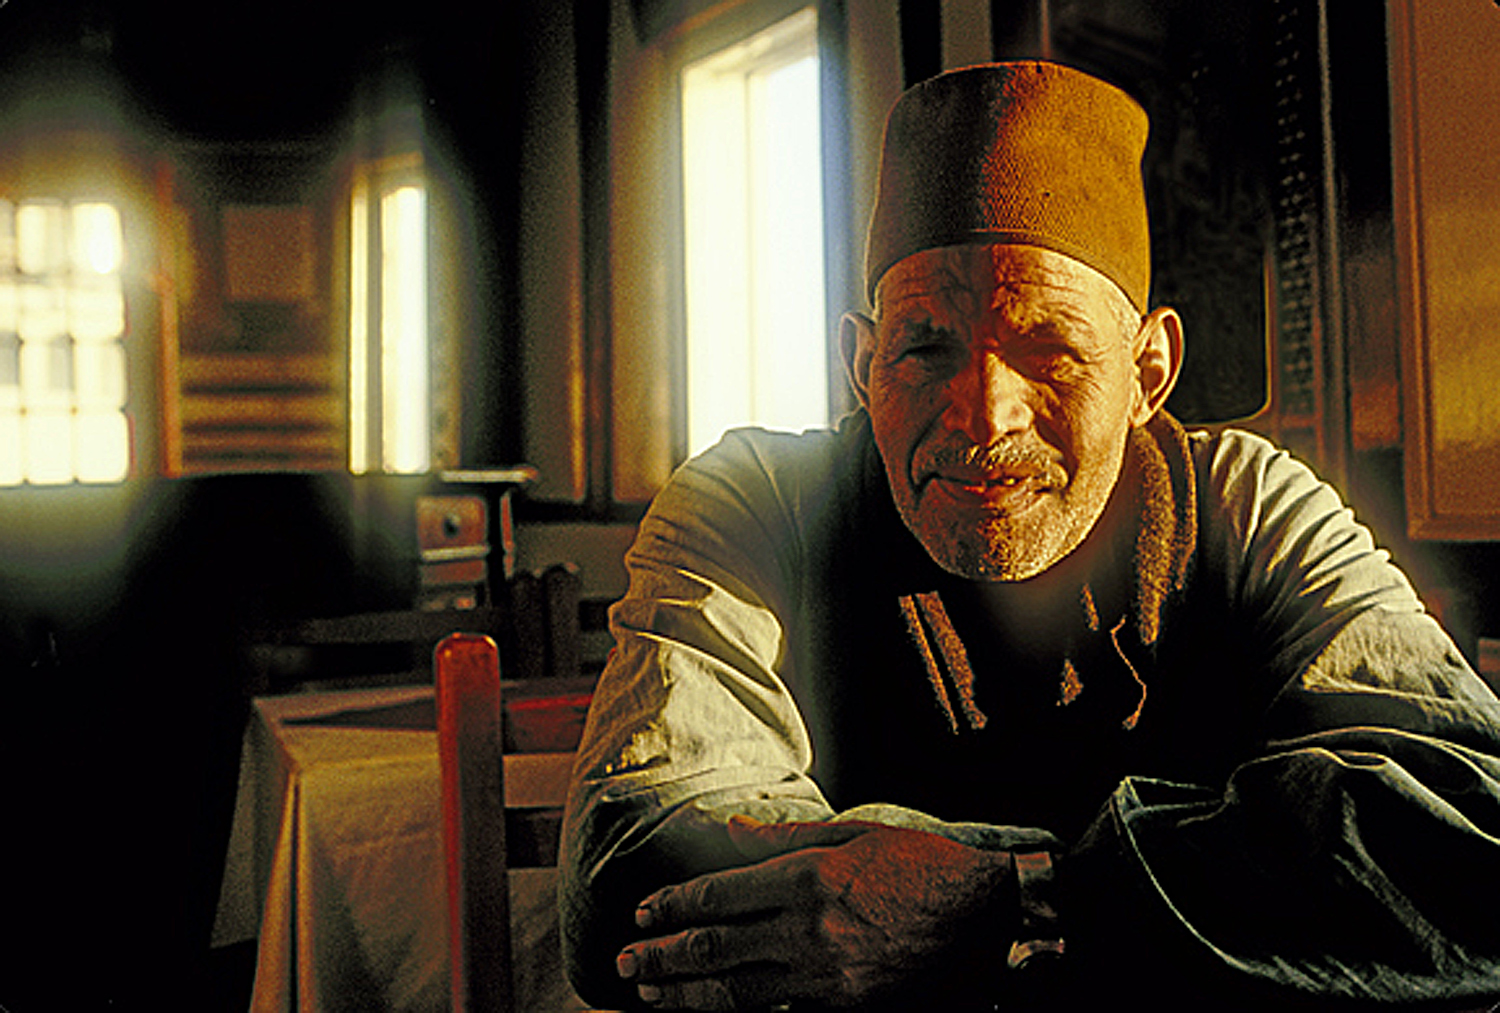
Look for rooms with multiple windows that will offer different kinds of lighting. one of my favorite ways to light a person ( as in the above photo) is to have them side lit with a window just out of the frame, and have windows in the background you can blow out. Ok, here’s a good time to tell you that whenever someone tells you that “clipping the highlights”  is not recommended, don’t walk away from them…RUN LIKE THE WIND because that person is going to have you take average, predictable photos; who wants that?

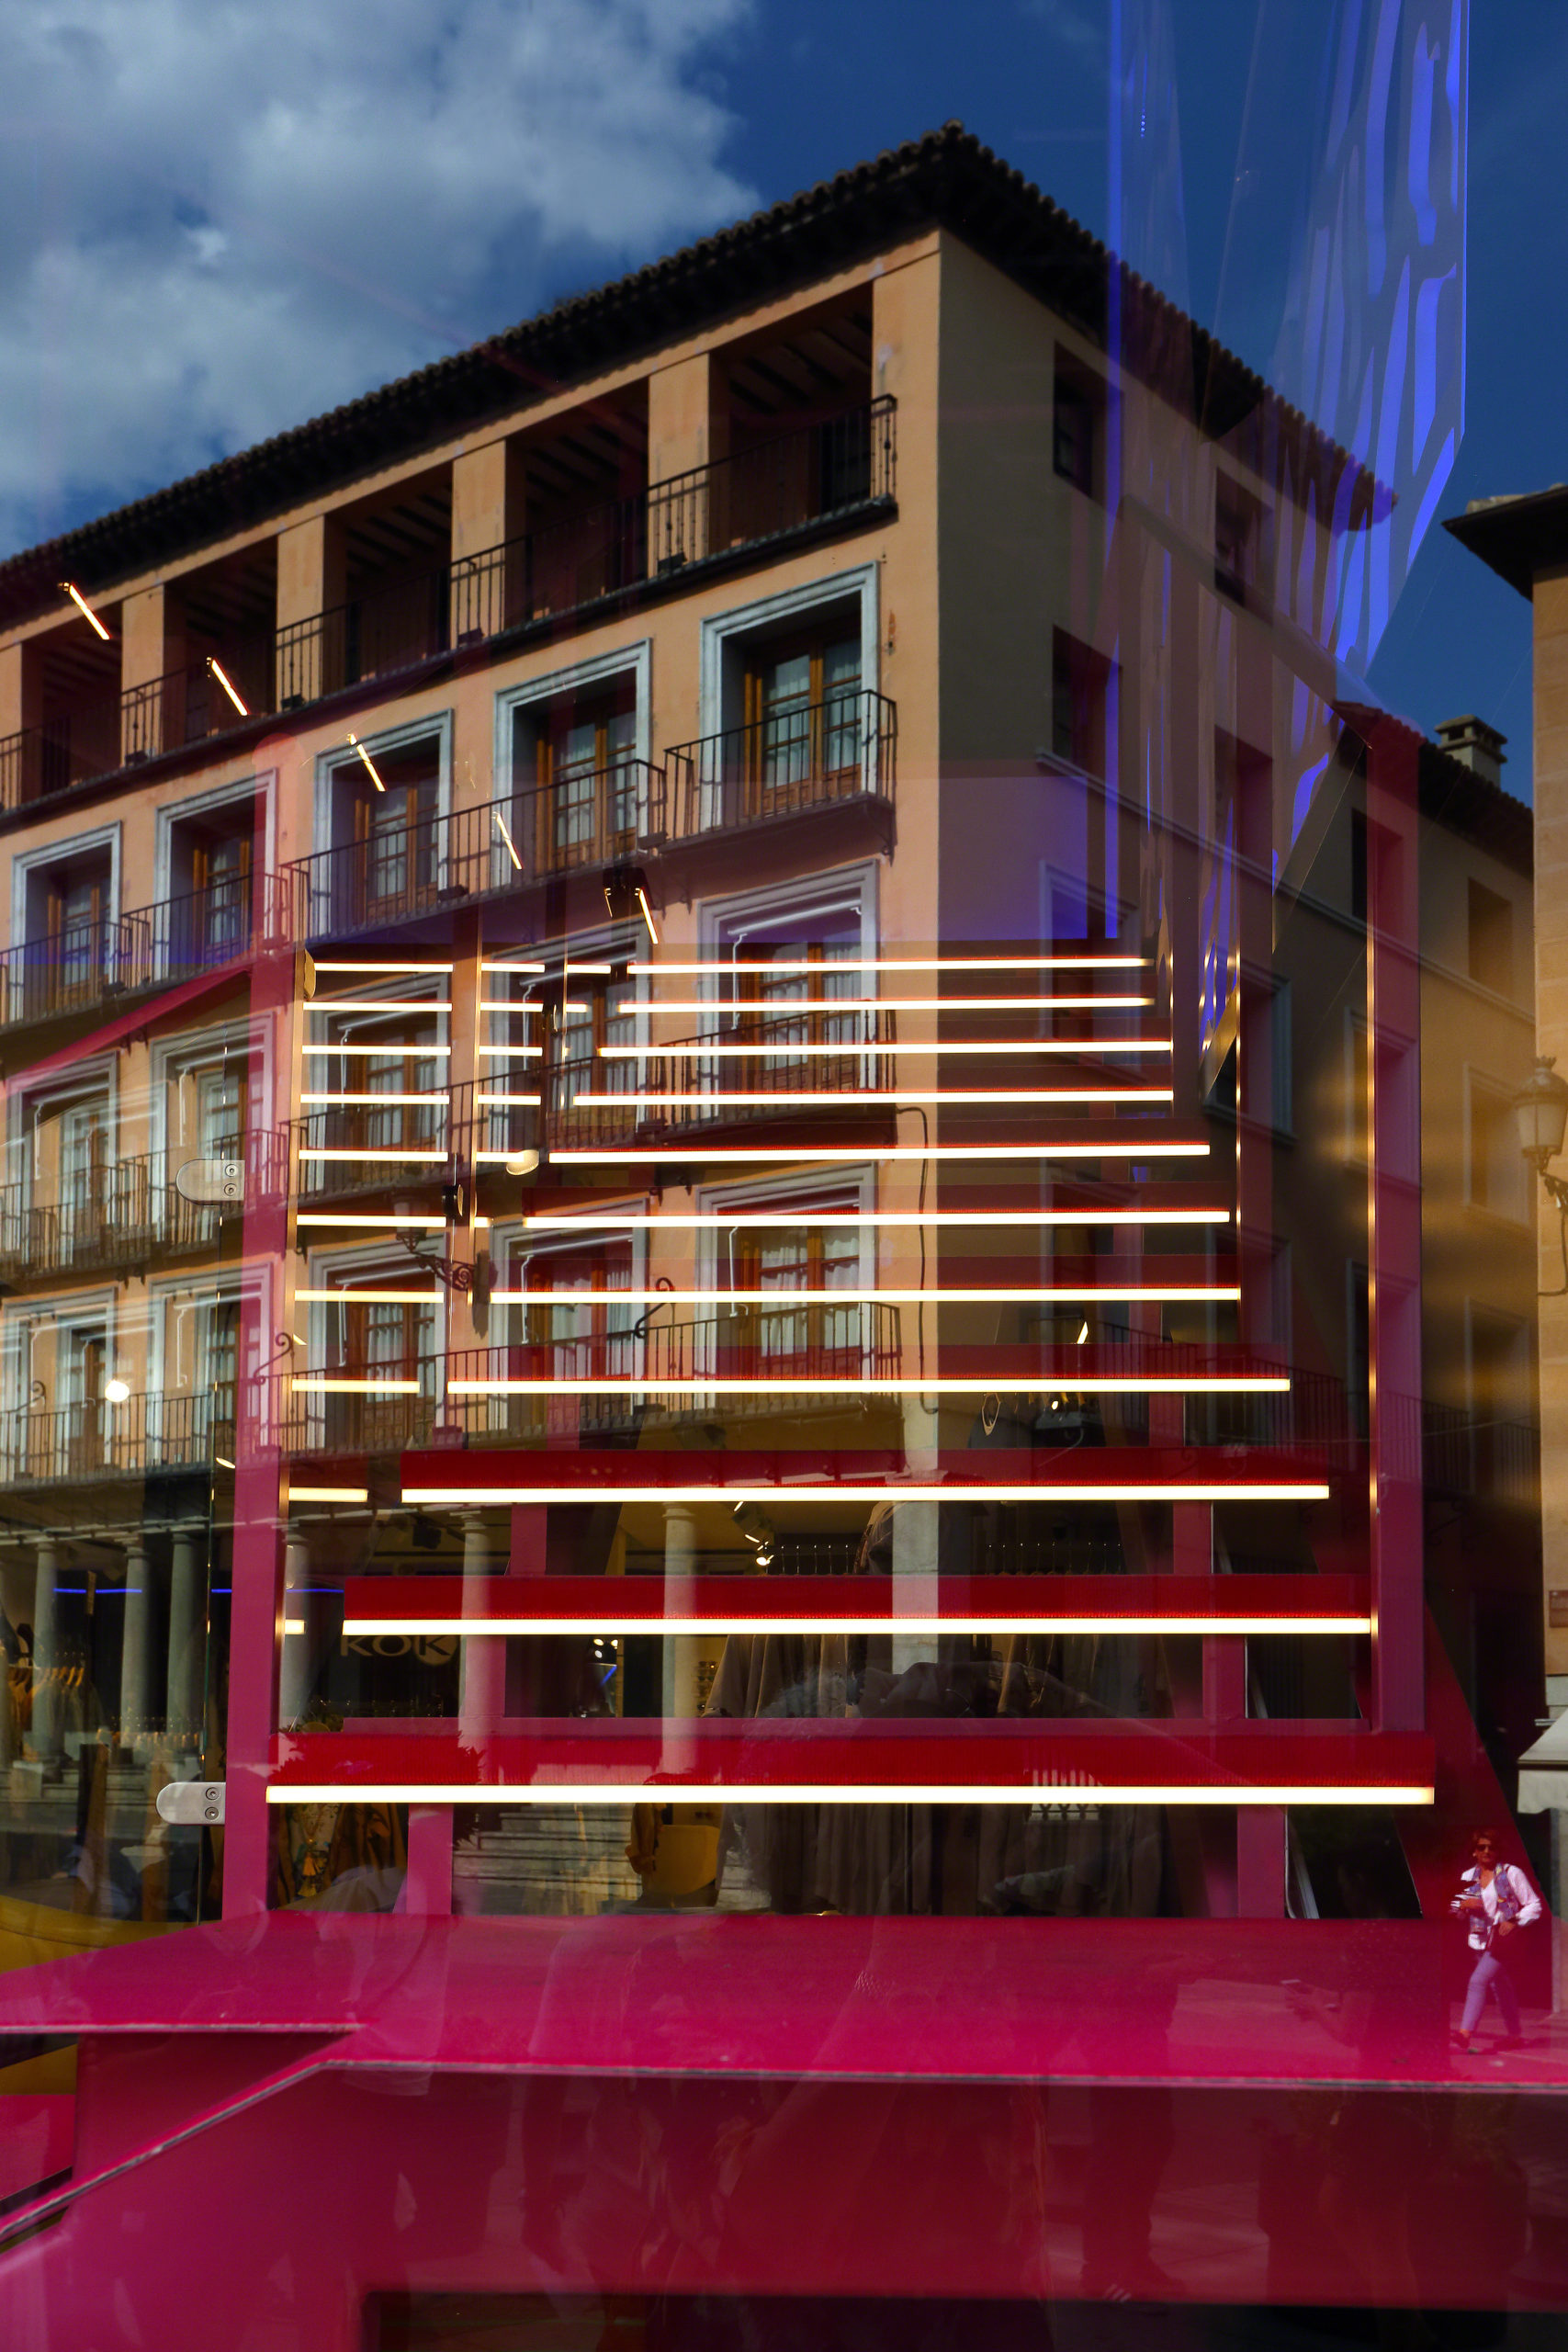
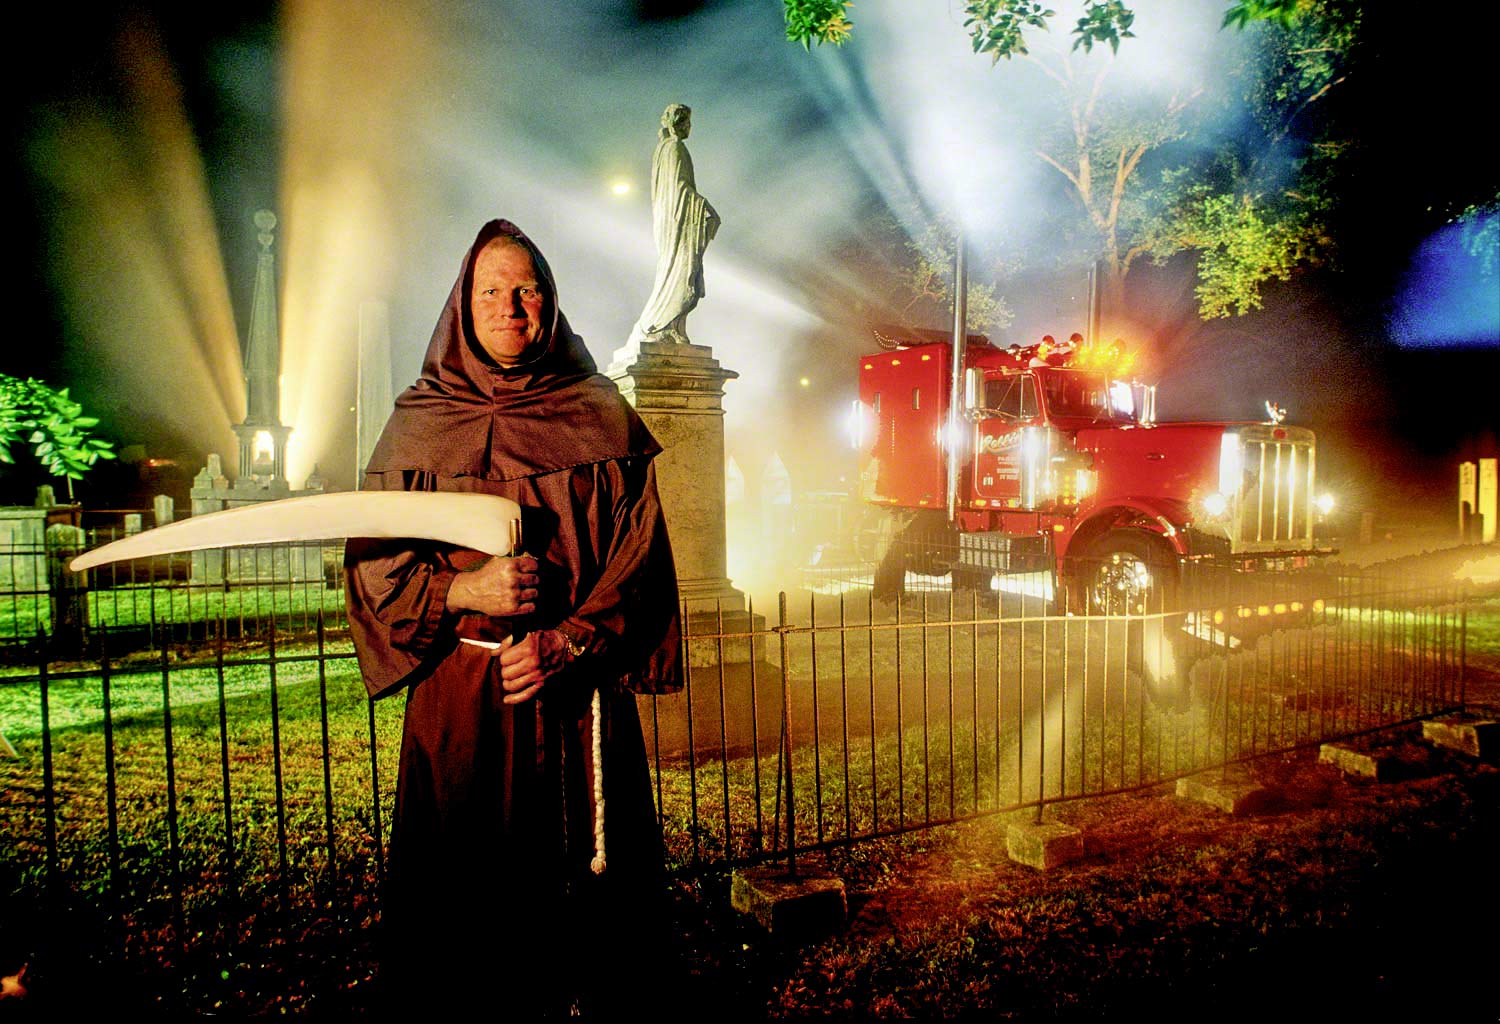
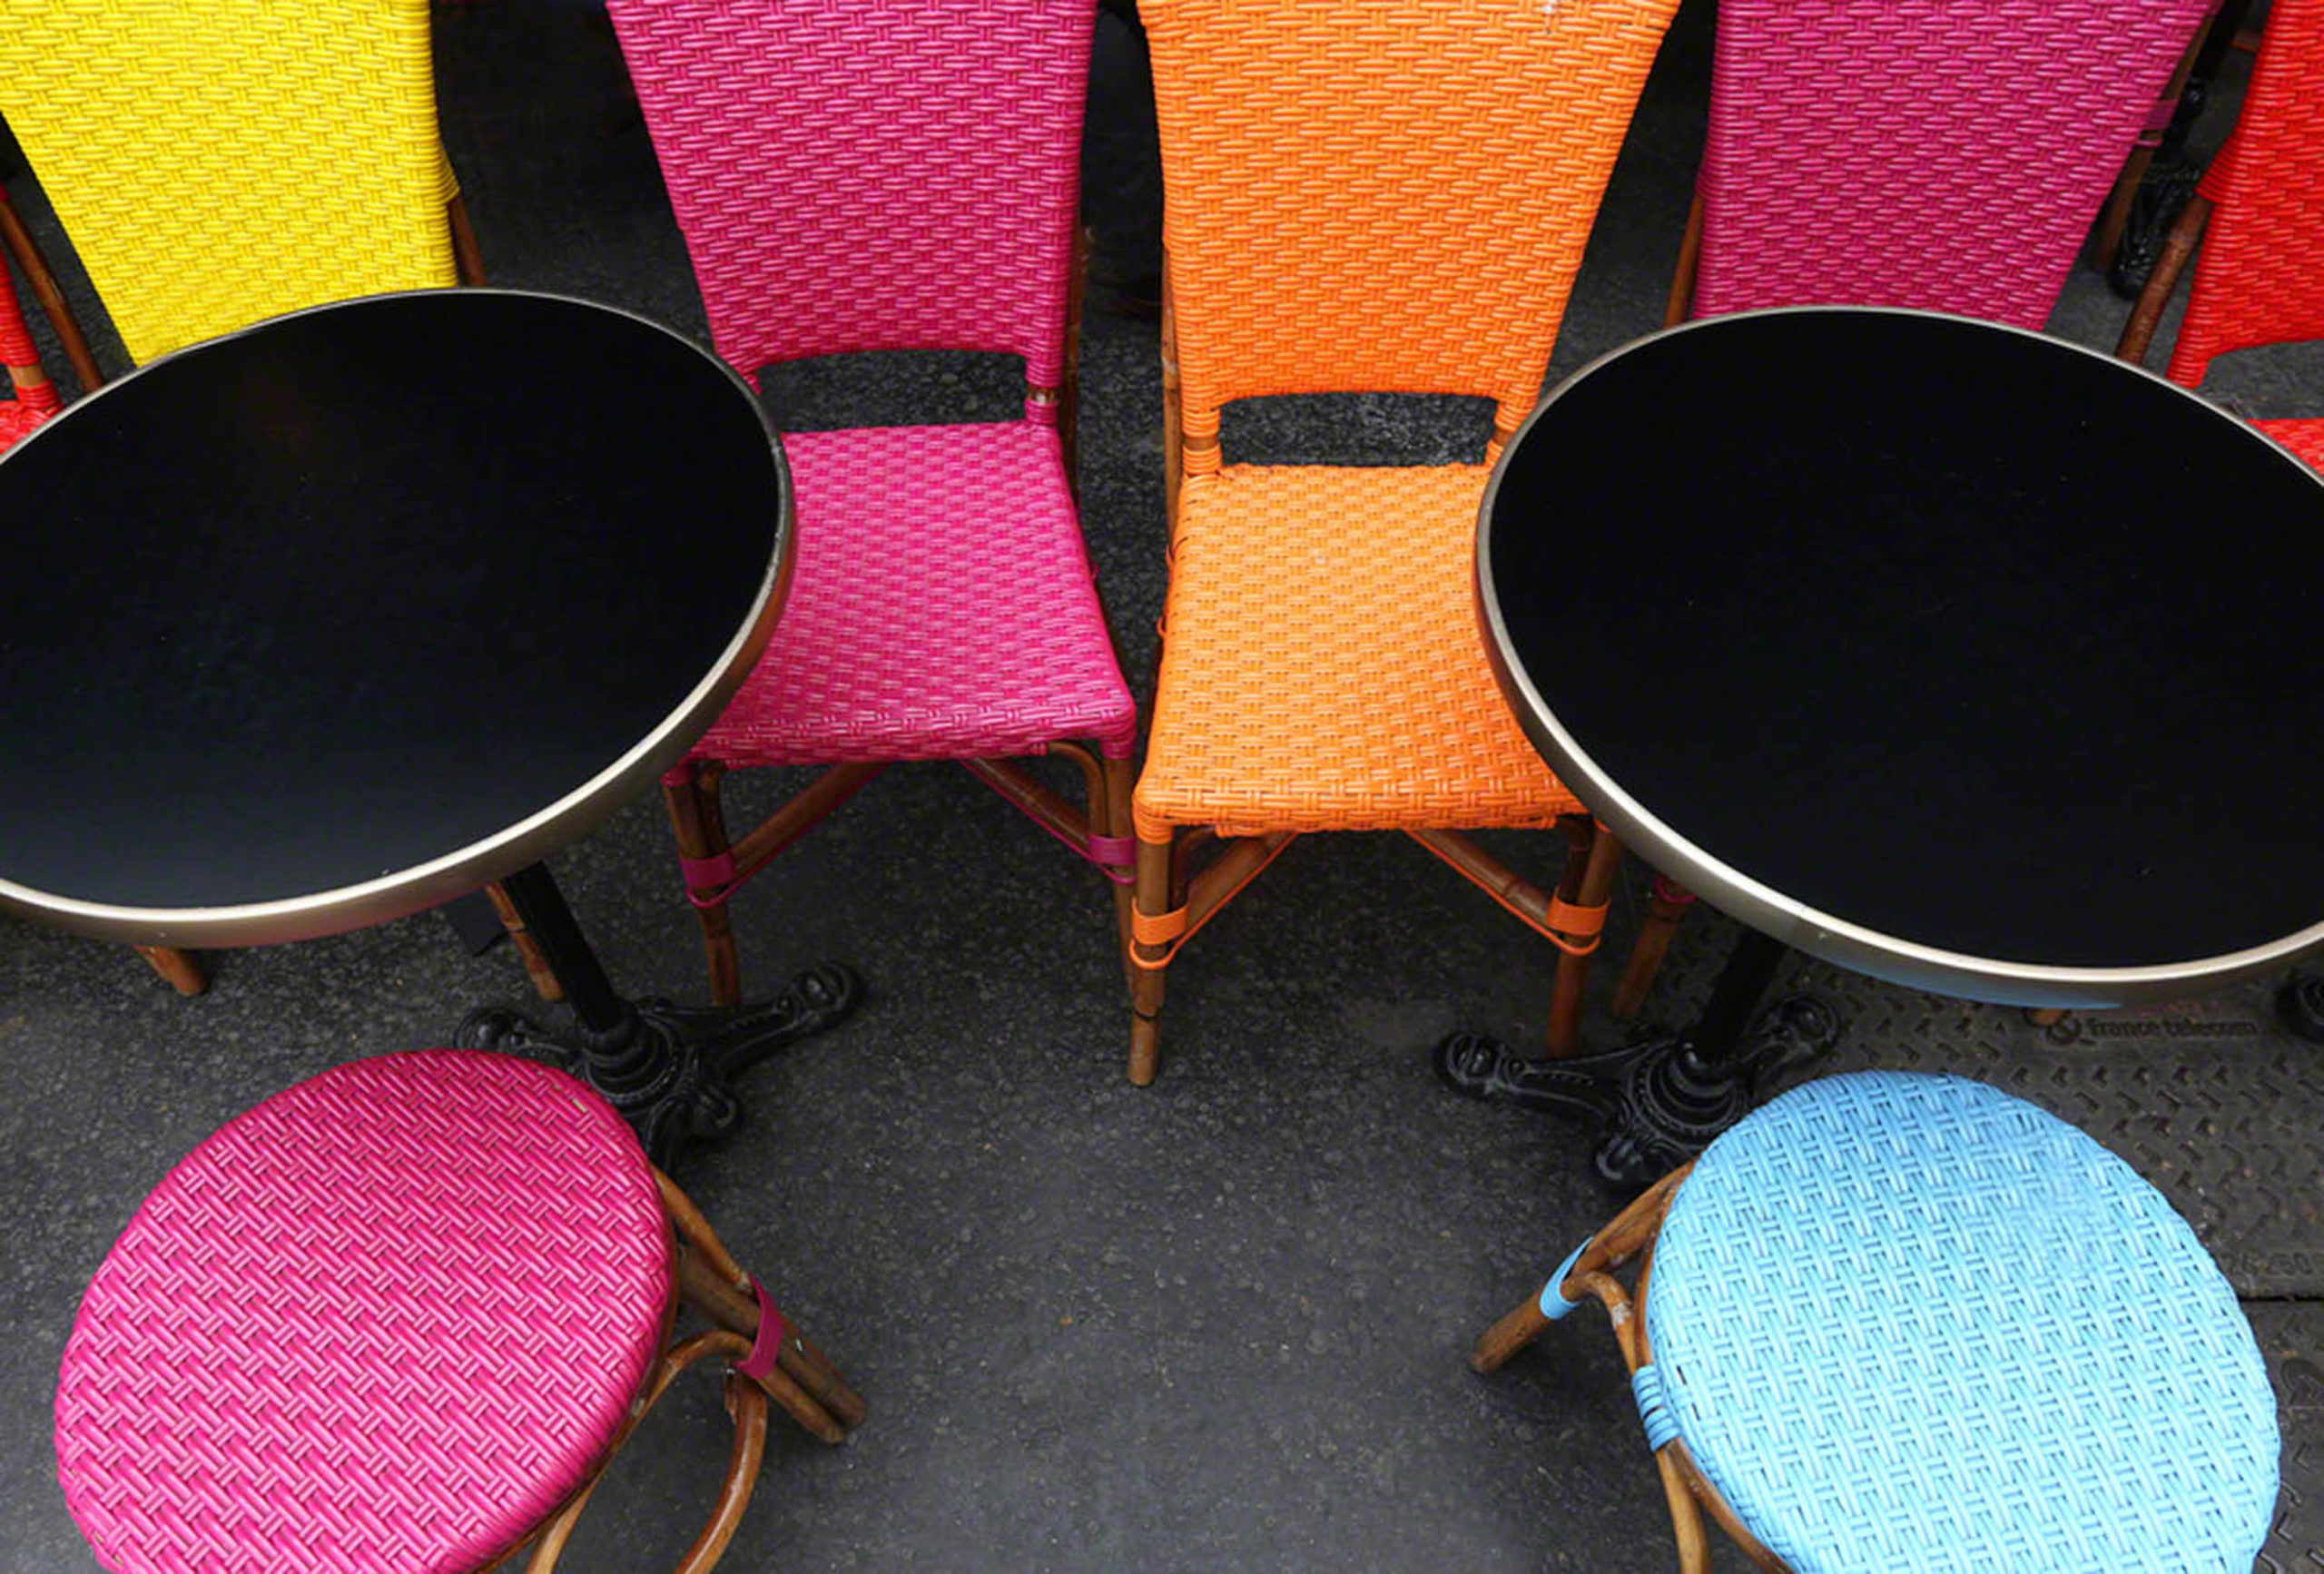
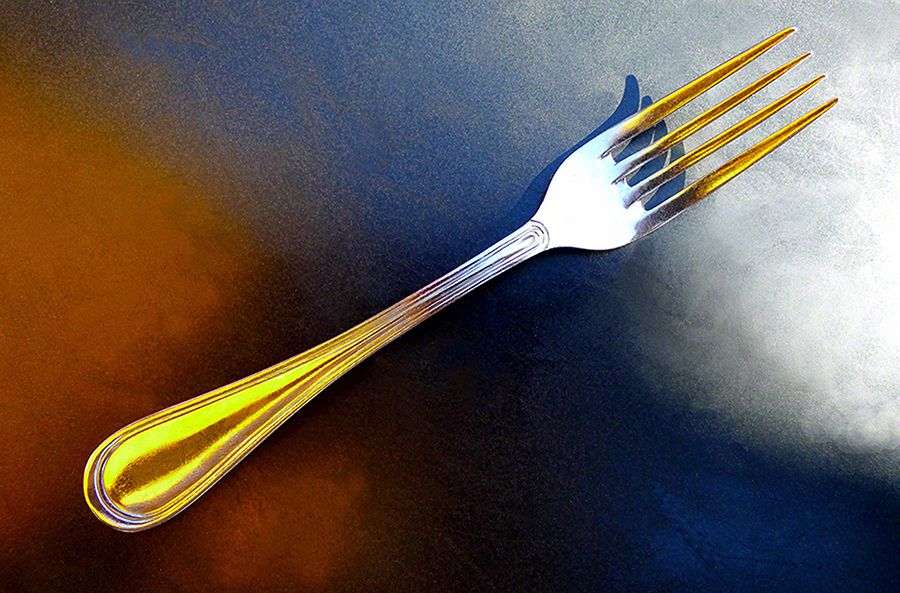
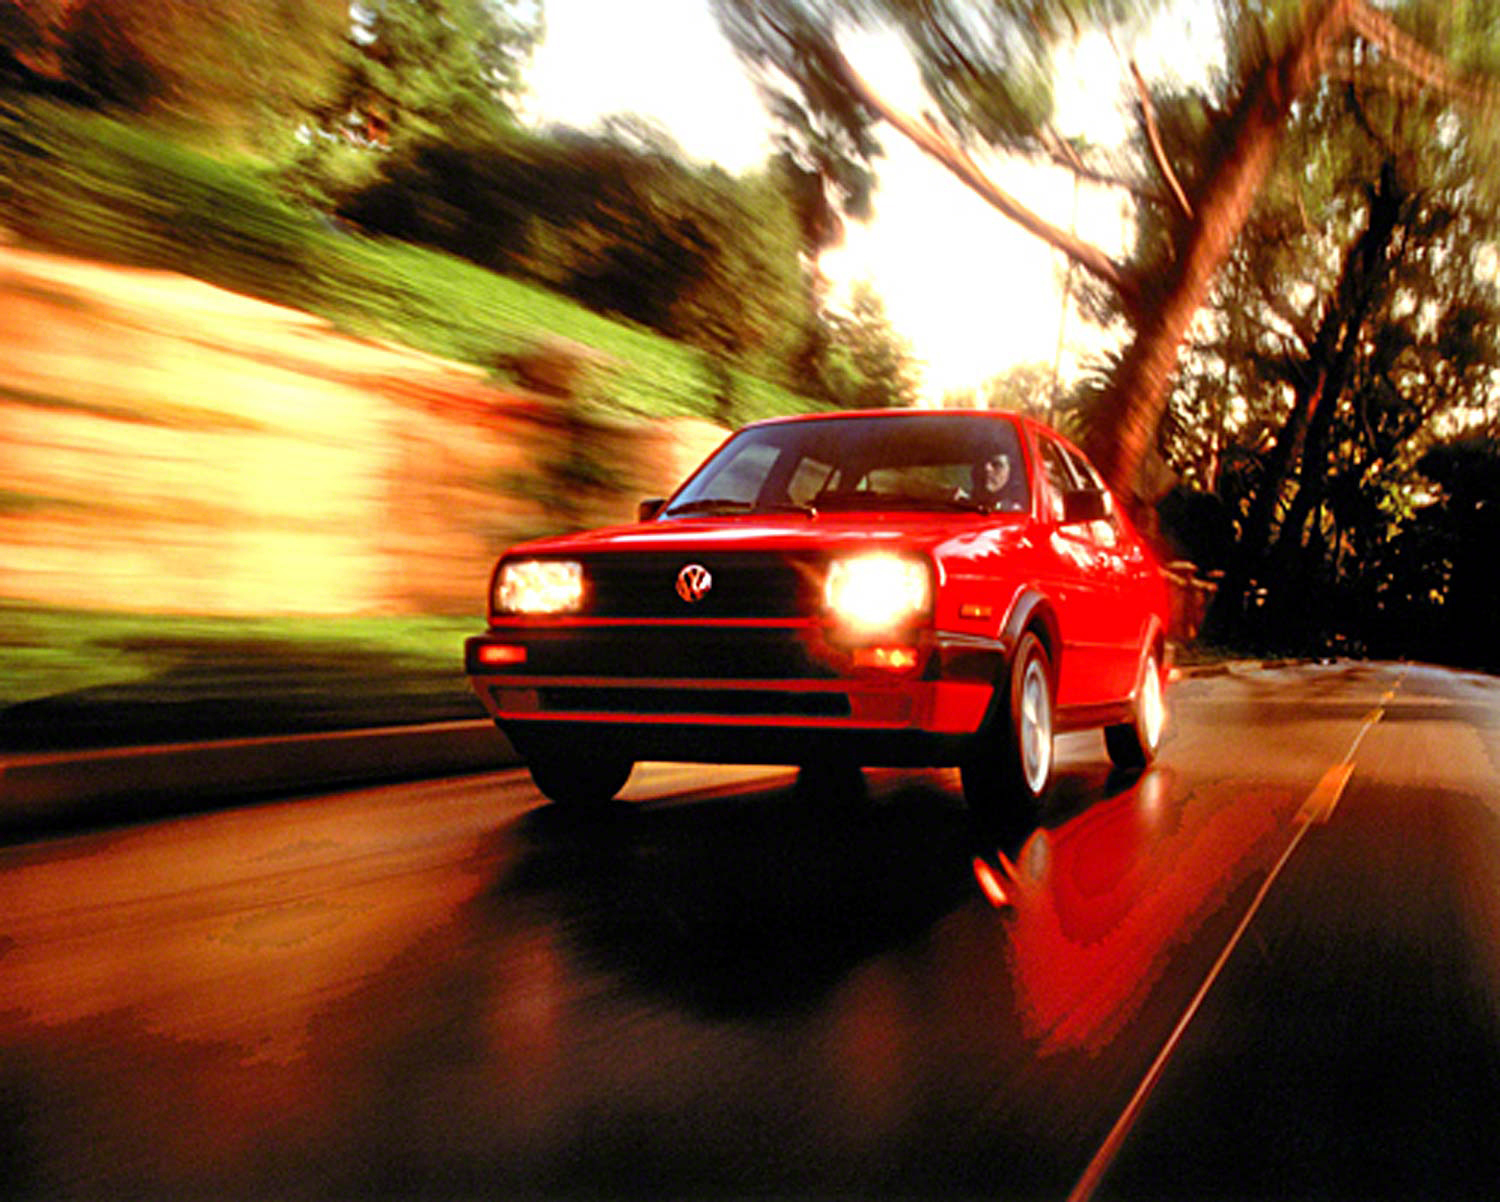
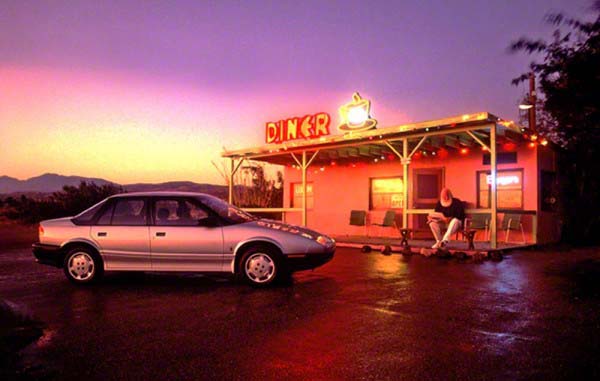
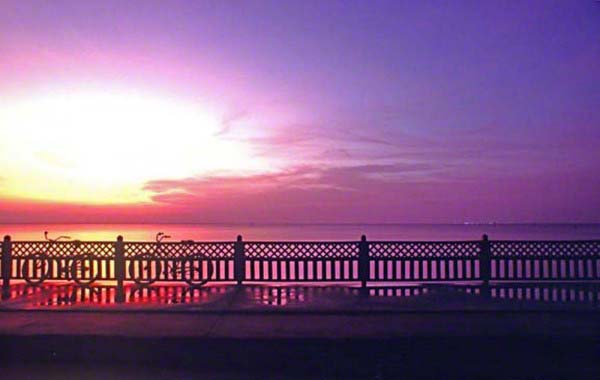
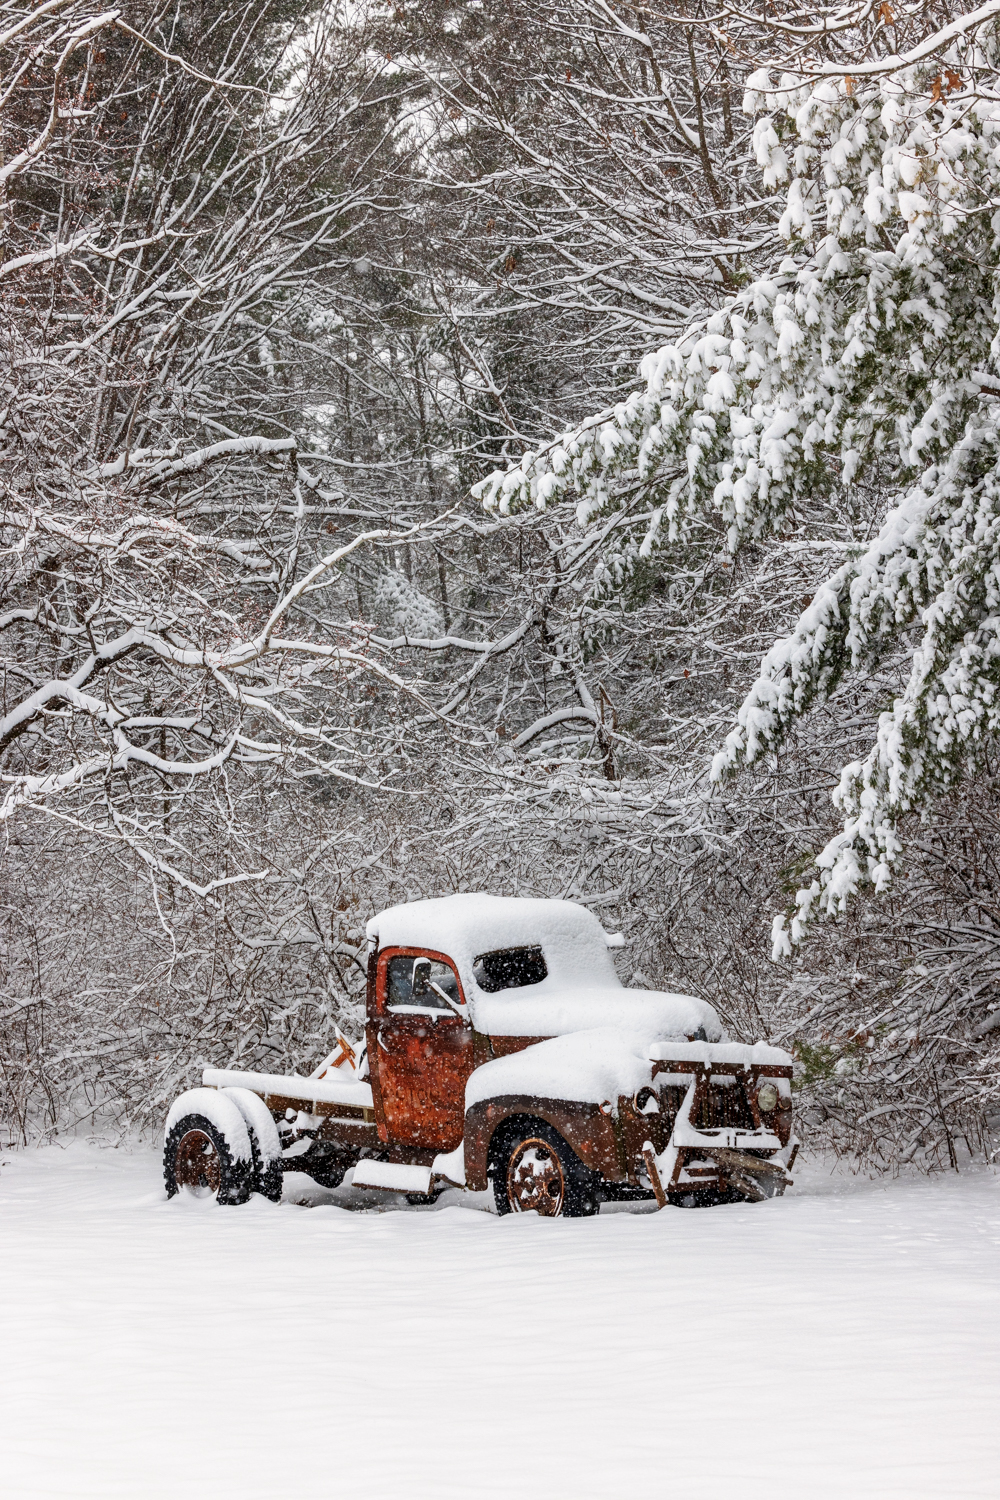
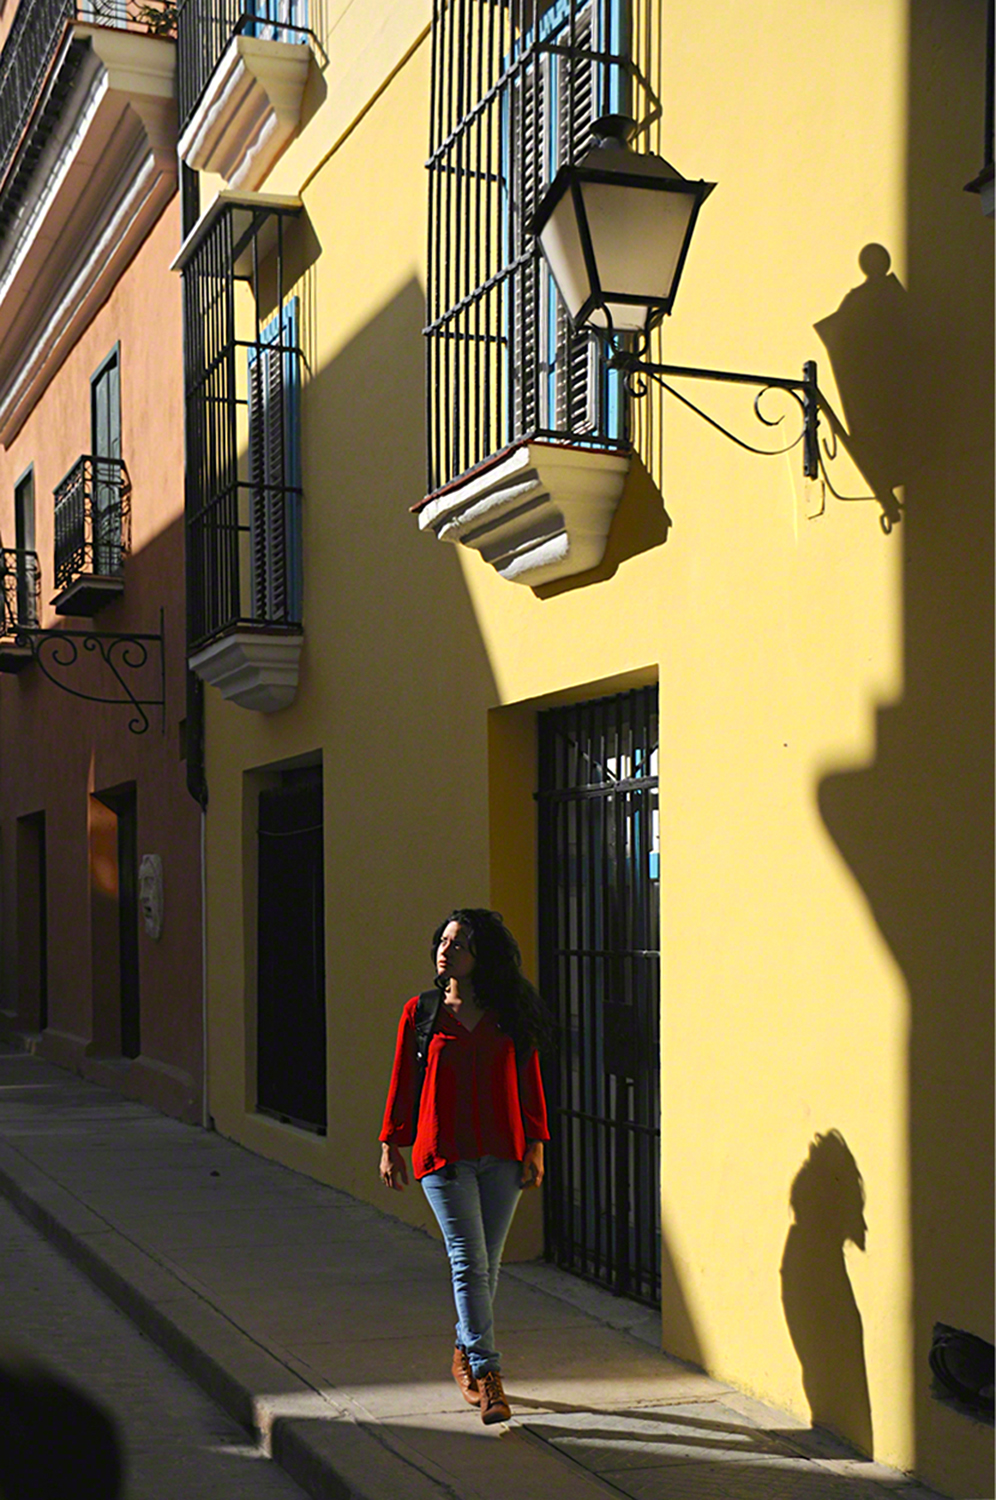
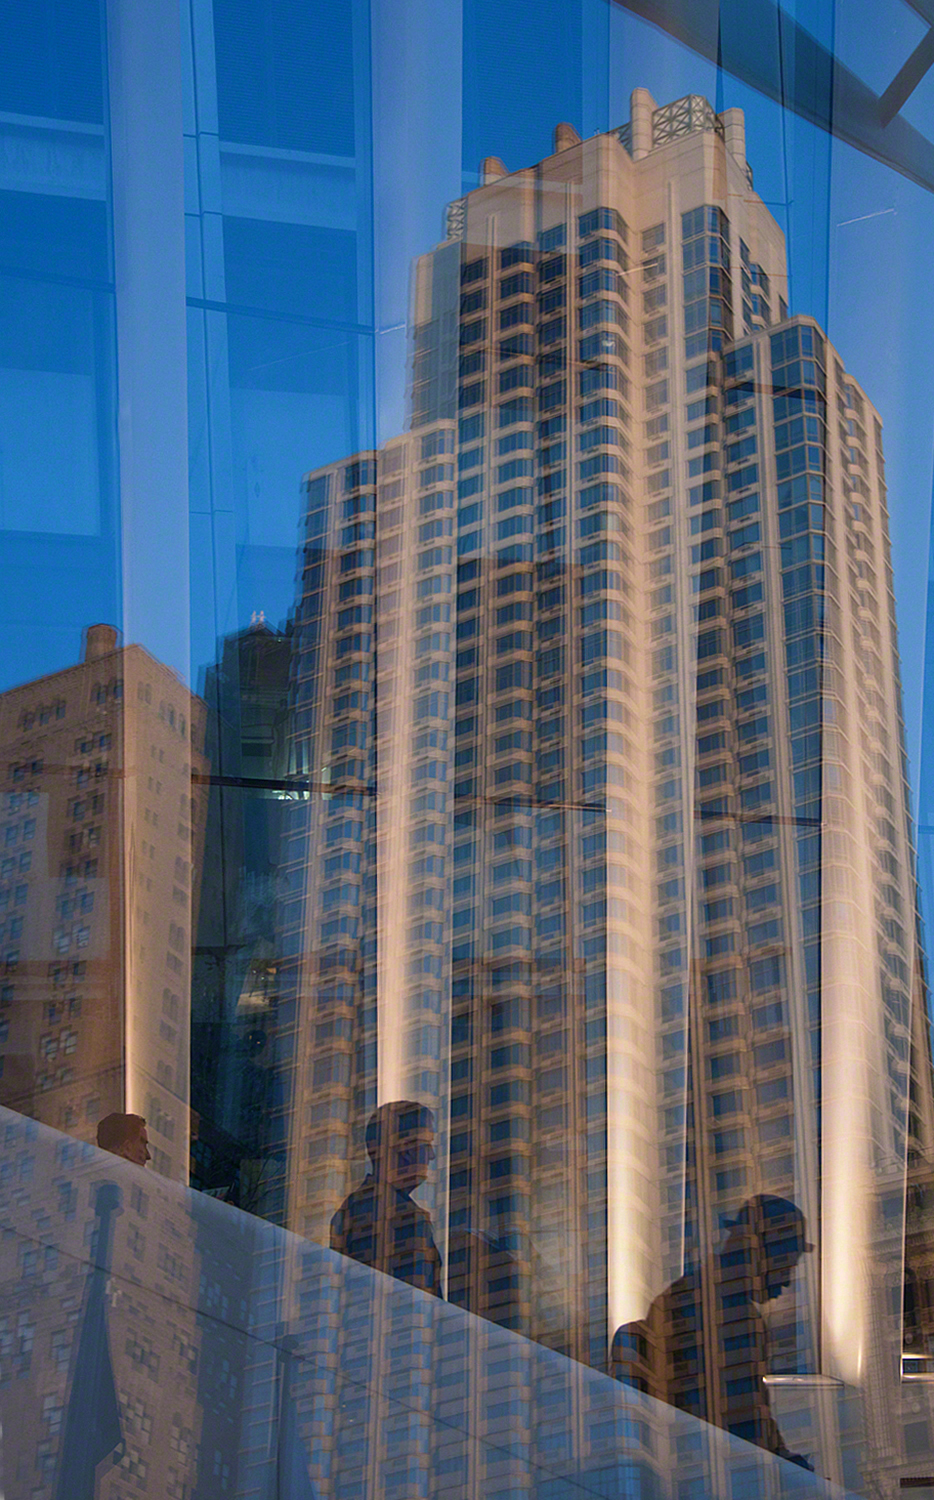
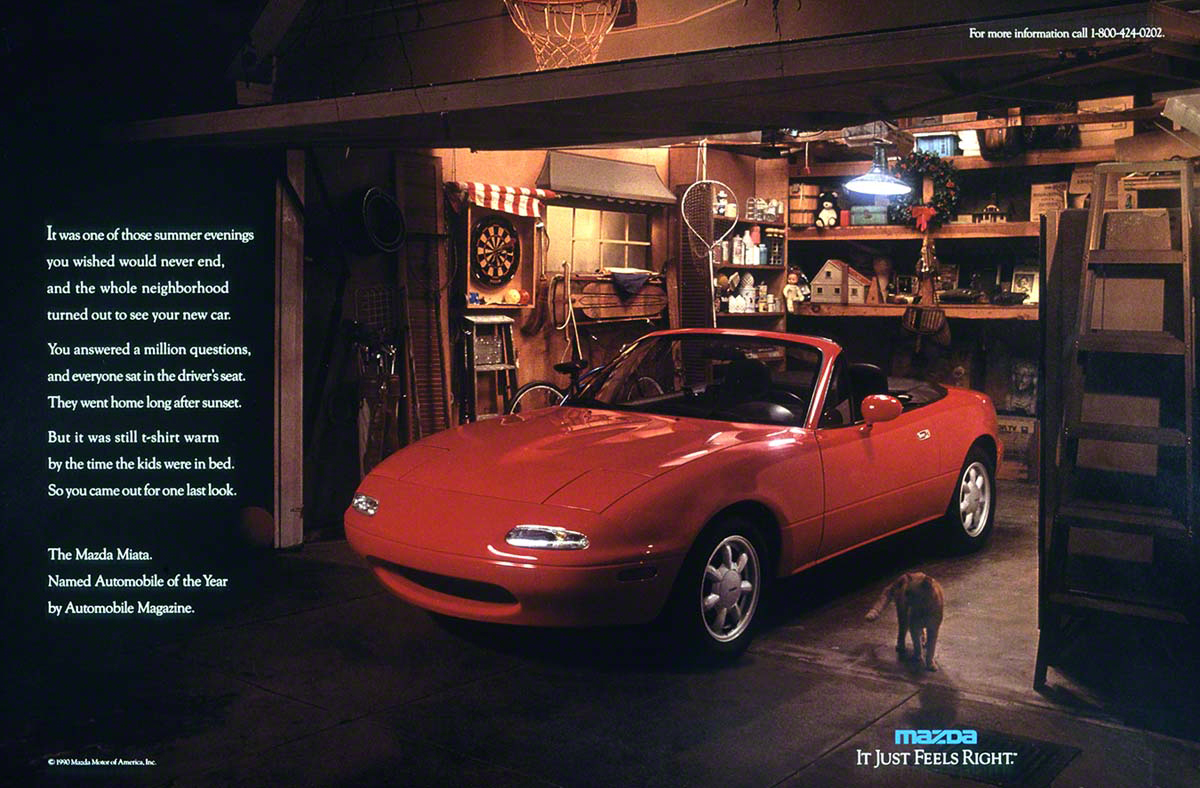
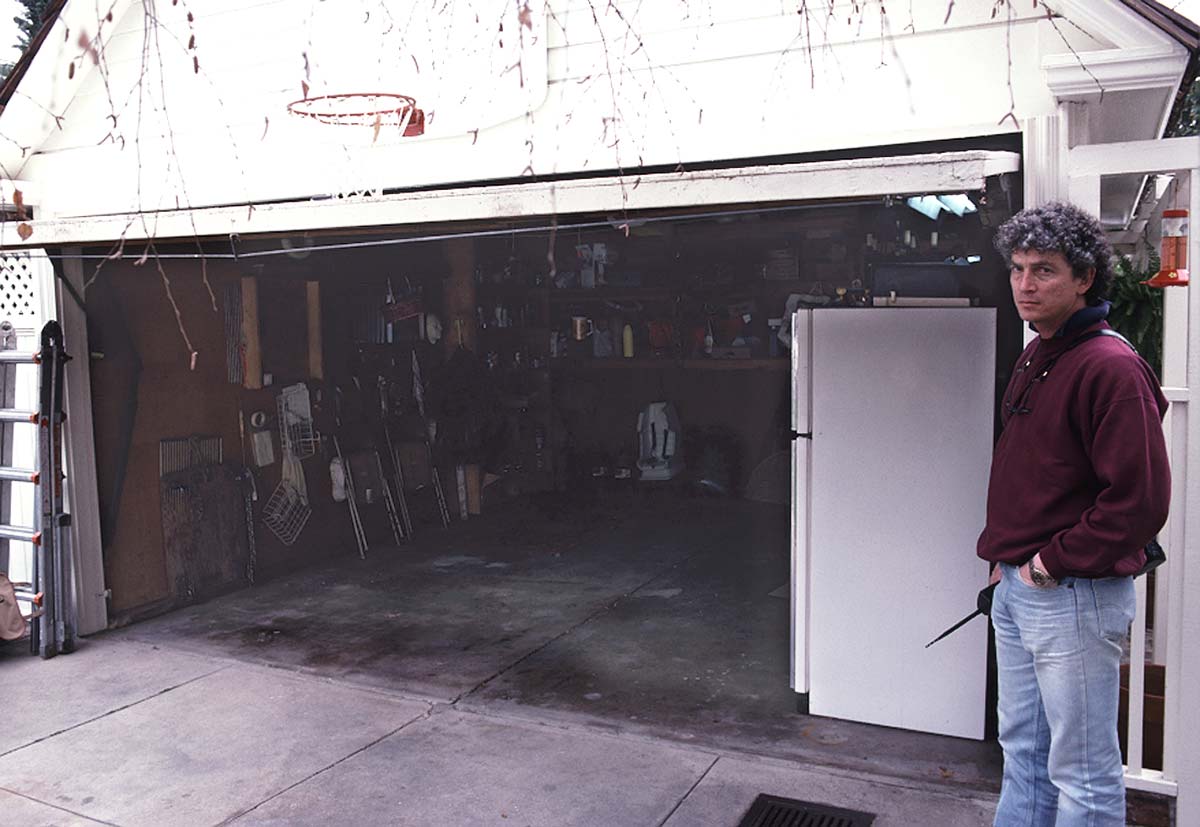
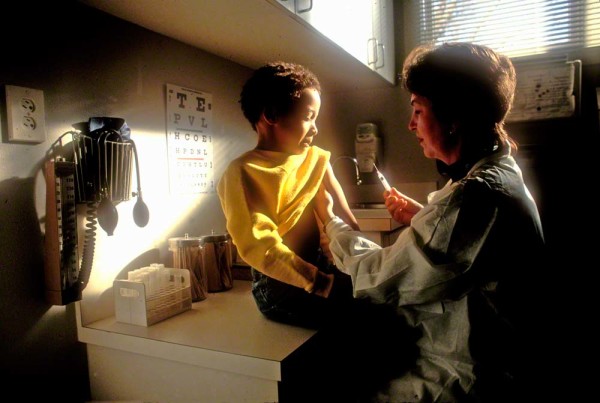
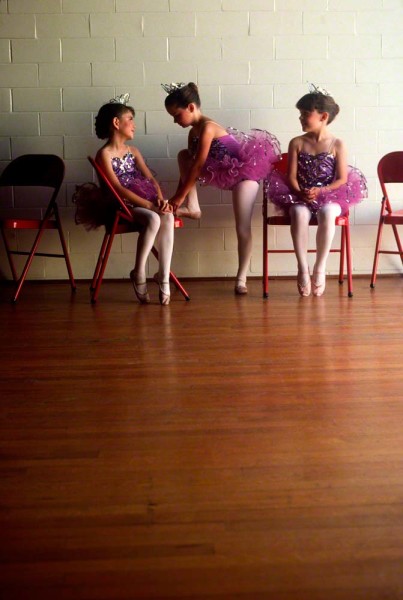
Take a look at this slideshow where the only source of light is a window somewhere usually out of the frame…but not always.

Visit my website at: www.joebaraban.com and check out my workshop schedule at the top of this Blog Come shoot available light with me sometime. Follow me on Instagram.

https://www.instagram.com/barabanjoe/

JoeB

Food For Digital Thought: Transcend the Ordinary

Transcending the ordinary

I teach fellow photographers how to incorporate the elements of Visual Design and composition into their photography. In my online class with the BPSOP, and in my “Stretching Your Frame of Mind” workshops I conduct around the planet people sometimes become complacent in their approach to their photos. They’re no longer interested in being the slightest bit critical of any of their images, and therefore are not putting any effort into the final results.

I once had a man taking my online class tell me that he wasn’t really interested in using these elements to take stronger photos. He told me, “I’m only interested in taking halfway decent pictures”.

My first thought was why in the world was he taking my class, so I asked him. He told me that he didn’t think it would require as much work as it turned out to be, and after the second week in my four-week class, he quit participating.

If your photographic goals are to take halfway decent pictures, then all I can say is go for it. Follow the same path you’ve been following and before too long you’ll be there. Odds are that you don’t have very far to go if you’re not already there.

If you’re determined to become better at your newfound love or passion or if you just want to improve on a twenty-year-old passion, then you’re going to have to commit to working at it. One of the ways is to “Transcend the Ordinary”.

Henry David Thoreau once said, “It’s not what you look at. it’s what you see”. I’ll add to that with one of my older “Personal Pearls of Wisdom” and tell you that “if you don’t like what you see, then photograph what you’d like to see”.

Don’t settle on walking up to a situation, stopping and bringing the camera up to your eyes, and snapping off a couple of frames. You might walk away with a good photo, but chances are that you could have taken a photo that no one else will find interesting but you. Now, if you only take pictures for yourself with absolutely no intention of sharing them, then proceed the way you are.

If you’re like most artists (and we are artists whose medium is a camera instead of a paintbrush), then think about ways to take an ordinary situation and take what I refer to as “Up a Notch”.

The next time you go out shooting, don’t look for the same ways to shoot the obvious, instead look for new ways; ways you conjure up in your imagination.

When you’re composing your shot, and it feels or looks like photos you’ve seen before, DON’T SNAP THE SHUTTER!!! Walk away because the best photo you’ve ever taken could be a photo you saw in your mind that was right around the corner.

In the photo above, I was shooting a leasing brochure for the apartments the man was living at. The client wanted a shot that conveyed the idea that when you came home from work, you could come by the office and get a free cocktail and go out by the pool.

I’m not sure how many times this idea has been photographed, but it could be up in the millions. One of the problems was that the pool area was surrounded by buildings so there wasn’t going to be any “Golden Light” to help. I had to shoot it when the sun was much higher than I liked.

I knew I was crossing into the “been there, done that” world and refuse to go without a fight. I walked around the iron fence and put the man where he would be backlit. The rim light around him and the glow of his gin and Tonic made the shot work. I had transcended the ordinary!!!!

Visit my website at: www.joebaraban.com and follow me on Instagram https://www.instagram.com/barabanjoe/be sure to check out my workshop schedule at the top of this blog. Come shoot with me sometime, and it won’t be ordinary.

JoeB

My Favorite Quotes: Leroy Van Dyke

I don’t always Walk on By

Ok, so my guess is that you’ve never heard of this guy. Well, it would take two things that would help…being old and loving CW music…Country and Western, that is!

I qualify for one of them, maybe both. I’m old enough to know Leroy’s rendition (Dione Warwick made it famous). I’m not a fan of current CW music because to my ear it all sounds the same. However, I do love the music from the forties and fifties.

The other day I had on a classic Country and Western CD, and this song came up. When it did, I immediately thought of what I ‘preach’ to my students that take my online classes with the BPSOP and those that come with me on one of my “Stretching Your Frame of Mind” workshops I have been conducting since 1983.

The title of the song is, Walk on By and the reason why I identify it to my teaching is that I’m invariably being told by one of my fellow photographers that even though they can’t seem to create a good composition, they go ahead and shoot it anyway.

Personally, I can’t think of a worse (photographically)  decision…if your goal is to become a stronger shooter. If you’re not happy with your photo, then skip it…Walk on by. The best photo you’ve ever taken could very well be your next one, and it could be waiting for you right around the corner.

In the old days when you were shooting film, and you had to pay not only for the film but the processing as well, you might have given it a second thought. Unfortunately, in the digital age, you can shoot as much as you like and not worry about the cost.

I say cost in a monetary sense. The cost to your ability to pick and choose based on the quality of the subject matter and the following composition is priceless. It’s hurting you far more than you can imagine.

Give this some Digital Thought the next time you’re out shooting. If it doesn’t feel right, then it’s probably not….Walk on By and think of this song: https://www.youtube.com/watch?v=8QlqQA8CyjE

Visit my website at www.joebaraban.com, and check out my workshop schedule at the top of this post. Come shoot with me sometime.

https://www.instagram.com/barabanjoe/

JoeB

Life Before Photoshop: Shell Oil Calendar

Look ma, no Photoshop.

Every time I write one of these posts, it reminds me of great memories and days gone by when you had to be a good photographer. When in order to eat every day, as in three squares,  you had to be able to take photos in the camera without any help after the fact; when Adobe was a type of house in the southwest part of this country.

Don’t get me wrong, as I tell my online students with the BPSOP, and in my “Stretching Your Frame of Mind” workshops I conduct around the planet, I’m not some kind of purist that refuses to use post-processing, I use it all the time to tweak my images. I can tell you that on occasion, it comes in mighty handy when I just can’t what I want in the camera, or I can’t leave something out no matter where I move to or stand.

It’s just that for me, I like the challenge of doing it all in the camera, and as a result, I can look at myself in the mirror and feel good that I accomplished something without any help from the new digital world created by lightroom and Photoshop. That makes me feel like a good photographer and not a good computer artist; I mean where is the line drawn between the two?

The above photo was shot for an advertising agency in Houston that handled Shell Oil. Every year Shell picked a city where Super Rigs from all over the country would gather and have a competition to see what twelve trucks would win a spot to be on next year’s Shell Rotella calendar. It was a big deal and an honor to have your truck represent one of the months.

I was given full reign to come up with an idea for the calendar and decided to take an environmental portrait of all the truck owners next to their Super Rigs. My producer was sent there ahead of time to find some locations based on our initial conversation. For the month of October, I decided on a scary theme mixed with some humor, and as I always say, if it is worth taking seriously, it’s worth making fun of…as in death and the Grim Reaper.

I told this owner of my idea, and would he like to represent October and Halloween. He was all over it like a cheap suit. We found the wardrobe and took Darin and the truck to an old Victorian cemetery. I placed all the lights in the cemetery, lit the truck, and Darin, then with a fog machine smoked it ll up to create the mood.

This was shot in one exposure without any help from any post-processing. In other words, all in the camera.

Visit my website at: www.joebaraban.com and check out my workshop schedule at the top of this blog. Come shoot with me sometime.

https://www.instagram.com/barabanjoe/

JoeB

My Favorite Quotes: Vincent Van Gogh

This is what I waned to see

We recently went to the Van Gogh exhibit here in Houston, and there were several of his quotes written on the walls. One, in particular, struck me as the way I not only teach but the way I personally approach photography.

In my “Stretching Your Frame of Mind” workshops I conduct all over the place, and in my online classes with the BPSOP, I encourage my students to realize that we’re artists. We have chosen the camera as our medium. A camera on a tripod is just the same as a blank canvas on an easel.

My personal approach is that I rarely see things as they are, rather as I’d like them to be.  I see things in my mind, and if I can see them there, I can usually create them in the camera.

Van Gogh said, “I dream of painting, and then I paint my dreams”. I’ll walk up to some location/photo op and not necessarily see what’s there. In other words, based on my thought process, I have no problem moving things around in my composition to see what I want. Of course, this is predicated on whatever permissions I need to get ahead of time.  If I need another one of those chairs that will introduce another shape or color, then I’ll move it. Conversely, if I need to simplify my composition, then I’ll take one out.

Photography, unlike painting, is the Art of Subtraction. When you use a brush on a blank canvas, you add subject matter until you get a finished work of art. In photography, you take away subject matter until you arrive at a finished work of art.

In my fifty-two-year-plus career, there have been many times when I was about to start on a project or leave for a destination I had pre-scouted before the start of my workshop,  and the night before I dreamed of how I wanted to arrange my composition.

So, my fellow photographers, think about the artist inside you. Don’t just go around photographing what you only see, but also what you’d like to see. Don’t follow the path well-traveled, start a new one and be the first one to go down it. When you do, think about coloring outside the lines.

Visit my website at www.joebaraban.com, and check out any workshops I may have coming up. Come shoot with me sometime.

https://www.instagram.com/barabanjoe/

JoeB

How We Perceive

Here’s a really good tip for those who shoot in a square format: It’s virtually impossible to create Tension (which gives your photograph strength, and intensity) in a square.

The reason is that we don’t perceive our world in a square format, we perceive it in a rectangle, and here’s the proof:

Stand up and look straight ahead with your hands down at your sides. While you’re looking straight ahead, very slowly raise both your arms at the same time, while continuing to keep your arms straight;  also, keep your fingers extended straight out. Now, wiggle your fingers while you’re slowly raising both arms at the same time.  Still looking straight ahead, stop when you see your fingers wiggling.

Now do the same thing, but this time have one arm extended straight above your head and the other stretched downward right in front of you. Looking straight ahead slowly move your hands as if to meet at eye level in front of you. Again, wiggle your fingers and stop when you see them moving.

If you were to draw a line connecting all four points where you first saw your fingers wiggling you would be drawing a rectangle. That rectangle is in a 2X3 ratio, the same as a 35mm camera’s viewfinder.

And that’s how we see the world we live in.

Most people that shoot in a square format wind up cropping their image, but I never crop my photographs. People that crop their photographs will never become aware of the edges of their frame. In both my online class with the BPSOP, and my “Stretching Your Frame of Mind” workshop I conduct around the planet I always have the students submit their images right out of the camera. That way, I’ll know their thought process at the time they clicked the shutter.

I always want to create a good photograph in the camera. When you look at all the photographs on my website, I want to remind you that none of them were cropped.

Check out my workshop description at www.joebaraban.com, and come shoot with me sometime.

https://www.instagram.com/barabanjoe/

JoeB

Food For Digital Thought: Take Art Classes

Years of art classes

Over the years, I’ve had countless people from the way to young to the not that old ( me for example) ask me what photography classes should they be taking; they say this for several reasons: One being that they’ve run out of ideas since they’ve taken so many. Or, they’ve become bored with the same old, same old approach to learning new things and digital cameras are above their pay grade. I’ve even been told that they like the instructor and therefore didn’t get anything out of the class, and finally, they’ve learned all there is to know about Photography!!!!!!!!!!!

I also run into similar questions in my online class with the BPSOP, and in my “Stretching Your Frame of Mind” workshops I conduct around the planet. Well, I always have the same answer…don’t take photography courses, take art classes.

A brief synopsis of my background will reveal that I’ve never taken a photography class, nor have I ever studied under or assisted another photographer. It wasn’t because I thought I was too good for all that, it was because I just didn’t know you could!!! When I went to college (1964-1969) the only photography classes that anyone could take were in the Journalism Department and were described as photo-journalism. Photography was not really considered a form of art. A camera was something you used to take pictures, and a brush or pencil was something you used to paint or draw pictures…and never the twain should/would meet.

However, in my opinion, I did something far better than taking photography classes. I took art classes.

From the time I was ten, I was into art, in any form. I was allowed to take two art classes in high school, and I studied at the Kansas City Art Institute. I took art classes all through college and settled with a degree in journalism. I took classes in design, composition, illustration, figure drawing, watercolor, oil painting, printmaking, color theory, and Art History, and I’m sure I’ve left out a few. I didn’t pick up a camera until I was twenty-one, and the moment I did and looked through the viewfinder, it was love at first sight; from that moment on it was instant gratification. I didn’t have to spend days or even weeks painting a picture.  The best part was that I still considered myself an artist, I just changed the medium from a canvas on an easel to a camera on a tripod.

it was a natural progression in that I simply applied everything I had learned in all my art classes to photography. All the elements of Visual Design I had studied over the years were still applicable.

So now, when I’m asked what photo classes to take, I always tell people to take art classes instead. Put your camera away and pick up a colored pencil. Sign up for Design 1 or composition 1 at your local school, and see where it leads.

Visit my website at: www.joebaraban.com and check out my workshop schedule at the top of this blog. Come shoot with me sometime.

https://www.instagram.com/barabanjoe/

JoeB 

My Favorite Quotes: Ansel Adams

Shooting right into the sun at sunrise is about energy.

Ever since I started teaching workshops, back in 1983, I’ve collected quotes written by various artists. Whether they were photographers, painters, writers, musicians are of no relevance. The important thing to me is that they are artists, and at the top of their game in their respective fields.; of course, the quote has to deal with some area that I’m interested in.

Years ago while studying a body of work by Ansel Adams, I came across a quote he said that has stuck with me all these years, and one I mention in my online class with the BPSOP, and in my “Stretching Your Frame of Mind” workshops I conduct around the planet. Ansel Adams said, “There are no rules for good pictures, there are just good pictures”.

What makes this quote so important to me is that I’m always defending it to my fellow photographers. If I had a dollar for every time a student told me that he was taught that shooting into the sun is a bad thing, or practice the Rule of Thirds, or the Leading in Rule (always have your subject walking into the frame), or how about this one….stay away from the color red, it’s too hard to photograph (who in the world said that?), I’d be on my Island right now. I’d be sitting on a chaise lounge on my beach, waiting for another blue and frothy drink to be brought to me; a drink with an umbrella hanging perilously down from one side.

Now I’m not suggesting that you don’t know what these rules are, as it’s important to know them. I’m suggesting that as soon as you know them…forget them. That is unless you want to be taken down the one-way road to mediocrity.

So my fellow photographers, what constitutes a good photo? Well, if you’ve been following my posts, you would remember a category I called “did it do it”. On my list is concepts that I think make a good photo. At least they do for me, and I’ve thought about this list for most of the fifty-three years I’ve been a photographer.

I can tell you from years of experience, the students of mine that stop listening to people who lived and died by these silly rules and started shooting what felt and looked good never looked back. As I’ve always told my kids, “Color Outside the Lines”.

Visit my website at www.joebaraban.com, and check out my workshop schedule.

https://www.instagram.com/barabanjoe/

JoeB

Quick Photo Tip: Wetdowns

Giving the street a wetdown.
Giving the street a wet down.

When you’re watching a car commercial on TV or looking at an ad in a magazine, have you ever noticed that the street looks wet? If not, next time one comes up look at the street. Why do they do this you ask?

In my online class with the BPSOP, and in my “Stretching Your Frame of Mind” workshop I conduct around the planet, I teach my students how to take their imagery what I refer to as “up a notch”. I do this by introducing the elements of visual design to them. One of the things we work on is Visual Tension, and one of the ways to create it is by the use of reflections. We also work on showing the subject and its reflection, but right now I want to talk about plain old reflections.

Besides the obvious reflection, that being in a mirror, reflections don’t necessarily have to show anything that’s recognizable. It can just be light and color reflecting off a surface. That alone is usually enough to create a pleasing and memorable photo. How do you achieve this? By doing a Wet down.

In the days when I shot the full line car brochures for several companies and national car campaigns, we use to do a Wet down before I shot. This required a water truck to lay down enough water to cover a street. There were two reasons for doing this: The first was to hide a particularly bad-looking street. Wetting the street down would hide all the problems by darkening the surface. The second reason was to create a surface that would reflect the environment in it. Being wet, it also took on a shine that made it easy to reflect all the light and color.

I realize that you probably can’t afford the money for a water truck, but I’ve also accomplished a Wet down by using a hose. I’ve even taken a bucket with me when I was shooting near a body of water.

There are other things to consider wetting down. A pier for example, or the sidewalk in your front yard. Anything that can create a reflection will look a whole lot better if it were wet. Sometimes a partial Wet down looks good, as in the photo below of the boy sitting on a pier and the silhouette of the two bikes against a railing. I had taken along a bucket which proved to be a good idea. As Eddie Adams once said, “When you get lucky, be ready”.

Give it a try sometime and you’ll see how easy it is to create stronger photos. All you have to do is to “Stretch Your Frame of Mind”!!!!

It’s food for digital thought.

Visit my website at: www.joebaraban.com and check out my workshop schedule at the top of this blog. Come shoot some reflections with me sometime.

https://www.instagram.com/barabanjoe/

JoeB

Food For Digital Thought: A Recipe For Mood.

Setting a mood.

Photography is most definitely the love of my life, but right under it is fishing and then cooking. I love to look through cookbooks, especially ones with great food photography, and find interesting things to serve when entertaining…which we love to do. Having said this, I’m really into recipes, and I’m always using some kind of recipe when talking with my online students with the BPSOP, and my fellow photographers that take my “Stretching Your Frame of Mind” workshops I conduct around the planet.

I often like to create an atmosphere where the viewer is drawn into my photo whether he wants to or not. I want to induce a feeling in his psyche. What’s behind this notion is all about the Psychology of Gestalt, where we want the viewer to be an active participant in our photos. We want to take control of how he processes and perceives our imagery.

Creating a mood is a good way to not only deliver your message visually but editorially as well. What do I mean by editorially? By using a certain mood to tell a story, which incidentally doesn’t have to be controlled by light.

According to the dictionary, the definition of mood is: “A temporary state of mind or feeling”. It also means “The atmosphere or pervading tone of something, especially a work of art”. This is where photography comes it since we’re all artists, our medium is a camera instead of a paintbrush.

So how do we achieve this atmosphere, this state of mind?  Well, first you have to determine what kind of mood you’re after. Do you want your photo to ooze with a bright and happy or a dark, melancholy, and introspective mood? Do you want the viewer’s eyes to well up with sadness or the proverbial grin from ear to ear?

If this is the way you’re after, then it’s all about how you manipulate the light and color. Darker colors for somber pensive moods or rich, bold, and vibrant colors for a more cheery look. Although color is a big factor, the use of light transcends everything.

As I said, the use of light doesn’t always factor in. If you look at the above photo, light isn’t that important; it’s all about the story I was telling.

It’s hard to create a somber mood on a bright sunny day. It’s all about the emotional environment. Since I shoot early in the morning and late in the afternoon, the light is going to be softer and the shadows longer. An overcast, gloomy day is a good way to create a type of mood, as well as the placement of your subject. For example, placing the subject small and in the bottom right-hand corner will give the feeling of loneliness as in the below slideshow of the cross country skier.

Visit my website at www.joebaraban.com and check out my workshop schedule at the top of this blog. Come shoot with me some time and I’ll get you in the mood.

https://www.instagram.com/barabanjoe/

JoeB

Guest Post: Nick DePasquale

 Nick DePasquale sent me this post with an interesting quote that I wanted to share. This is the first time I have shared something with another photographer, but I found this to be pertinent to the way I see things.

“Film is cheap these days!”  That’s what I tell the students in my digital photography classes when I’m explaining concepts that Joe Baraban consistently talks about in his blog posts, online classes, and photography workshops around the world.  Sometimes it takes a few seconds for my joke to sink in, but I do get a laugh.  In the world of digital photography, we don’t have to think about conserving our shots as much as we did in the film days.   With typically 36 shots in a roll of film, I would be careful on how many shots I took not only because of the cost of the film and developing it but also because I did not want to run out of film at the most inopportune time.

Just imagine having to change out a roll of film just when your kid was scoring their first soccer goal!  With our digital cameras, we can easily make as many adjustments and variations as we care to; sometimes an adjustment by moving an inch to remove a distraction in the background or creating separation;  or a variation showing a subject from a different perspective or point-of-view.

Tom Watson, Jr., the second President of IBM, is quoted as saying:  “If you want to increase your success rate, double your failure rate”.   In digital photography, to me, this means to shoot, shoot, and then shoot some more.  Not haphazardly, but with discipline and intention.

We have the luxury of being able to experiment, stretching our creativity outside of the box, and coloring outside of the lines like Joe often says, because we are not limited as much by technology.

In this context, and as Mr. Watson was communicating, failure is good.  You learn much more from the photos that don’t work out than the ones that do.  I like to characterize it this way: there are no failed pictures, just lessons learned from the shots that don’t work out.

In the winter of 2021, I photographed an old truck in a field near my home in New England during a snow storm.  When I returned home, I was not at all happy with my images.  They were ok, but I did not have a “wall hanger”.   Instead of being disappointed, I thought about what I could do differently and returned this year, again during a snow storm.  I shot different variations based on my observations from the previous year and came up with an image that I liked.

Nick DePasquale: https://nickdepasqualephotography.com/

My Favorite Quotes: Edward Steichen

Waiting paid off

Edward Steichen was one of the early photographers that did so much to transform photography into an art form. His images were always in his newly created magazine called Camera Works. Which incidentally
I have several original issues.

A prolific photographer who was so influential in changing the way the people in that era thought of photography as more abstract than realistic.

One of his quotes has always been one that I have passed on to my online classes with the BPSOP, and also in my “Stretching Your Frame of Mind” workshops. He once said, “Always be ready for the unexpected to happen.”

Just how do you do that?

Well, there are many ways, but here are five that I’m always thinking about when I’m out ‘street shooting’.

1) In my workshops we invariably are shooting in the middle of the day, a lot of time in narrow streets in some small village. Half of the street might be in shadow, and the other in full sun. Regardless of what side I’m on, I will shoot several exposures to get the one I want and set that reading in my camera…that’s set on manual. That way, I’ll be spot on when something unexpected happens. I wouldn’t want to have a reading based on the full sun when whatever happens, happens on the shady side and I’m too far away to help later in post-processing.

2) One of the things I’m constantly seeing when I’m walking down the street with a fellow photographer is that he/she almost always just looks straight ahead. What that means is that person only sees twenty-five percent of the possible photo ops that are taking place all around. If something does happen and he only sees it in his peripheral vision, by the time he can look at it and react, whatever it was is long gone.

3) Whatever you do, don’t keep your camera in a pouch on your waist, backpack, or camera bag. When you get to your desired location, decide what lens you want to use FIRST and put it on.  Whatever you do, don’t decide when whatever it is that you’re excited about is happening. That might open an entirely different can of worms…like feeling rushed and drop something you didn’t want to drop.

Having said that, if the location is one that might offer a landscape, or something that isn’t constantly changing, you have the opportunity to look at it (and shoot) with a different focal length lens. Of course, that depends on how much of that really good light you have left.

4) Now that you settled in with the lens you want, keep your ears and nose open to noises that might offer a photo op. For instance laughter, the smell of hotdogs, or pizza, sounds of the city, as in construction noises, commotion, etc. I have often followed those noises leading to a ‘keeper’.

5) Pay attention to any action and try to anticipate the same action that would happen again. For example, the photo I’ve shown above. I saw the wonderful late light hitting an intersection and people walking through it. Because of where I was standing the light was completely unexpected, and I just knew that it was going to be the place to stand.

I got my exposure set as far as what shutter speed/aperture combination  I wanted and took a few exposures to get it to where I wanted it…doing all of this in the camera instead of in front of a computer.

I waited and waited and after fifteen minutes this woman came walking down the street. It was a great photo op and because I was ready for something, I was excited but not to the point of rushing my one or two exposures before she was out of the light.

Visit my website at www.joebaraban.com, and check out my workshop schedule at the top of this blog. Come shoot the unexpected with me sometime.

https://www.instagram.com/barabanjoe/

JoeB

Quick Photo Tip: Verticals in a Vertical Format.

  A topic of conversation that always comes up in my online classes with the BPSOP, and in my “Stretching Your Frame of Mind” Workshops I conduct around the planet, to always shoot both horizontally and vertically. For one thing, it will give you choices.

The majority of the images that I look at are horizontal, mainly because that’s the easiest way to shoot; also because the camera is designed to shoot that way.

How easy it is to merely bring the camera up to your eye, no matter what the subject matter is. I can tell you that way of thinking is not going to be in your best interest.

Horizontals are calming, as they mimic the horizon. They should be thought of when your subject is wider than it is tall, and it will move the viewer across the frame.

Using lines, both leading and directional is a good way to do this, and usually works best when you have a lot of space to do it in…as in a horizontal….it’s the way we perceive and process information.

Line is the most important of all the elements of visual design, and nothing could exist without it. Planes, trains, and autos…you and I included all have an ‘outline’. When composing, consider the lines. Your longest lines might be the best way to determine whether you should shoot one way or another.Moving the viewer around is a good way to keep him involved in your composition, and when he is he will stick around longer

Verticals have more energy because it will take the viewer longer to look from the bottom of your frame to the top. That time is energy, and energy can be equated to tension. Tension gives your photos strength and intensity.

Verticals are best considered when the subject is taller than it is wide.   A vertical subject is going to have even more energy when composed in a vertical format. It will keep the viewer from sensing any extended peripheral vision that would be in a horizontal.

The best advice I can give you is to always try to shoot both ways, and compare them back home on your computer where you have time to really think.

Visit my website at www. joebaraban.com  and check out any upcoming workshops at the top of this blog. Come shoot with me sometime.

https://www.instagram.com/barabanjoe/

JoeB

Life Before Photoshop: Miata Campaign

Look ma, no Photoshop!

For those new to my blog, I teach photographers how to incorporate the elements of visual design into their imagery. Both through the BPSOP, an online school,  and in my “Stretching Your Frame of Mind Workshops” I conduct around the world. This is another in my series I call “life before Photoshop”.

For all you out there that began your love for photography in the digital era, there was a time when Adobe was a type of house made of sand, clay, and water, mixed with a fibrous material like straw. Now, Adobe Photoshop rules the photographic world, and these new photographers truly believe they can’t create good photos without it.

I’m not saying I don’t love Photoshop, for I would be considered one fry shy of a happy meal. With me, I use it sparingly, and only after what I’m trying to accomplish in the camera just can’t be done. For me, being a good photographer that can’t think without the aid of post-processing just makes me feel better. I love a challenge, and there’s no better challenge than creating in reality and through the lens what I’m thinking in my mind.

Years ago I worked on the Mazda account, and one of the ads created by the Art Director/writer was to show a Miata in the garage of its owner. They wanted to convey that this car was the love of the owner’s life and wanted me to carry that idea into a single photograph.

My location scout found a garage that would not only work, but the price to rent it was somewhere in the budget’s ballpark; considering this was shot in Burbank, $3000.00 was on the high side of reasonable. I had a stylist gather props several days ahead of time while I was figuring out how to light the car. At the same time, my producer was tracking down a Cat Wrangler that could make a cat stay on command.

I had several 2400 watt/second heads mounted in the ceiling facing up towards several large pieces of white Foamboard so the light would be soft when it fell onto the car. I had another 4X8piece of foam board in front of the car so it would light the front.  This entire set-up took the entire day and was a hell of a lot of fun!!!

Here’s the garage the way we found it.

Before

This photo would probably not be shot the same way today. The car would be shot in a studio and the Agency would use CGI (computer-generated imagery) to put it all together. HOW AWFUL!!!

The digital age has done so much in so many areas, but in my opinion, it’s hurt photography in a way that can never be repaired.

🙁

Visit my website at: www.joebaraban.com, and check out my workshop schedule. Come shoot with me some time and we’ll cry together over a glass of wine!!!

🙂

JoeB